
Cats, with their captivating charm and playful antics, have long held a special place in our hearts. Their adorable faces and expressive eyes make them a favorite subject for artists of all levels. If you’re eager to learn How To Draw A Cat Face that truly captures their feline essence, you’ve come to the right tutorial.
This guide will walk you through the process of sketching a cat face that appears both genuine and endearing. While cats are known for their soft fur, understanding the underlying anatomy is key to creating a believable drawing. So, before we pick up our pencils, let’s briefly touch upon the essential aspects of cat anatomy relevant to drawing their faces.
Let’s embark on this artistic journey and discover how to draw a charming cat face, step by step.
Understanding the Basics Before You Draw
Learning how to draw a cat face effectively starts with observing and understanding basic shapes. Before diving into details, take some time to study photographs of cats and even anatomical diagrams of cat skeletons. This will help you grasp the proportions and structure beneath the fur. Pay close attention to the placement and size of facial features like the eyes, nose, ears, and mouth, ensuring they are in harmony with each other. Using light grid lines can be helpful in initially positioning these features accurately; these lines can be easily erased later.
A quick online search for “how to draw a cat face” will reveal a vast array of styles and approaches, from simplistic cartoon renditions to highly realistic portraits. This tutorial is specifically designed to guide beginners in creating a cat face that is both serious yet undeniably cute. We will be building our drawing from basic shapes, allowing for flexibility in coloring and style once the fundamental structure is complete.
Essential Tools for Drawing a Cat Face
Having the right tools can significantly enhance your drawing experience. For this tutorial on how to draw a cat face, whether you prefer a traditional or digital approach, the essentials remain quite simple. For digital artists, a drawing tablet paired with a stylus and your chosen drawing software is ideal. For traditional artists, pencils of varying grades (HB, 2B, 4B), an eraser, and drawing paper will suffice.
Step-by-Step Guide: Painted Stylized Cat Face Drawing
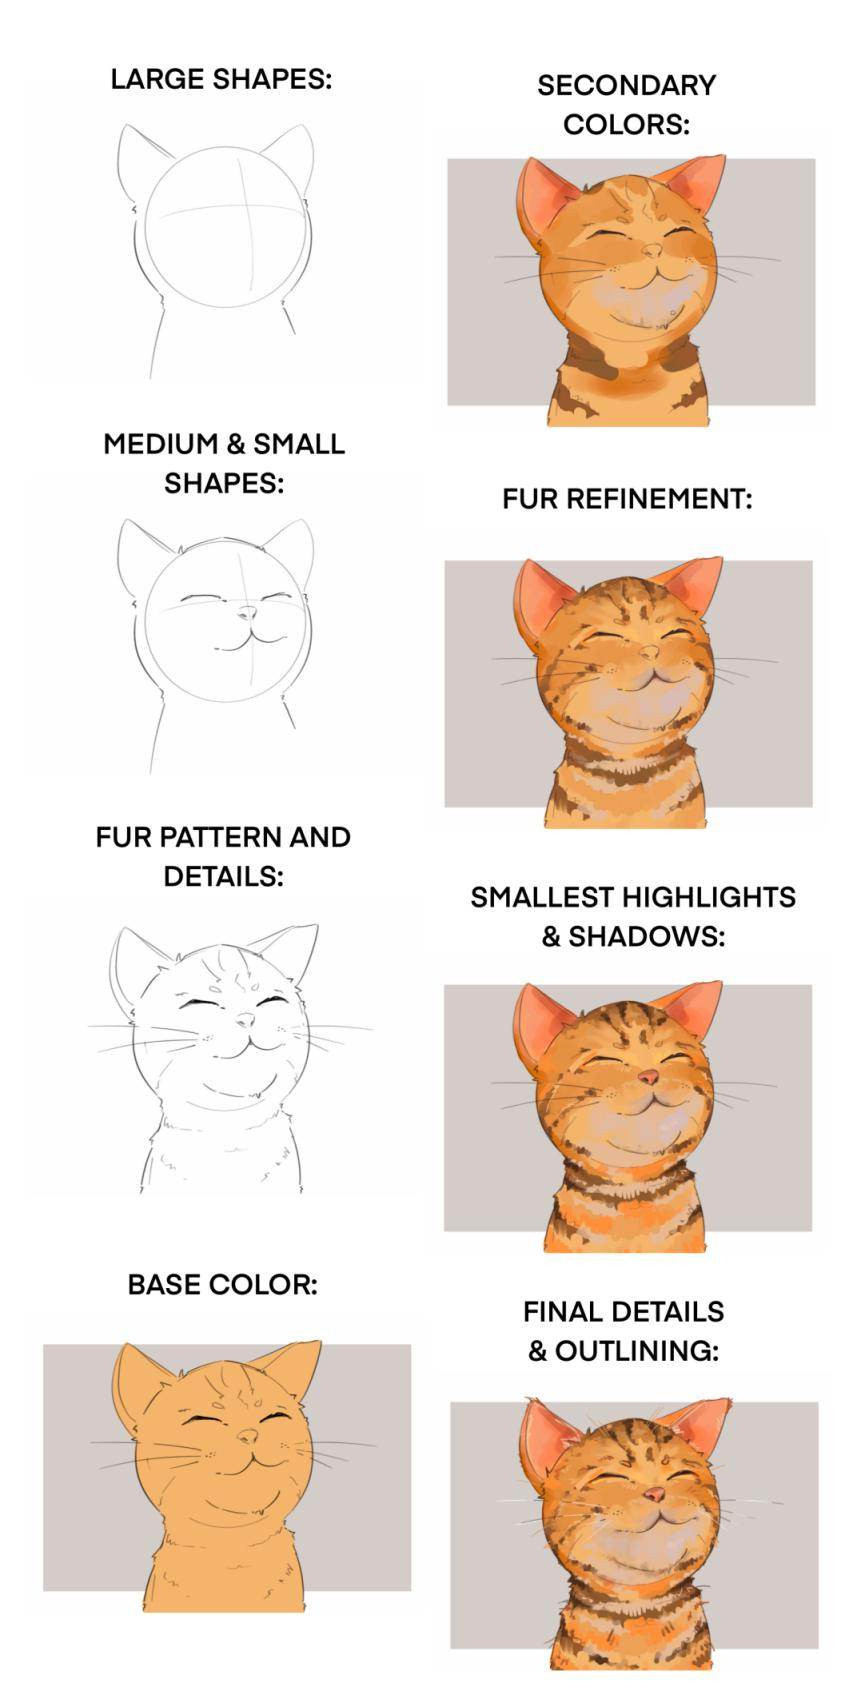 Basic guide to stylized cat face drawing using digital painting techniques.
Step 1: Laying Down Basic Shapes
When learning how to draw a cute cat face, starting with basic shapes is crucial. This initial step sets the foundation for your drawing and helps ensure correct proportions. Think of simplifying the complex form of a cat’s head into elementary shapes.
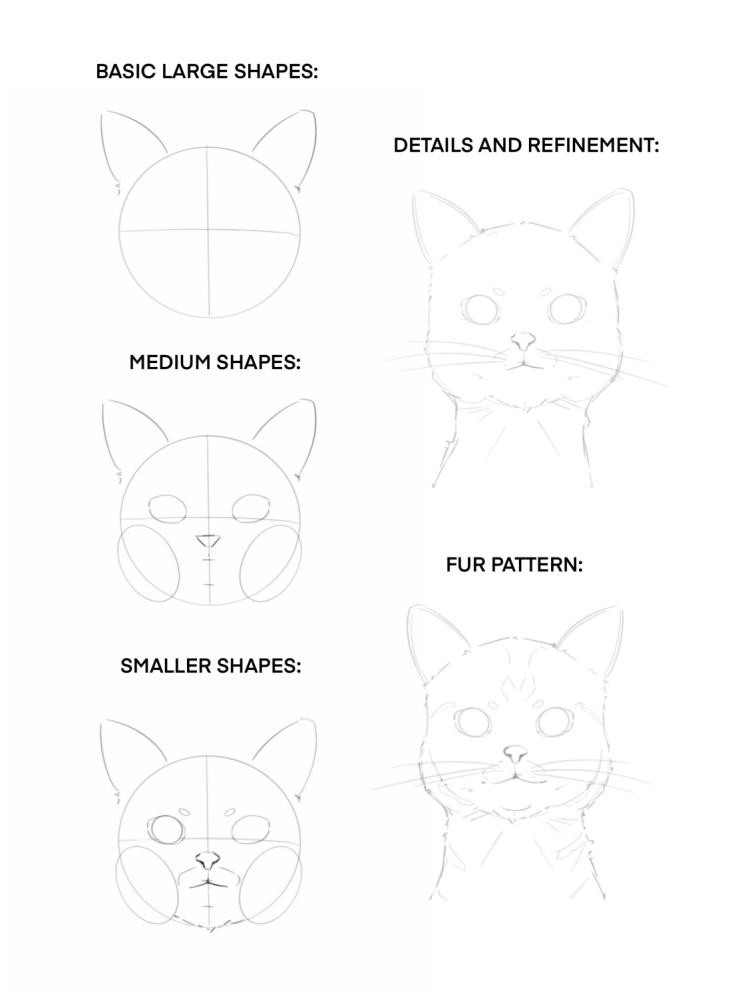
For the head itself, a large circle works perfectly as a starting point. For the ears, triangles are ideal. This technique of breaking down a subject into basic shapes is fundamental in drawing and painting, allowing you to construct a framework before adding details. When sketching these initial outlines, use light strokes. Applying too much pressure with your pencil early on can make erasing and refining lines more difficult later in the process.
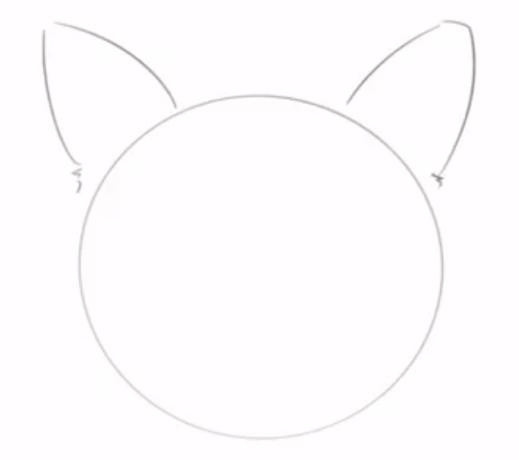 Initial sketch of a cat face using circles and triangles to establish basic form and proportion.
Step 2: Refining with Organic Shapes
Cats are known for their wonderfully expressive ears, which are capable of detecting a wider range of frequencies than human ears. As you refine the ear shapes, remember that they aren’t perfect, rigid triangles. Soften the lines and slightly curve the edges to make them appear more natural. Similarly, adjust the initial circle for the head, slightly pushing it into a more oval shape to better represent the feline head structure.
A common mistake when learning how to draw a cat face is making shapes too geometric and stiff. To achieve a more realistic and appealing cat face, it’s important to replace sharp, rigid lines with softer, more organic curves throughout your drawing process.
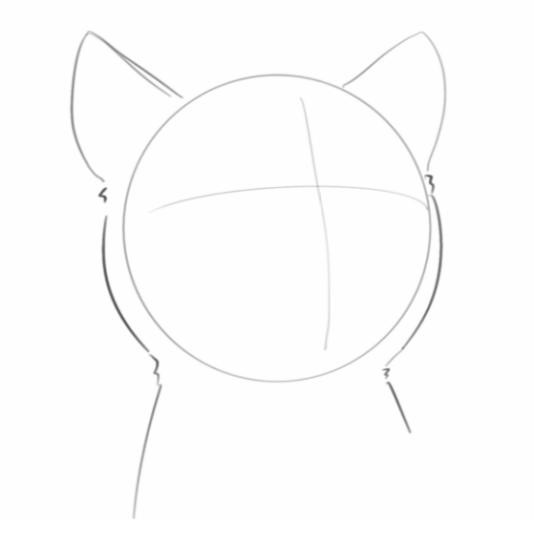 Refinement of initial shapes into more organic forms, softening lines to resemble natural curves of a cat's face.
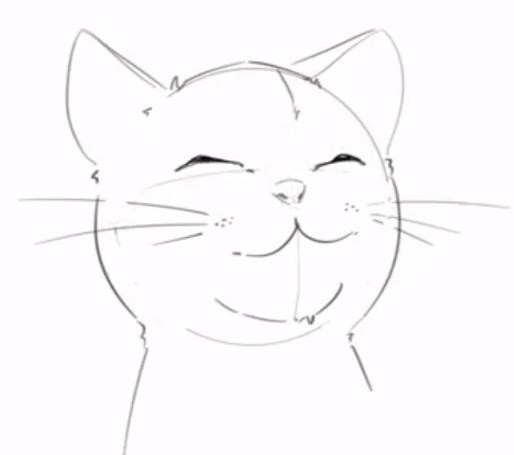
Step 3: Adding Medium Shapes for Definition
In the previous steps, we established the foundational shapes for the cat’s head and ears. Now, we move on to defining the facial features. In this step, you’ll begin to sketch the snout, cheeks, and the ridges above the eyes. These are what we call ‘medium shapes’ – they bridge the gap between the large, basic forms and the fine details.
Incorporating these medium shapes is essential for adding definition and character to your cat face drawing. They help to break down the larger shapes into more manageable sections, making it easier to place and refine the smaller details later on. This stage starts to bring the drawing to life, making it clearly recognizable as a cat.
 Introduction of medium shapes to define snout, cheeks, and eye ridges, adding facial structure to the cat drawing.
Step 4: Incorporating Smaller Details
With the medium shapes in place, it’s time to add the finer details that truly bring your cat face to life. This step focuses on the smaller shapes that define the facial features: the eyes, nostrils, whiskers, and mouth.
A simple and effective way to sketch the eyes is to start with two circles. These basic circles can then be refined into more almond or oval shapes as needed. For the nose, a small triangle is a good starting point. The mouth can be represented by a shape resembling a reversed “m,” but remember to keep the lines soft and wide to maintain a natural look.
Did you know that cats typically have around 24 whiskers, with 12 on each side of their nose? These whiskers are incredibly sensitive and act as sensory tools, helping cats to navigate their surroundings and maintain balance. While anatomically accurate, drawing all 24 whiskers isn’t necessary for a stylized drawing. Representing them with three or four well-placed whiskers on each side is usually sufficient. When drawing whiskers, use a light touch. Relax your arm and use short, soft strokes to create thin, delicate lines.
 Detailing the cat face with smaller shapes including eyes, nose, mouth, and whiskers to enhance feline features.
Step 5: Adding Patterns and Fur Details
With all the facial features sketched in, you can now start adding patterns and details to represent the cat’s fur. This is where you can introduce lines and variations in the shapes to suggest volume and texture to the fur. Adding subtle breaks and directional strokes can create a sense of randomness, which makes the drawing appear more natural and lifelike.
Consider the type of cat you’re drawing. Are they short-haired or long-haired? What kind of fur pattern do they have? Using reference images of real cats can be incredibly helpful in this stage. Observe how the fur flows and clumps, and try to replicate these patterns in your drawing.
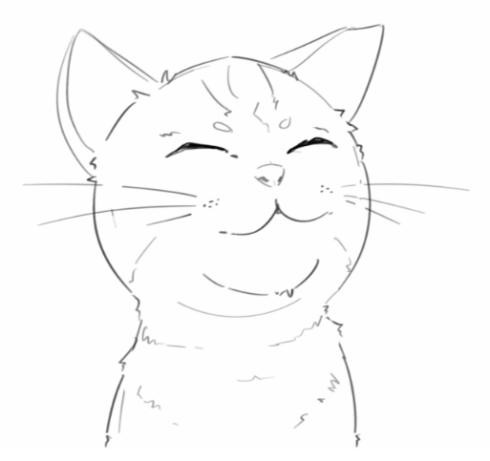 Adding fur patterns and details to the cat face sketch to create texture and a more lifelike appearance.
Step 6: Applying Base Colors and Rendering Fur
The next stage in learning how to draw a cat face realistically, especially if you’re working digitally or with colored pencils, is to apply base colors. Start by filling in the larger areas of the cat’s face with your chosen base colors.
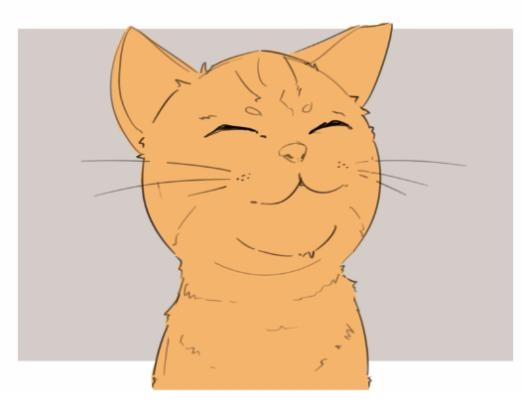 Applying base colors to the cat face drawing, starting the process of rendering fur and adding depth.
Once the base colors are in place, you can begin the second layer of coloring to add depth and dimension.
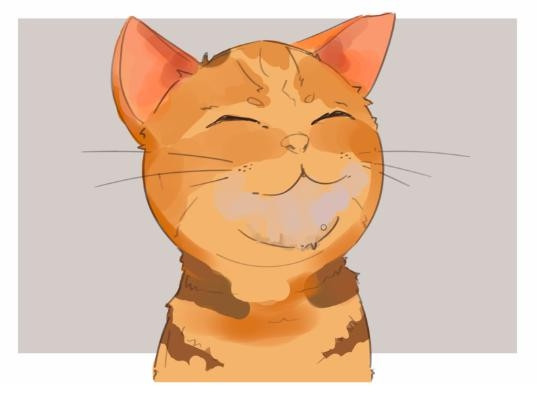 Layering colors to enhance the fur texture and depth of the cat face drawing.
When rendering fur, pay attention to the direction in which the fur grows. Apply brushstrokes (or pencil strokes) in the direction of the fur flow to create a natural look. To achieve a realistic fur texture, mix areas of soft edges with hard edges. You can focus detailed fur texture in certain areas, like around the eyes or snout, and keep other areas smoother for contrast and visual interest.
 Brushstroke technique for coloring fur, focusing on direction and texture to enhance realism in the cat face drawing.
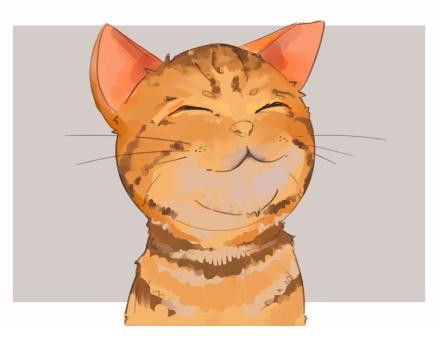
Step 7: Adding Highlights and Shadows
The final step to add polish and realism to your how to draw a cat face artwork is incorporating highlights and shadows. Carefully observe where light would naturally fall on the cat’s face and where shadows would be cast. Adding highlights and shadows around the edges and contours of the face will enhance the three-dimensional quality of your drawing.
Furthermore, subtle color variations can significantly contribute to the sense of volume and depth. Use slightly lighter shades for highlights and darker shades for shadows, blending them smoothly into the base colors to create a seamless and realistic effect.
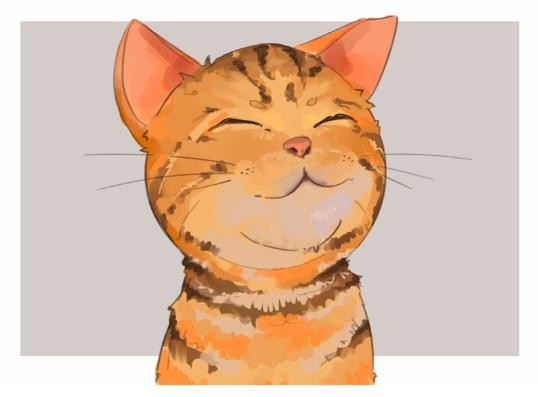 Final touches with highlights and shadows to add volume and dimension, completing the stylized cat face drawing.
Quick Guides: Realistic and Stylized Cat Faces
While the step-by-step guide above focuses on a painted, stylized approach, here are brief insights into drawing realistic and further stylized cat faces.
Realistic Cat Face Drawing Guide
 Guide showcasing the realistic approach to drawing a cat face, emphasizing accurate proportions and details.
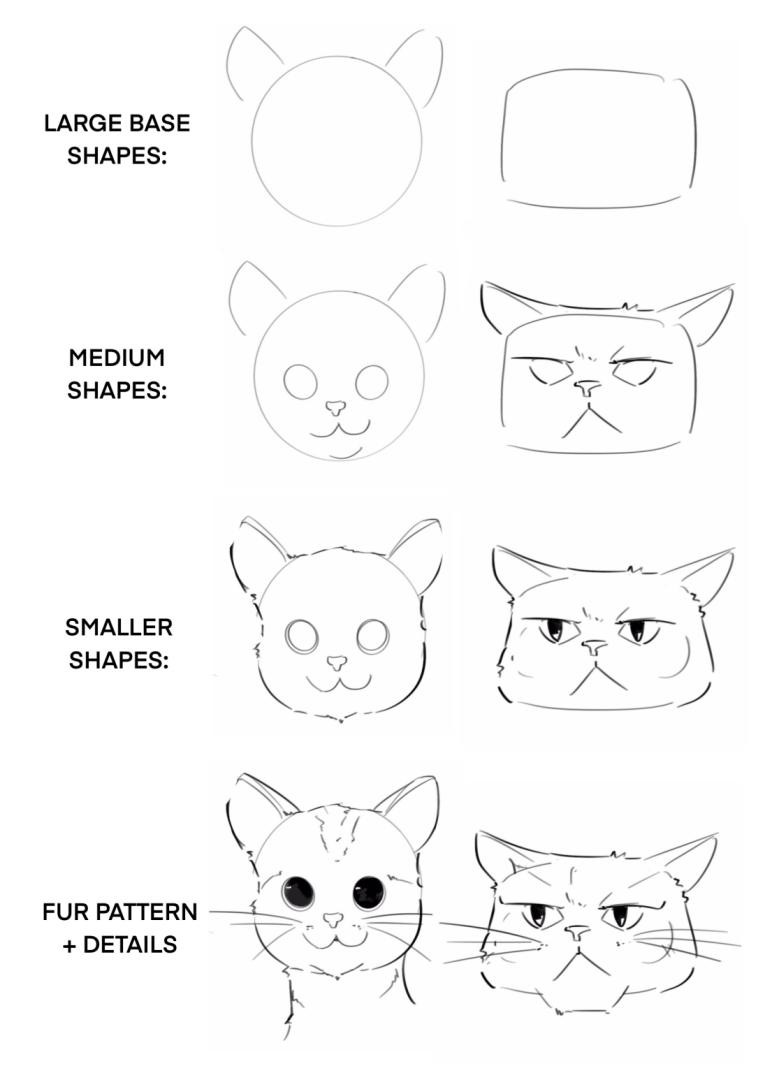
Creating a realistic cat face involves focusing on accurate proportions and detailed rendering. Start by sketching the cat’s outline using a combination of curves and straighter lines to capture the specific shape of a cat’s head. Pay close attention to anatomical details and proportions. You can enhance realism by adding fur texture around the outline using short, fine strokes. Even without full coloring, a detailed line drawing focusing on form and texture can effectively depict a realistic cat face.
Stylized Cat Face Drawing Guide
 Example of a stylized cat face drawing, demonstrating creative adaptations of basic cat features.
Stylization in how to draw a cat face allows for more creative freedom. It’s about bending and adapting the rules of realism to create a unique and expressive artwork. The key to stylization is understanding the basic shapes and dimensions of a cat’s face, and then exaggerating or simplifying these shapes to achieve a particular artistic style. Think about how you can push and pull shapes to add interest and storytelling to your drawing, while still maintaining the recognizable essence of a cat.
Choosing the Right Drawing Tablet
For digital artists, the right tools can make a world of difference. A quality drawing display is an invaluable tool to bring your creative visions to life, whether you are a beginner, hobbyist, or professional.
Drawing tablets are versatile tools for various creative tasks, from photo editing and retouching to animation and digital painting. The XPPen Artist Pro 16 (Gen 2) stands out as a highly recommended option for artists looking for a blend of performance and features.
 Image of XPPen Artist Pro 16 (Gen 2) drawing tablet, highlighting its professional features for digital art creation.
Key Features of XPPen Artist Pro 16 (Gen 2):
- Realistic Color Creation: With a 159% sRGB color gamut, it ensures vibrant and accurate color representation, bringing your digital cat face drawings to life with vividness and detail.
- Comfortable and Natural Drawing Experience: The X-Nature Display is designed for eye comfort, reducing blue light emission while maintaining color accuracy. The textured screen surface mimics the feel of paper, and full lamination reduces reflections, ensuring precise pen strokes.
- Enhanced Workflow with X-Remote Control: The included X-remote Control offers quick access to shortcuts and frequently used functions, streamlining your creative process. It supports both wired and Bluetooth connections for flexible workspace setups.
- Precision with X3 Pro Smart Chip Stylus: Paired with the X3 Pro Smart Chip Stylus (X3 Pro Smart Chip Stylus), it delivers a highly sensitive and accurate drawing experience, capturing every nuance of your artistic intention.
Conclusion
In summary, learning how to draw a cat face is a rewarding and enjoyable creative endeavor. Whether you aim for realism or prefer a stylized approach, understanding the fundamental shapes and anatomy of a cat’s face is essential. Remember that consistent practice is key to improvement. With time and dedication, you’ll refine your skills and develop your unique artistic style in drawing feline portraits.
The right drawing tools can significantly enhance your creative process, so explore different mediums and find what inspires you most, whether it’s traditional pencils and paper or digital drawing tablets. So, take what you’ve learned, experiment with techniques, and let your imagination soar as you create captivating cat face drawings. Happy drawing, and enjoy the journey of artistic discovery!