Learning to draw can be a rewarding experience, and what better subject to start with than a cat? This guide breaks down the process of creating a charming Drawing Of A Cat into four easy-to-follow steps. Whether you’re an absolute beginner or looking to refine your sketching skills, this tutorial will help you capture the essence of your feline friend on paper. We’ll explore a simple method to construct your drawing, focusing on proportions and gradually adding details to bring your cat sketch to life.
Step One: Blocking in the Basic Shape of the Cat’s Face
The foundation of any good drawing of a cat lies in accurately capturing the basic proportions. Begin by visualizing an imaginary frame around your subject. A helpful technique is to use your pencil to measure the width and height of the cat’s face in your reference image or from life. Extend your arm, hold your pencil up, and use your thumb to mark off the dimensions. Transfer these measurements onto your drawing paper by lightly sketching a box that represents the overall area the cat’s head will occupy.
Once you have your box, the next step is to sketch the primary shapes within it that define the cat’s face. Don’t worry about details at this stage; focus on the larger forms. Observe the angle of the cat’s head. It’s a common mistake to draw angled features as straight, which can distort your drawing of a cat. Pay close attention to the tilt of the head and accurately represent it in your initial sketch within the box. This initial framework is crucial for ensuring correct proportions in your final cat drawing.
Step Two: Hatching in the Background to Establish Value
Starting a drawing of a cat can feel daunting, and getting those first lines right is paramount. These initial lines set the stage for everything that follows. If these foundational lines are inaccurate, subsequent layers will also be off, making corrections more challenging down the line. Remember, drawing is a human endeavor, and slight variations from reality are natural and part of the artistic process.
In this step, we’ll introduce value by hatching in a rough background around the cat’s face. Creating a dark background provides a crucial reference point for judging the values within the cat’s fur in the next step. This contrast helps you accurately gauge how light or dark to make the different areas of the cat’s face, ensuring a more realistic and dimensional drawing of a cat. Hatching, using closely spaced parallel lines, is a great technique for building up value gradually.
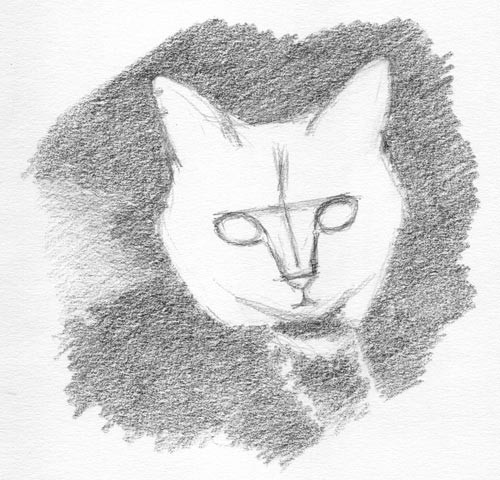 Adding Background Hatching to a Cat Sketch
Step Three: Defining Shadow Patterns on the Cat’s Face and Body
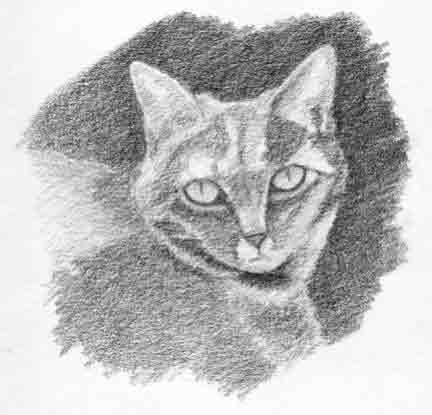
With the background in place, we can now focus on defining the form of the cat through shadow patterns. Begin by blocking in the value pattern on the cat’s face. Observe your reference and identify the areas of shadow and light. In this example, the lightest areas are along the edges of the ears and across the forehead. Lightly shade in all other areas that are not the lightest, establishing the basic value structure of your drawing of a cat. Remember to consider the direction of your light source as you define these shadow patterns.
During this stage, it’s also important to continually assess the accuracy of your cat drawing. In the original sketch, the eyes were initially positioned too high and too far apart. Corrections like this are common and essential to refine your drawing. Don’t be afraid to adjust proportions and placements as you progress. After adjusting the facial features, darken the background further. It’s crucial that the background is darker than the cat’s fur, especially around the cheek area, to make the lighter fur stand out and enhance the depth of your cat sketch.
 Correcting Eye Placement in a Cat Drawing
Step Four: Adding Final Details to Complete Your Cat Drawing
This final step is where your drawing of a cat truly comes to life. Refine all the values you’ve established, pushing the darks darker and ensuring the lights remain bright. Re-examine the proportions and make any necessary corrections, such as the eye placement adjustment mentioned in the previous step. Now it’s time to add those characteristic feline details, most notably the whiskers.
For a clean and effective way to draw whiskers, try using a battery-powered eraser to lift highlights from the darker fur, creating the thin, crisp lines of the whiskers. After erasing, you can further refine the whiskers with the tip of your pencil, thinning them or adjusting their shape to make them appear more natural and whisker-like. With the values finalized and details added, your drawing of a cat is complete. This process allows you to capture not just the physical likeness, but also the unique character and perhaps even the inner personality of your feline subject, from the texture of the fur to the expressive nature of the eyes and nose.