
Are you looking for a delightful and easy sewing project? Dive into the world of crafting with these charming Happy Cats! This free sewing pattern allows you to create your own adorable cat plushies in two sizes. Perfect for beginners and seasoned sewers alike, this project offers a quick and satisfying way to expand your crafting skills and create a lovable happy cat family. Get ready to experience the joy of watching your handmade feline friends come to life!
What You’ll Need to Create Your Happy Cats
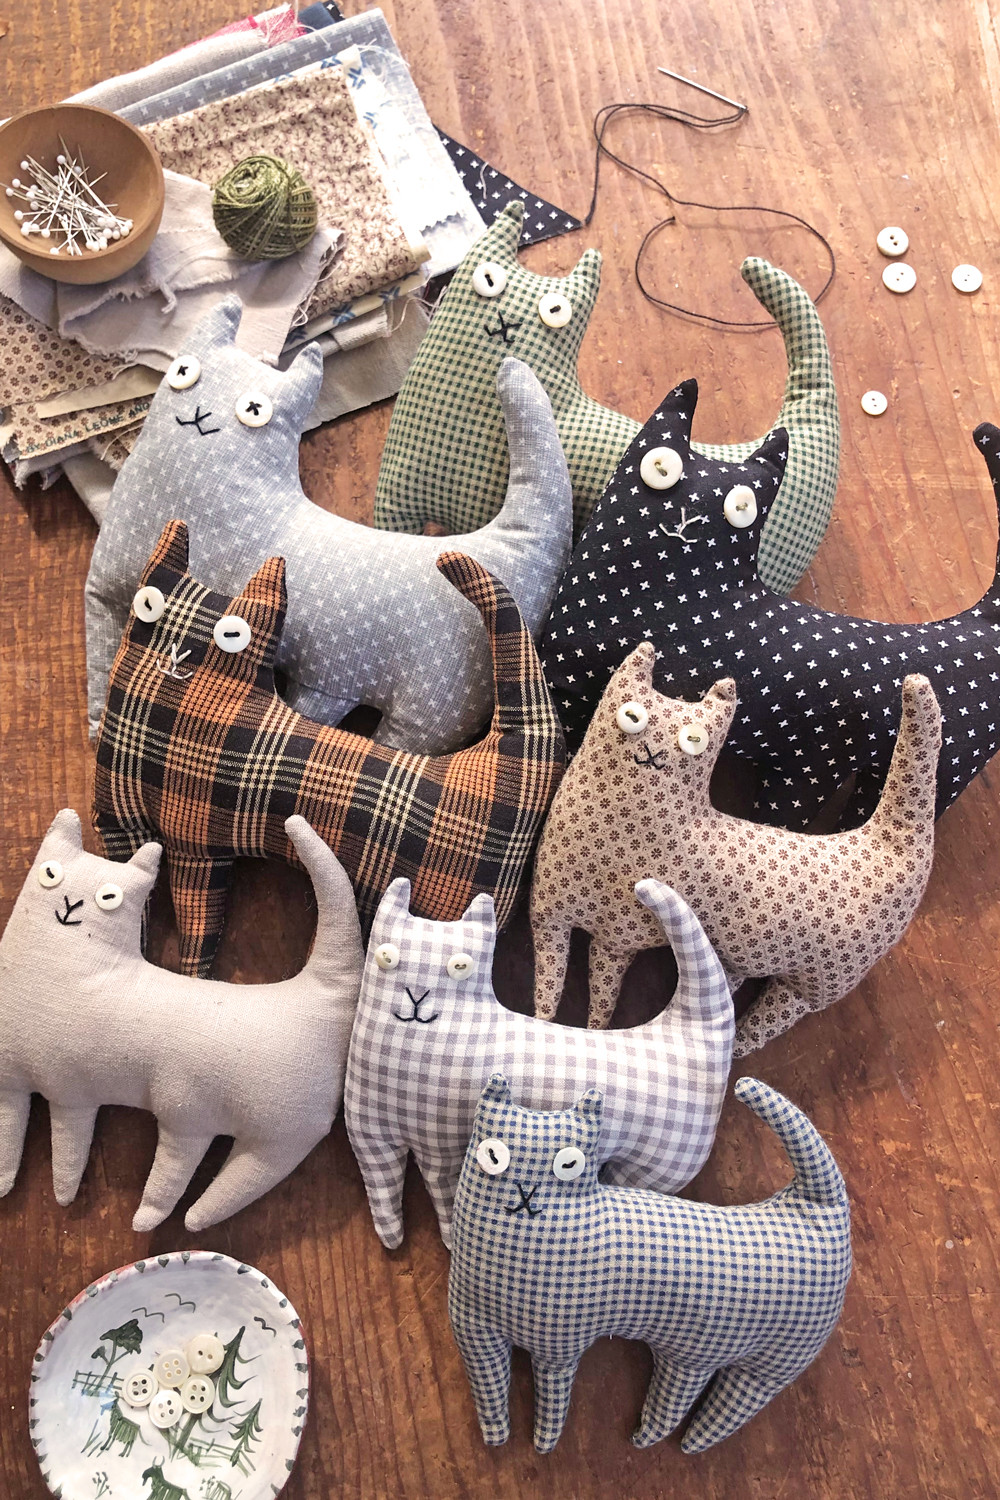
Before you begin crafting your happy cats, gather these essential supplies:
- Cotton fabric (choose your favorite colors and patterns!)
- A basic sewing kit (needles, thread, scissors, pins)
- Chopstick or similar tool (for turning and stuffing)
- Stuffing – wool stuffing is recommended for a wonderful feel
- Buttons for eyes (or embroidery thread for stitched eyes)
- Embroidery thread for facial features
 Materials and pattern templates for sewing happy cat plush toys.
Step-by-Step Guide to Sewing Happy Cats
Let’s embark on this fun sewing journey together! Follow these simple steps to create your own happy cats.
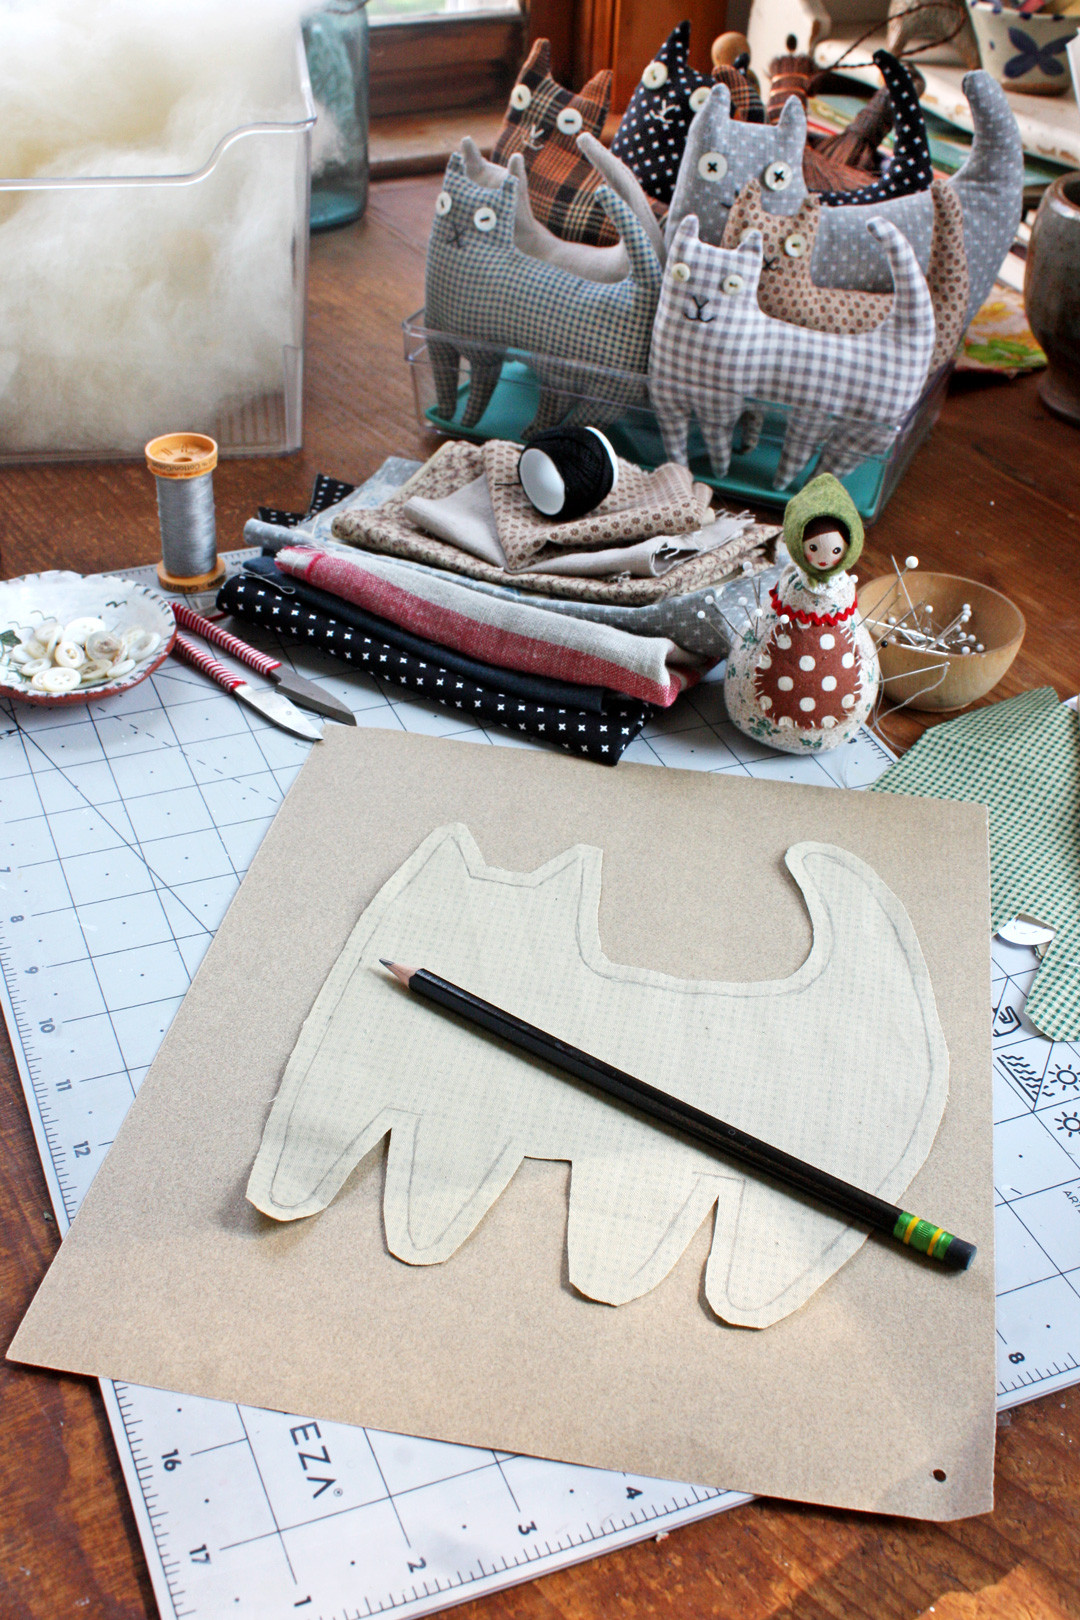
1. Download and Cut the Pattern
Start by downloading the free happy cat sewing pattern here. You’ll find templates for both small and large cats, giving you the option to create a whole happy cat family! Once downloaded, print and cut out your chosen size template. Pin the paper template to a double layer of your chosen fabric, ensuring the right sides of the fabric are facing each other. Carefully cut out the fabric pieces following the pattern outline.
 Two sizes of handmade happy cat plushies: small and large.
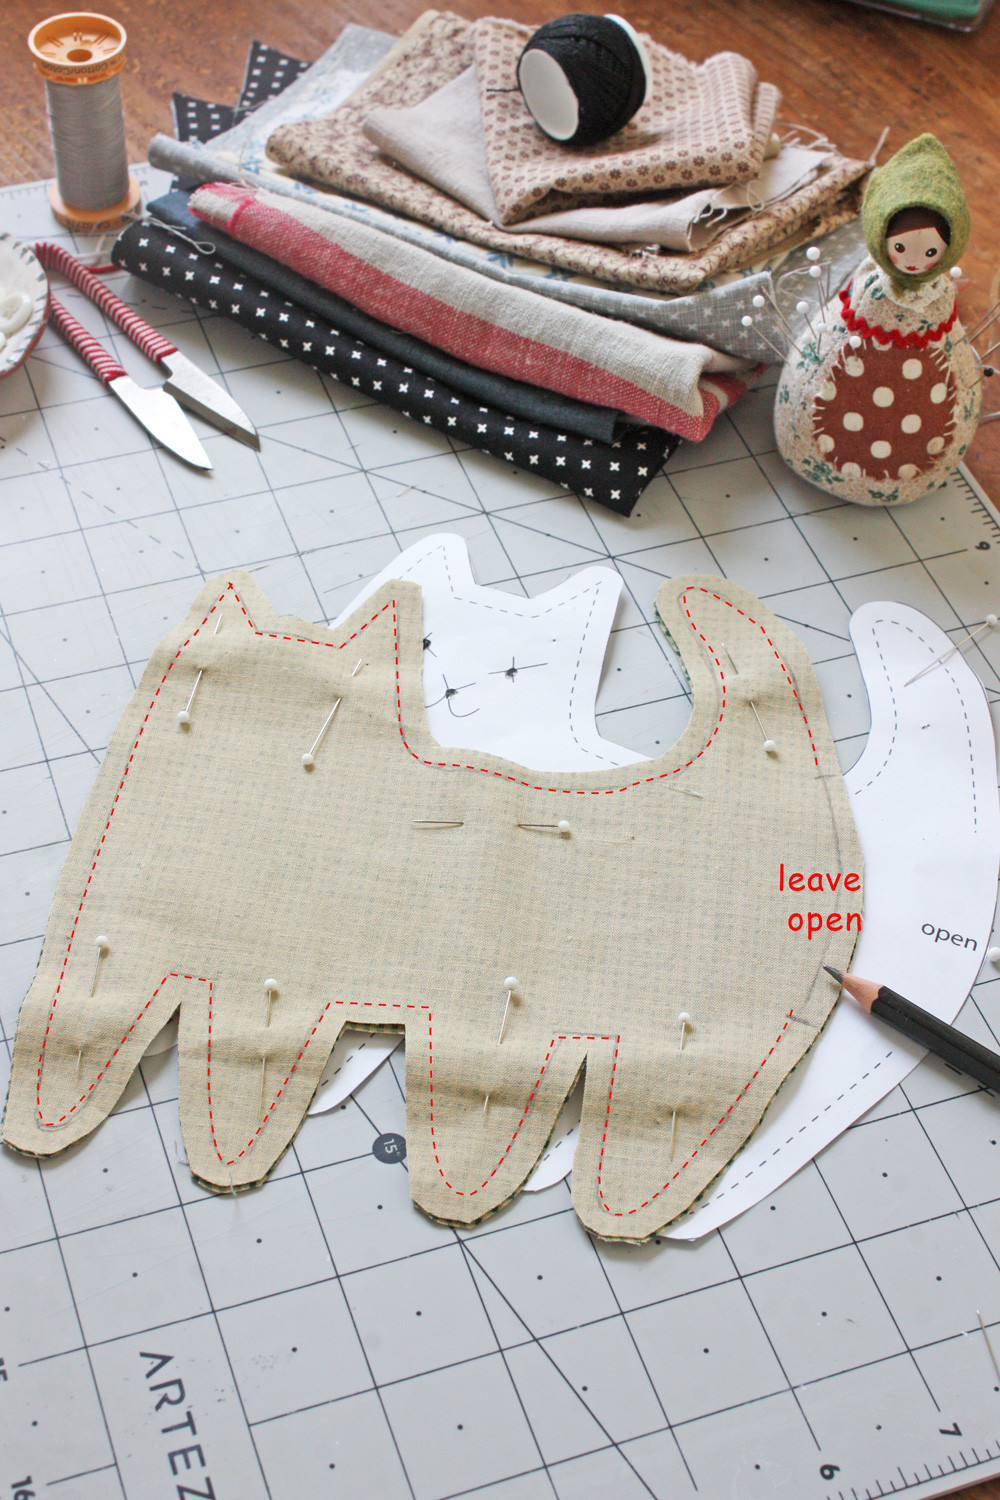
2. Mark the Seam Line
Separate the two fabric cat pieces. Now, it’s time to mark your seam line. A quarter-inch seam allowance is recommended for this pattern. Use a ruler or measuring tape to create small dots around the edge of the pattern, about every couple of inches, as a guide. Connect these dots with a pencil to draw your seam line. Pro tip: Place a piece of fine sandpaper underneath your fabric to prevent slipping while marking – this is especially helpful for beginners! Marking the seam line is crucial, particularly for ensuring the legs of your happy cat are sewn correctly. Don’t forget to also mark the area you’ll need to leave open for turning and stuffing later.
 Marking the seam allowance for the happy cat sewing pattern with a pencil.
3. Mark Face Guide Dots
Next, we’ll prepare for the adorable face of your happy cat. Looking at the right (printed) side of one of your fabric pieces, decide which direction you want your cat to face. Use the pattern template to mark the guide dots for the eyes, nose, and mouth. Simply push your pencil through the paper template at the designated points to transfer the markings onto your fabric. Alternatively, you can trace the entire face outline onto the fabric if you prefer.
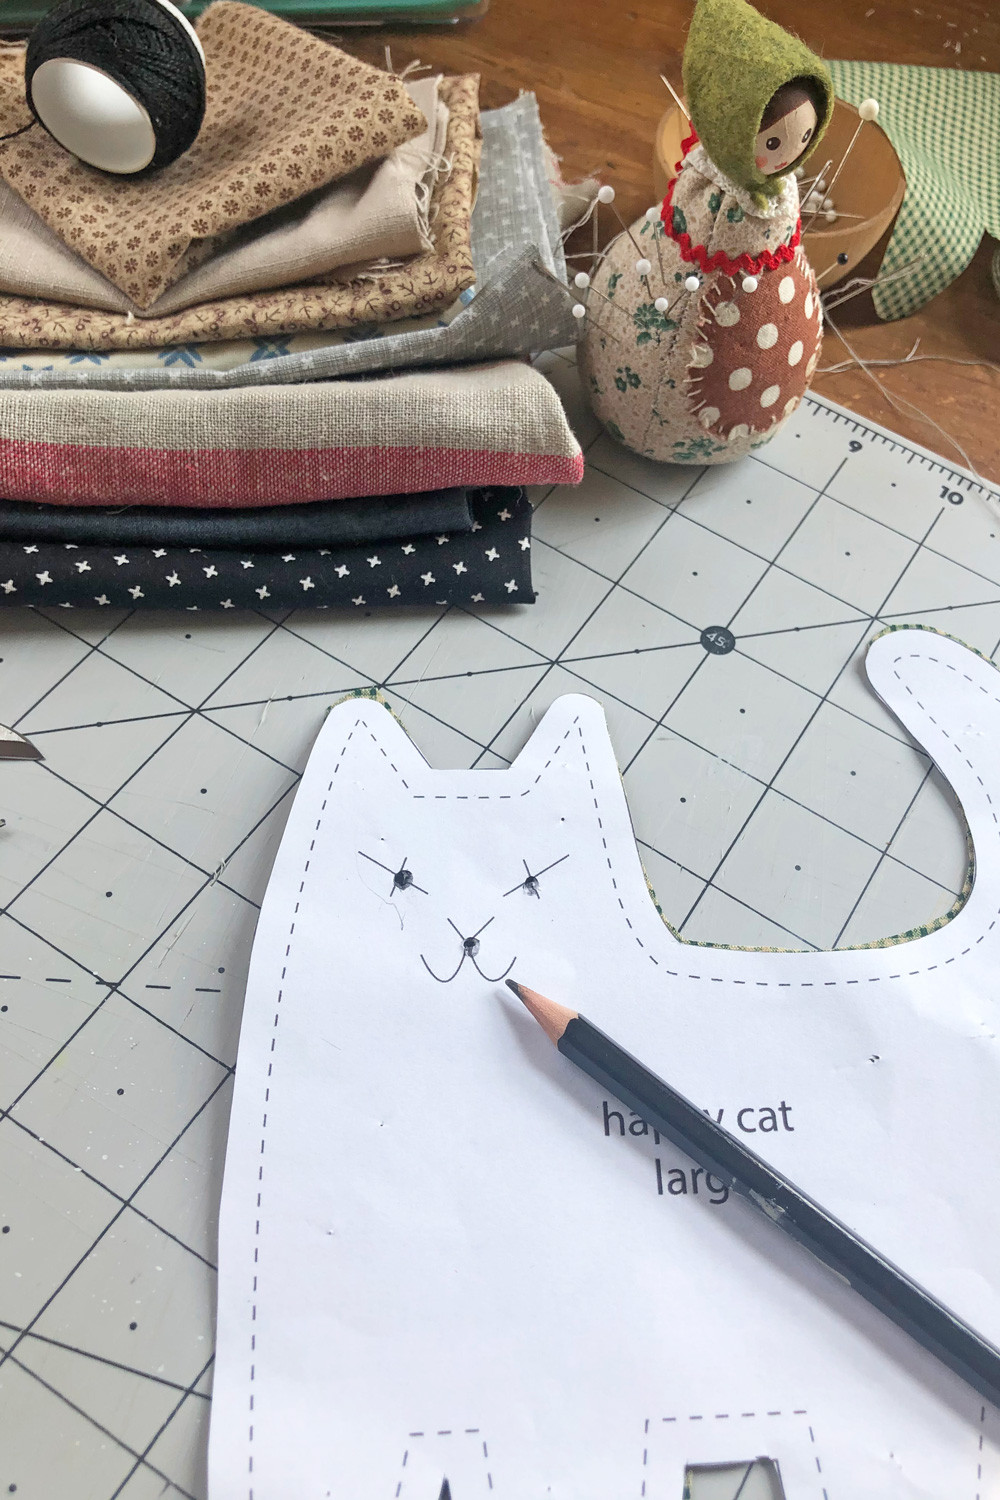 Marking guide dots for facial features on the happy cat sewing pattern.
Continue Sewing Your Happy Cat Plushie
4. Sew Along the Seam Line
Pin the two fabric pieces back together, ensuring the right sides of the fabric are still facing each other. Use plenty of pins to secure the layers and prevent shifting during sewing. Now, sew directly along the seam line you marked earlier. You can choose to sew by hand or use a sewing machine – both work perfectly for this project. Remember to leave the opening you marked earlier unsewn; this is essential for turning the happy cat right side out and adding stuffing.
 Sewing along the marked seam line for the happy cat plush toy.
5. Clip Curves and Corners
Before turning your happy cat right side out, it’s important to clip the curves and corners of the sewn seam. Carefully make small notches around all curved edges, such as the feet, tail tip, and neck curve. Clip off the pointed tips of the ears near the seam and trim a small amount of the seam allowance at the ear points. Also, clip a notch into each of the inner corners where the legs meet the body, and along the curves where the tail and back join. These clips will release tension in the seams, allowing for smoother curves and sharper corners when you turn the happy cat right side out.
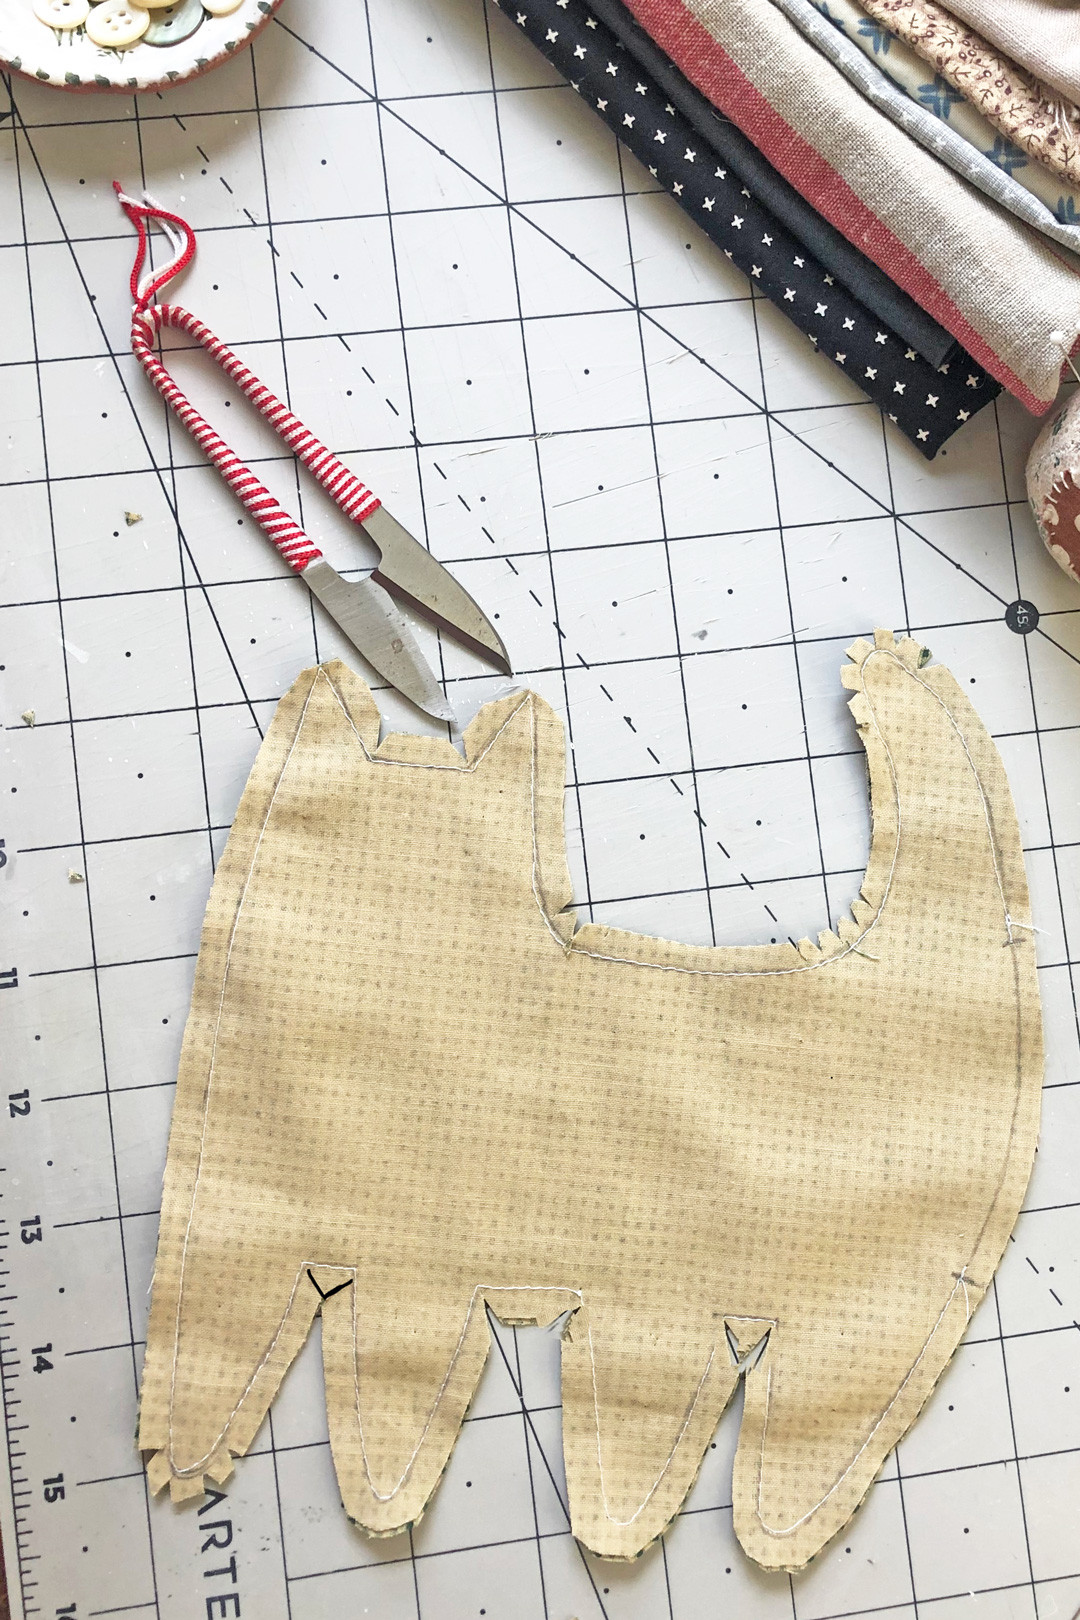 Clipping notches around the curves of the happy cat plushie before turning it right side out.
6. Turn Right Side Out and Massage Seams
Now comes the exciting part – turning your happy cat right side out! Gently push the fabric through the opening, gradually turning the plushie right side out. Use a chopstick or a similar blunt tool to carefully push out the legs, ears, and tail, ensuring they are fully turned. Take your time and use slow, firm pressure, twisting the chopstick slightly if needed. Once turned, use your fingers to stretch and gently massage the curved seams. This helps to smooth them out and give your happy cat a nicely defined shape.
 Massaging the seams of the happy cat plushie to smooth out the curves after turning it right side out.
7. Stuff Your Happy Cat
It’s time to give your happy cat some cuddly volume! Begin stuffing your plushie through the opening you left. Wool stuffing is highly recommended for its lovely texture and eco-friendly qualities. Take small amounts of stuffing at a time and gradually fill the body. Be sure to start by stuffing the toes, legs, and tail first, ensuring these smaller parts are well-filled before adding larger clumps of stuffing to the body. This prevents the legs and tail from becoming blocked and ensures even stuffing throughout your happy cat.
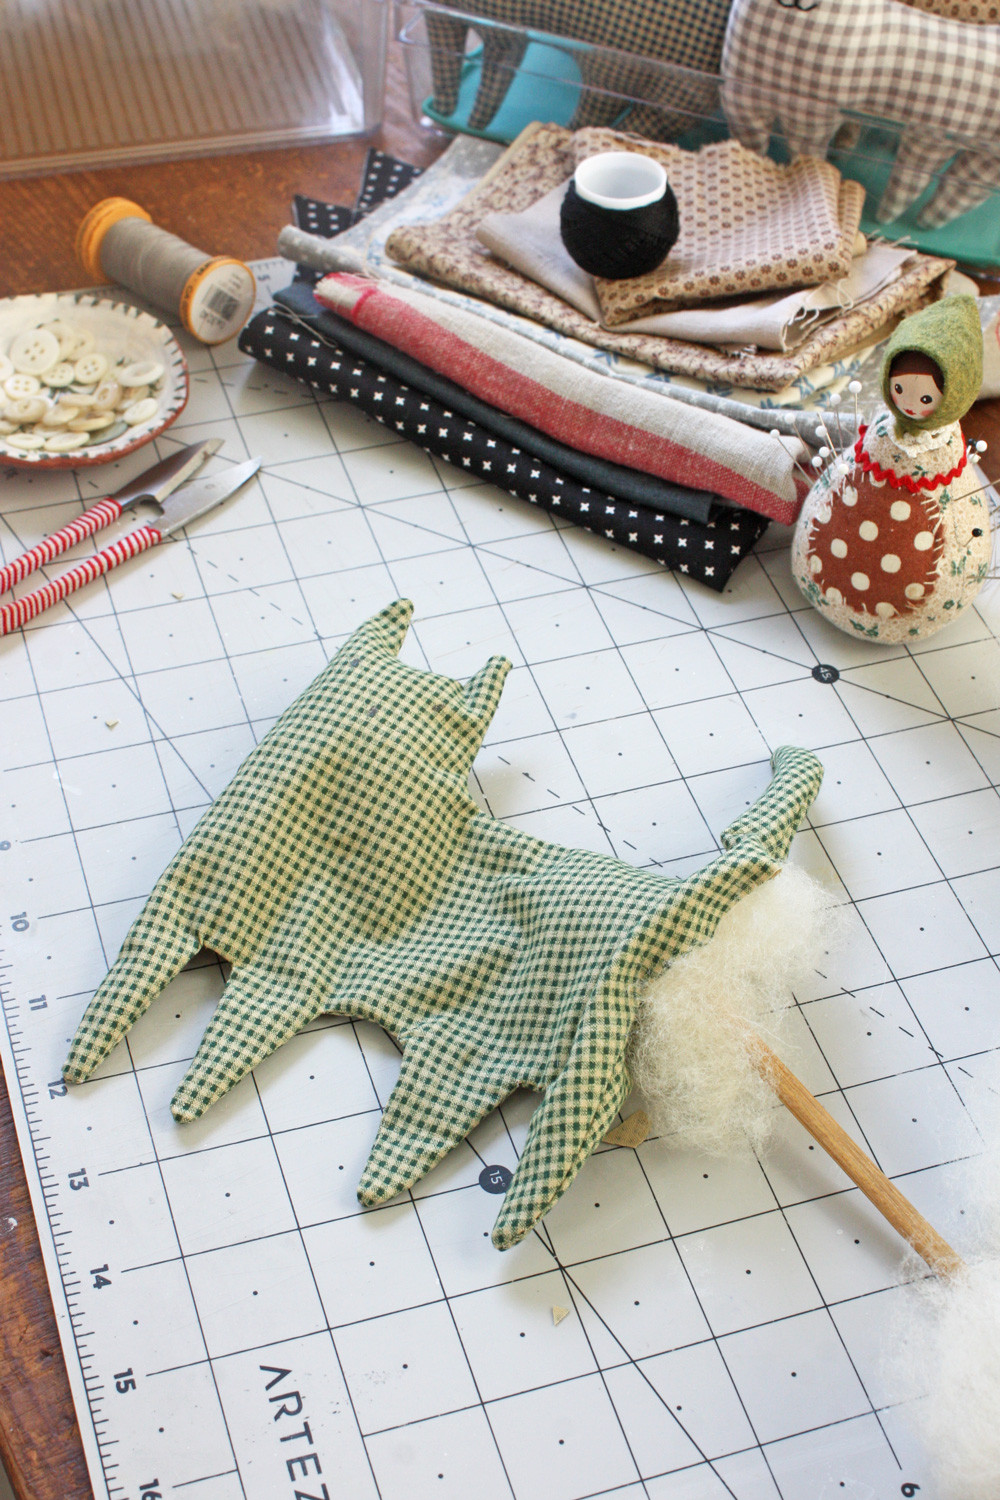 Stuffing the happy cat plushie with wool stuffing material.
8. Close the Opening
Once your happy cat is sufficiently stuffed to your liking, it’s time to close the opening. Fold the raw edges of the fabric at the opening inwards, creating a clean, folded edge. Pin the folded edges together. Using a needle and thread, stitch the opening closed with a neat, invisible stitch like a ladder stitch or a slip stitch.
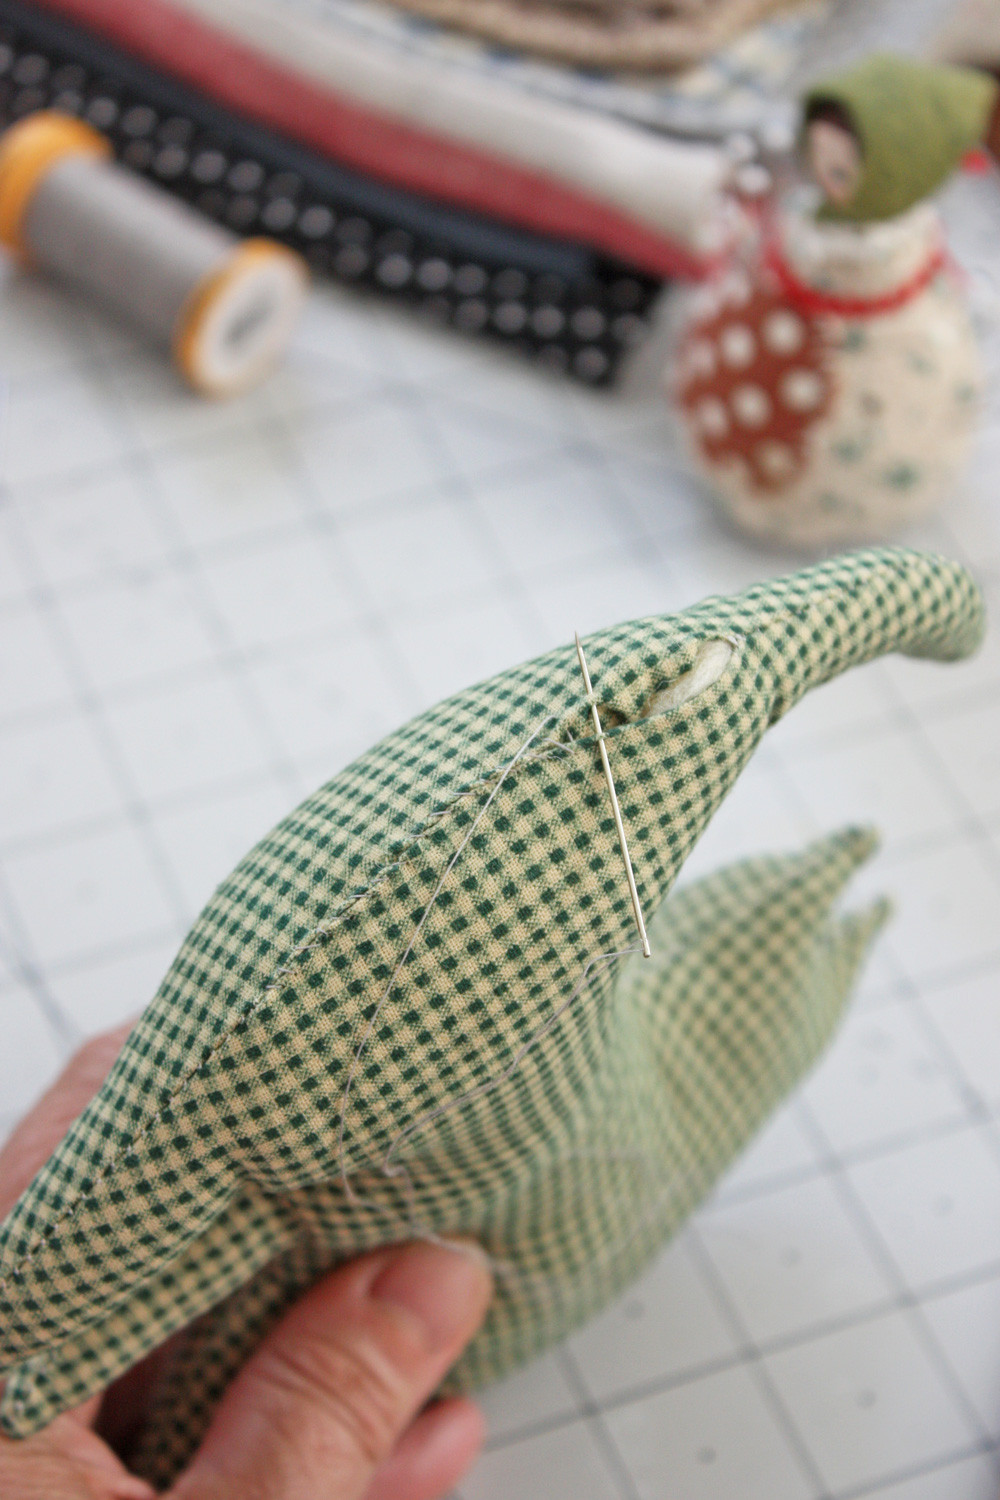 Hand-stitching the opening closed on the back of the happy cat plushie.
 The back opening of the happy cat plushie being stitched closed.
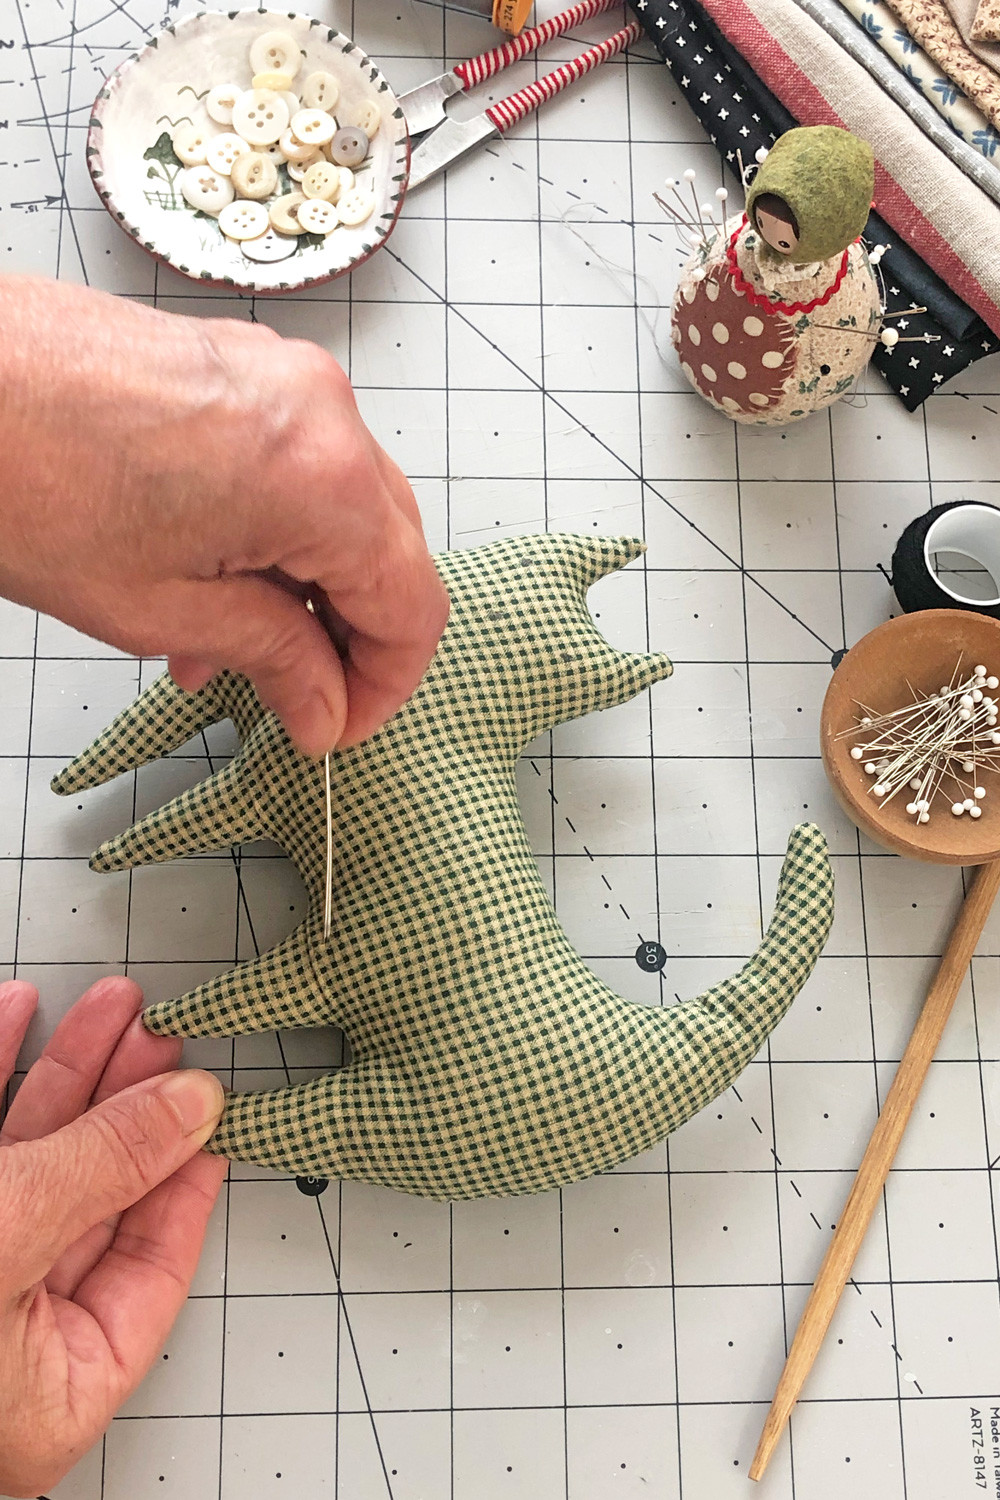
9. Refine Stuffing and Press (Pro Tip)
For final adjustments to the stuffing, you can use a doll needle or a large embroidery needle to gently move stuffing around from the outside. Pro tip: For an extra smooth finish, place your completed happy cat under a stack of books for a couple of hours. This gentle pressing technique helps to even out the stuffing and gives your plushie a wonderfully smooth shape.
Embroidering the Happy Cat’s Face
Now for the most charming part – giving your happy cat its personality! You can use buttons for eyes, or embroider X-shaped eyes as indicated on the pattern. The following steps detail a simple embroidery sequence for the face, but feel free to use any embroidery stitch you prefer to achieve your desired look.
It’s helpful to read through these steps once before beginning the embroidery.
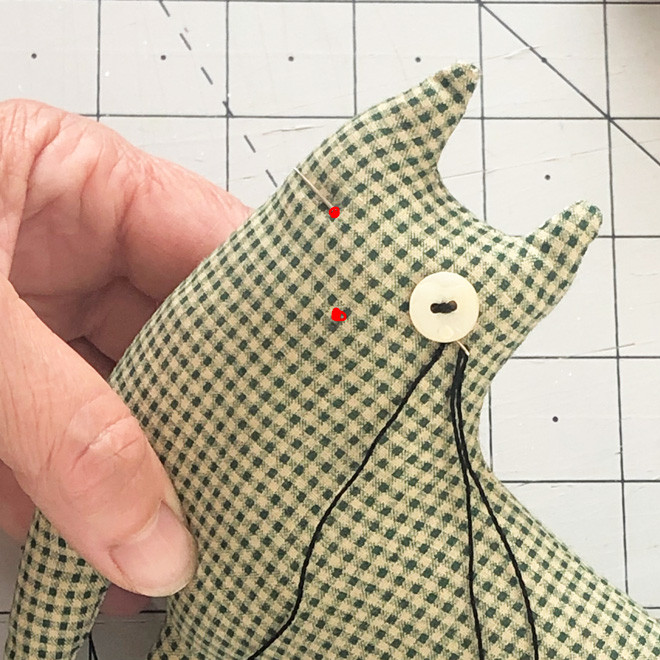
10. Start with the First Eye
Begin by threading your embroidery needle with embroidery thread (Perl DMC 8 is a good choice). Make a knot close to the end of the thread. Insert the needle into the fabric slightly away from one of the marked eye dots and bring it out at the eye dot itself. Pull the thread gently to pop the knot inside the fabric, concealing it neatly. If a small thread tail remains, use your needle to tuck it inside. (For more detailed instructions on this knot-hiding method, you can refer to this helpful tutorial on hiding thread ends).
 Step 11: Sewing on the button eye for the happy cat plushie.
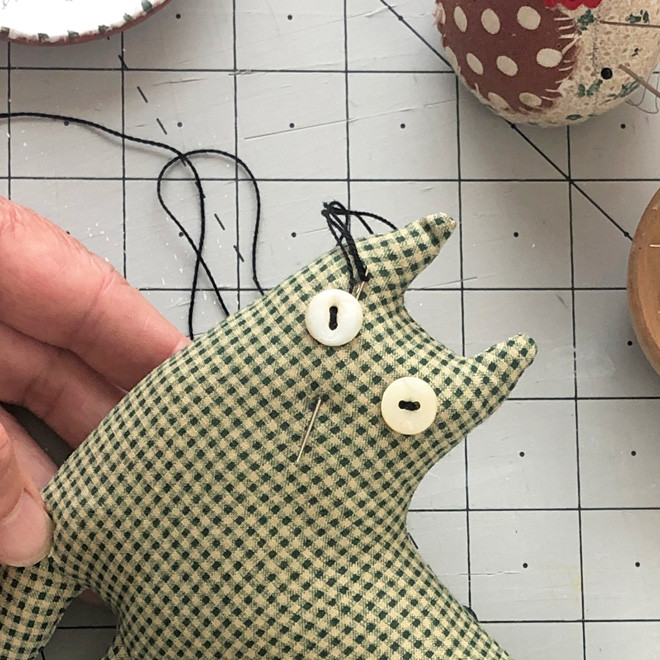 Step 12: Attaching the second button eye and preparing to embroider the nose.
11. Embroider the Nose
With the thread still attached from the eye, make a tiny stitch and knot it securely. If you are using buttons for eyes, sew on the first button eye with a couple of stitches. Make a knot under the edge of the button, then insert your needle back in under the edge of the button and bring it out at the other marked eye dot. Attach the second button eye in the same way. With the thread still attached, insert the needle back in under the edge of the second button and bring it out at the marked nose dot.
12. Embroider the Mouth
Create a diagonal stitch for one side of the nose triangle, bringing the needle back out at the top of the opposite side of the nose mark. Insert the needle back in at the original nose pencil mark, completing the triangle shape for the nose. Now, bring the needle out a little to one side and below the nose, ready to begin the mouth. Create a diagonal stitch for one side of the mouth, and bring the needle back out at the nose mark again. Insert the needle back in at the end of the first mouth stitch. Bring it out where the other side of the mouth will start. Make the diagonal stitch for the other side of the mouth, and bring the needle out at the nose mark once more.
13. Finishing Knot
Before making the very last stitch of the mouth, create a knot in your thread, but don’t tighten it fully yet. Insert the needle into the loop of the knot and, as you tighten the knot, use the needle to carefully draw the knot down the thread, positioning it close to the fabric. Adjust the knot until it’s just a little further away from the fabric than the length of your final stitch will be.
14. Final Touches
To make the last stitch of the mouth, insert the needle at the end point of the previous stitch. Bring the needle out a little away from the face, pull the thread tight to pop the knot through to the back of the fabric, and clip the thread close to the fabric surface. If a small thread tail remains, use your needle to sweep it inside from underneath for a perfectly clean finish.
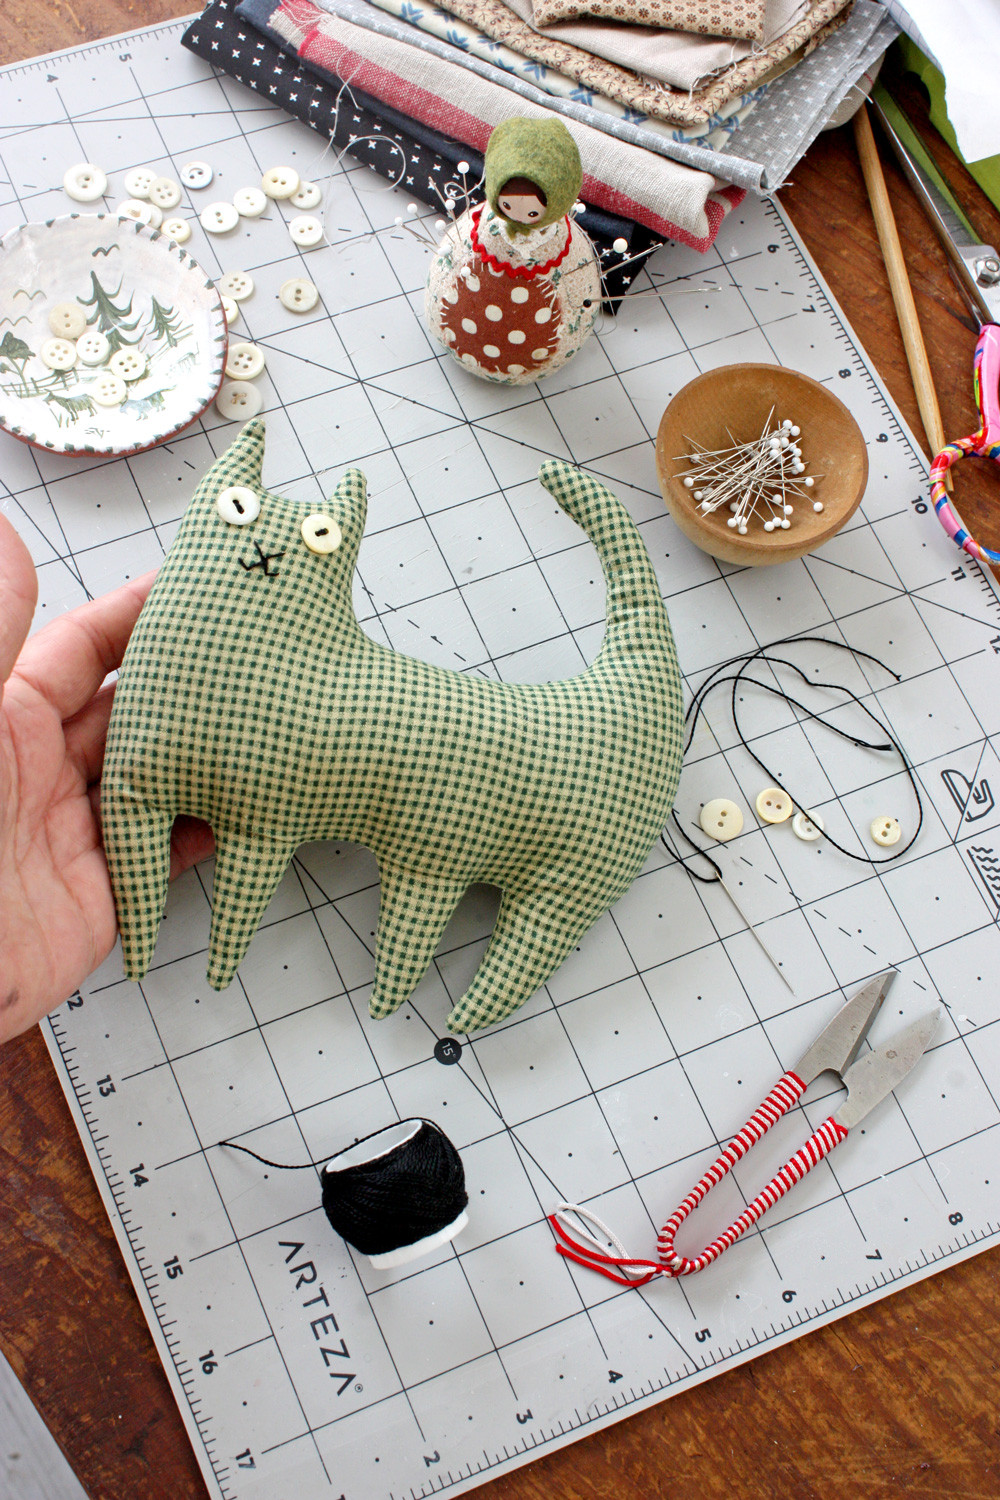 Finished handmade happy cat plushie made with a free sewing pattern.
Hello Happy Cat!
Congratulations, you’ve sewn your very own happy cat! We hope you enjoy making many more of these adorable feline friends. Feel free to share your creations on Instagram using #annwoodpattern – we’d love to see your happy cats!
 Subscribe to the newsletter for more free sewing patterns and tips.
Do you enjoy free patterns and sewing tips?
Subscribe to our free weekly newsletter for tips and tricks, creative ideas, the latest news, blog posts, and exclusive content just for subscribers, delivered to your inbox every Friday (mostly!).