Family cosplay is a delightful way to bond and express creativity, and for our family, it’s become a cherished tradition. Last year, we embraced the magic of Studio Ghibli with a heartwarming Totoro theme, a memory we treasure deeply. As our daughters grow older, their understanding and enthusiasm for dressing up alongside us has only deepened, making each cosplay experience even more special. This year, our hearts were set on another beloved Studio Ghibli masterpiece: Kiki’s Delivery Service. This enchanting film, with its captivating storyline and soul-stirring music, holds a special place in many hearts. For those unfamiliar with the movie, it tells the story of Kiki, a young witch who embarks on an independent journey with her steadfast and witty black cat companion, Jiji.
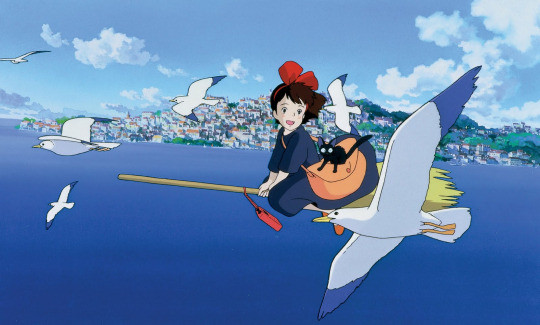 Kiki and Jiji flying on a broomstick, showcasing the main characters of Kiki's Delivery Service
Kiki’s journey is not without its charming encounters, including Tombo, a boy with a keen interest in aviation and a distinctive look with his thick black glasses and red and white striped shirt, who quickly becomes Kiki’s love interest.
 Tombo smiling and waving, a key character and Kiki's friend in Kiki's Delivery Service
Adding to the charm of Kiki’s Delivery Service are the adorable feline characters, Jiji and Lily, each with their unique personalities and roles in Kiki’s life.
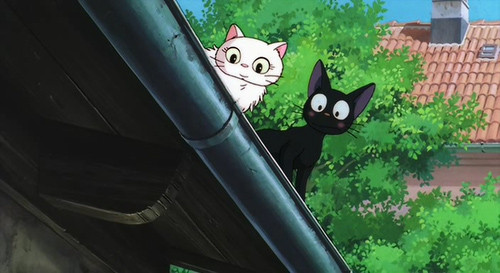 Jiji and Lily sitting together, illustrating the cute cat characters from Kiki's Delivery Service
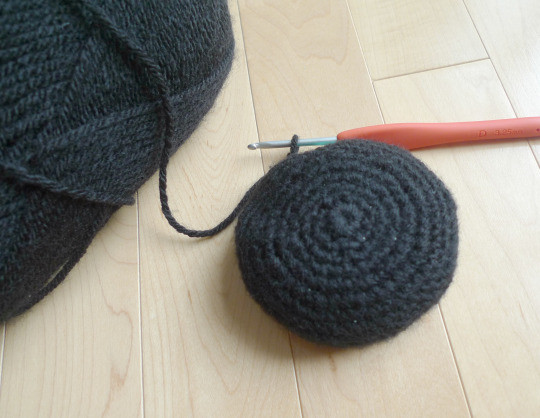
To infuse our Kiki’s Delivery Service cosplay with a personal touch, I decided to incorporate crochet elements. My vision was to crochet Kiki’s iconic giant red bow headband, a project I’ll detail in another post, and, most importantly, my very own Jiji cat amigurumi. My quest for the perfect Jiji cat crochet pattern led me to the wonderful free pattern designed by Anne Gee White of “A Gamer’s Wife,” available on Ravelry. For this project, Lion Brand Yarn’s Vanna’s Choice yarn was ideal due to its excellent color selection, and I chose “Black” and “Scarlet” to bring Jiji to life.
 Crocheted Jiji cat amigurumi in progress, showcasing the yarn and hook used for crafting
What makes this Jiji crochet pattern particularly interesting is its top-down, continuous construction. The head, neck, and body are crocheted as one seamless piece, simplifying the process and creating a wonderfully cohesive amigurumi. Here you can see the initial stages, crocheting the top of Jiji’s head. I opted for a 3.25 mm crochet hook to achieve tight, dense stitches, crucial for amigurumi to prevent stuffing from showing.
 Close-up of crocheting Jiji's head, demonstrating the amigurumi crochet technique
With Jiji’s head complete, the pattern seamlessly transitions to crocheting the neck and body, maintaining the continuous flow of the project.
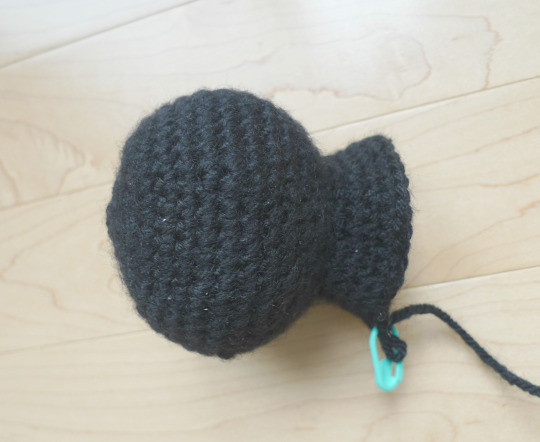 Jiji amigurumi taking shape with the head and body being crocheted together
Throughout the crocheting process, I adhered strictly to the stitch counts provided in the Jiji cat pattern, ensuring accuracy and the intended proportions of the final amigurumi.
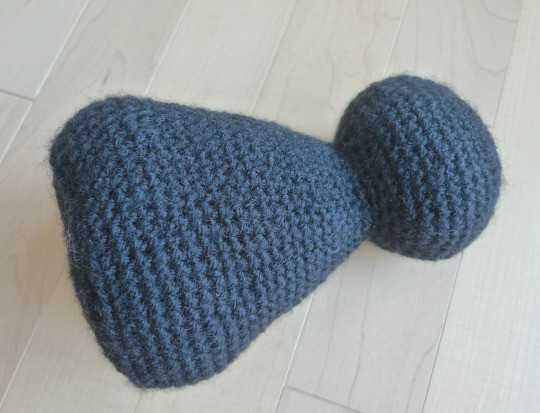 Following the Jiji cat crochet pattern precisely for an accurate amigurumi
This image gives you a sense of the relative size of Jiji’s head and body as the crochet work progresses, held in hand for scale.
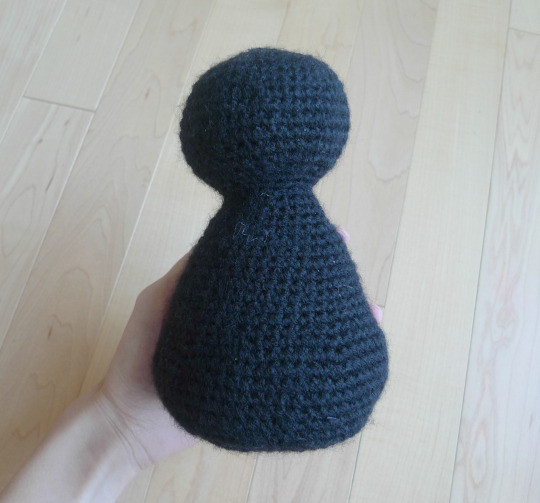 Holding the crocheted Jiji body to show the size and progress of the amigurumi
To add a touch of playful realism to our Jiji amigurumi, we decided to make his tail poseable. This was achieved by using wire, bent into a loop with an extended length. This wire structure was inserted into the base of Jiji before closing up the body, providing an anchor for the poseable tail. The extending wire allows for attaching the crocheted tail. (For more detailed instructions on adding wire to amigurumi, you can refer to my Monkey pattern). It’s important to note that wiring should be avoided when creating amigurumi for babies or small children due to safety concerns.
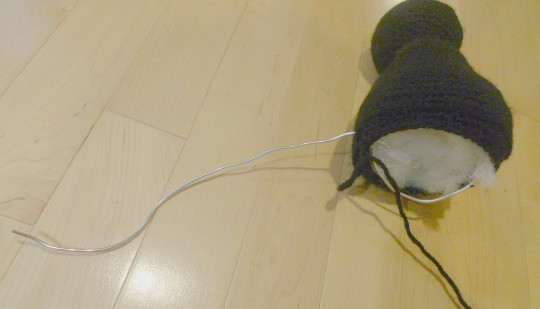 Preparing to add a poseable wire structure to the Jiji amigurumi for the tail
Next came crocheting the smaller components: Jiji’s ears, front legs, and the poseable tail.
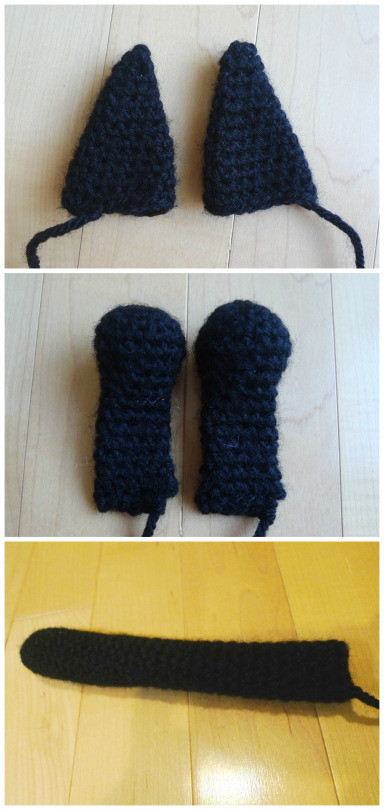 Crocheted parts of Jiji including ears, legs, and tail before assembly
Ryan and I worked together to complete Jiji late one evening. As the project neared completion, fewer progress photos were taken in the excitement. After attaching the ears and front legs, and securing the tail to the wire, it was time to add the felt details. We used black and white felt for Jiji’s expressive eyes, white felt for the inner ears, and pink felt for his cute little nose.
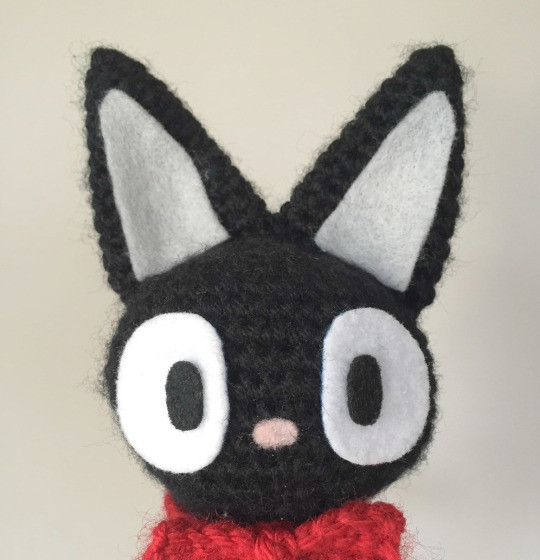 Adding felt details to the Jiji amigurumi to create the face and ears
As a final, charming detail, we decided to crochet an adorable red bow for our amigurumi Jiji, mirroring Kiki’s signature bow and adding a delightful pop of color. Below is the simple pattern I created for Jiji’s red bow collar:
Jiji Red Bow Collar Crochet Pattern
 Jiji's red bow collar pattern diagram, illustrating the crochet steps
Using a 2.75 mm hook and Vanna’s Choice yarn in “Scarlet”
Rectangle (Bow):
Chain 10
Row 1: Starting in the 2nd chain from the hook, single crochet 9 stitches (9 sts).
Row 2: Chain 1, turn. Single crochet 9 stitches (9 sts).
Row 3: Repeat Row 2. Fasten off.
Middle Knot:
Chain 8
Row 1: Starting in the 2nd chain from the hook, single crochet 7 stitches (7 sts)
Fasten off, leaving a long tail for sewing. Wrap and sew the middle knot around the center of the rectangle to shape the bow.
Collar:
Chain 25. Sew one end of the chain to the back of the middle knot of the bow. Wrap the collar around Jiji’s neck and sew the other end to the back of the middle knot. Alternatively, hot glue can be used to attach the collar to the bow for quicker assembly.
I was absolutely thrilled with how my crocheted Jiji amigurumi turned out! The felt details truly brought him to life, giving him those endearing, wide eyes and a sweet, petite nose. Ryan’s precision in cutting the felt pieces was, as always, impeccable, contributing significantly to Jiji’s polished look.
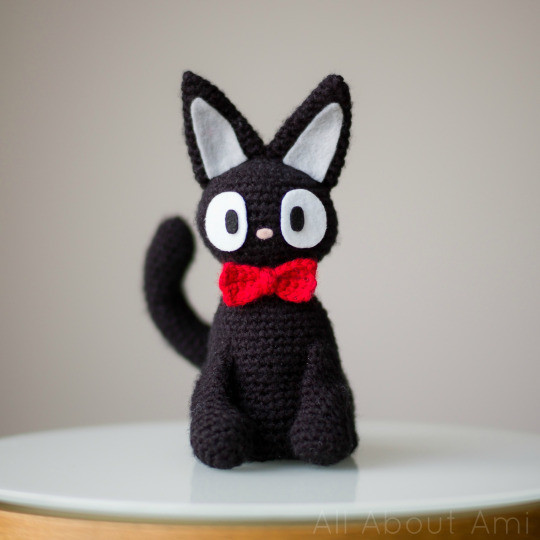 Finished crocheted Jiji cat amigurumi with felt eyes and nose details
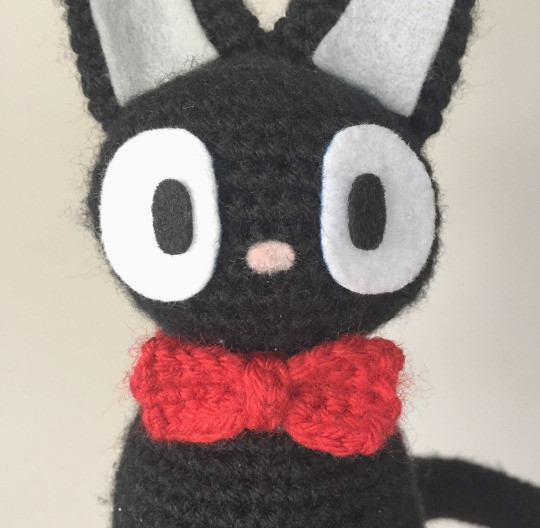
The tiny red bow collar added such a charming touch and a vibrant splash of color, perfectly complementing the giant bow I would be wearing as Kiki.
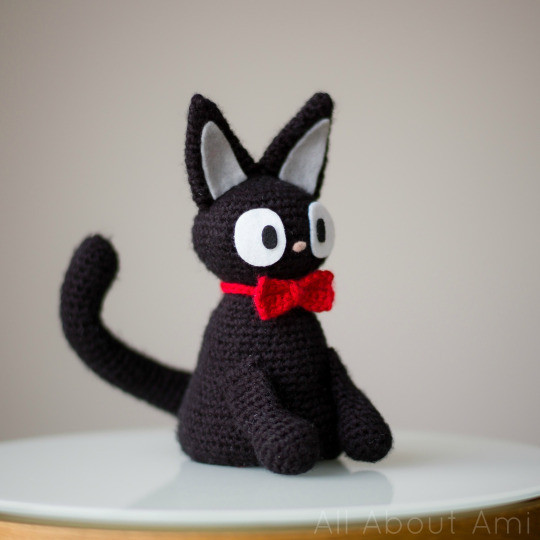 Jiji amigurumi wearing the red bow collar, a cute accessory for the crocheted cat
The poseable wire in Jiji’s tail proved to be a fantastic addition, allowing for playful customization and dynamic posing.
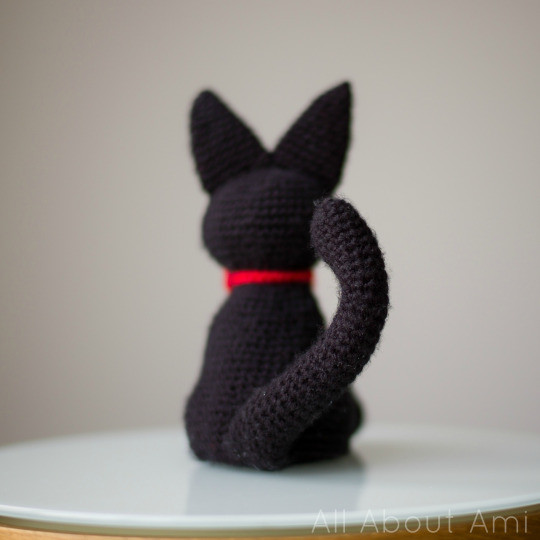 Poseable tail of the Jiji amigurumi being bent, showing the flexibility added by wiring
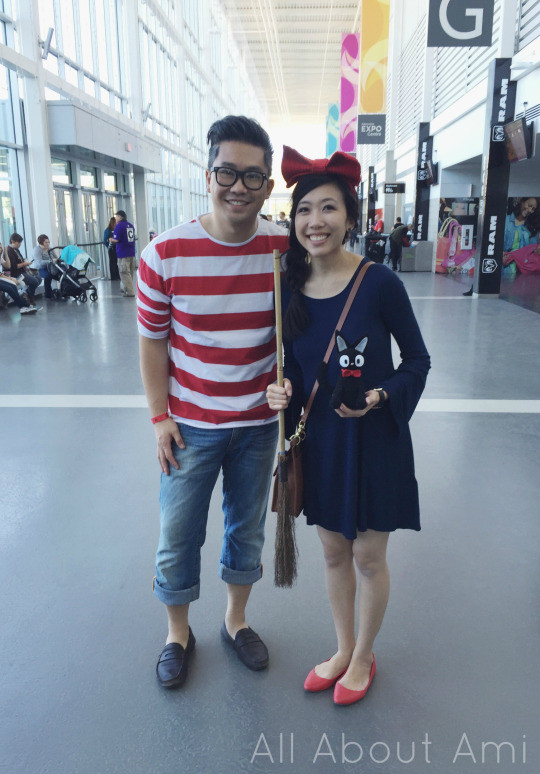
Finally, the moment arrived to debut our Kiki’s Delivery Service family costumes at the Edmonton Expo! Ryan transformed into Tombo, I was Kiki, Myla embodied Jiji, and Brie became Lily. Myla proudly carried a plush Jiji, an official Ghibli souvenir from Japan, while my handmade Jiji cat rested on the floor – a casualty of Brie’s toddler enthusiasm!
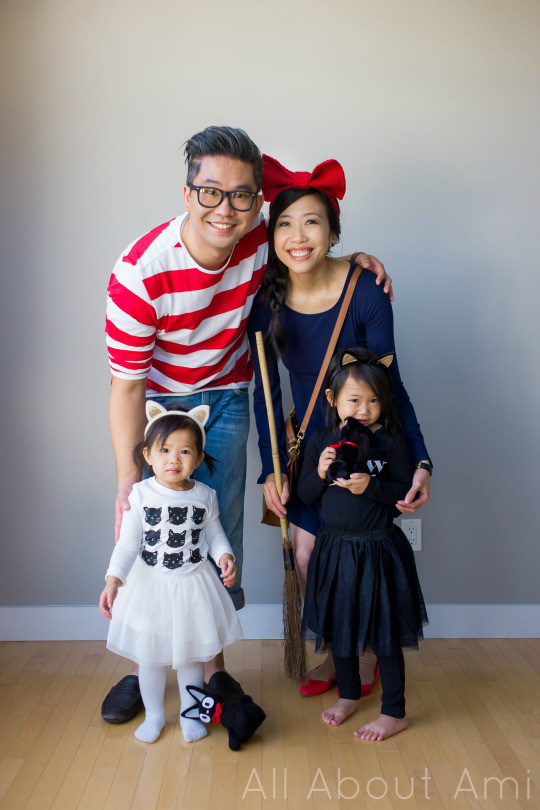 Family dressed in Kiki's Delivery Service costumes with crocheted Jiji cat
Ready and excited, we were about to step into the Expo, our Kiki’s Delivery Service cosplay complete with our crocheted Jiji cat.
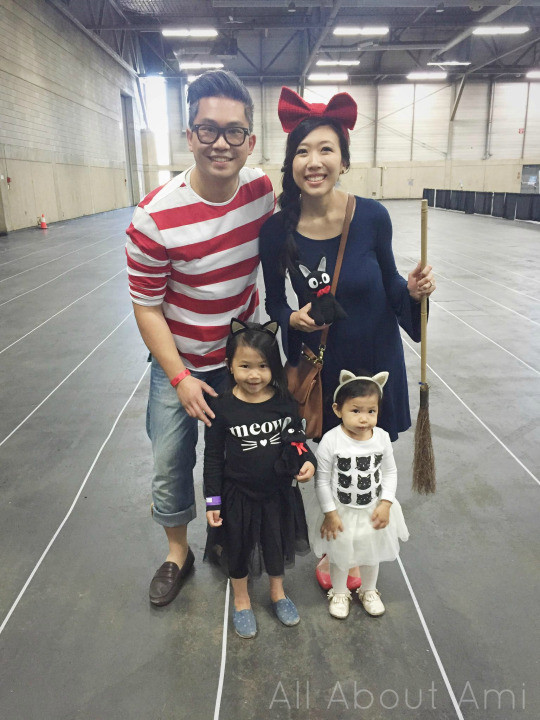 Family cosplay group ready to go to Edmonton Expo as Kiki's Delivery Service characters
Dressing up as a family is such a joy, and being able to incorporate my crochet creations into our costumes made it even more fulfilling. Amusingly, Ryan’s Tombo costume frequently led to him being mistaken for Waldo, with many exclaiming “I found Waldo!” as they passed by. However, true Ghibli aficionados recognized our Kiki’s Delivery Service theme and were delighted to see the girls involved in the cosplay fun! I’m excited to share the pattern for the giant red bow headband in an upcoming blog post for anyone interested in crafting their own Kiki accessory. I’ll also provide details on where I sourced all the components for my Kiki costume.
 Family cosplay at Edmonton Expo, showcasing Kiki's Delivery Service theme and Jiji cat
If you are a fan of Kiki’s Delivery Service, crocheting a Jiji cat amigurumi is a rewarding and relatively quick project, thanks to the straightforward pattern. Even if you aren’t familiar with Jiji, this black cat amigurumi makes a wonderfully charming Halloween decoration for your home, or simply a delightful crocheted cat toy. Feel free to experiment with different yarn colors to create a unique cat amigurumi of your own. You can find the free Jiji cat crochet pattern HERE! Stay tuned for the upcoming bow headband pattern and Kiki costume details!