
Cat lovers and baking enthusiasts, get ready to combine your passions! These adorable Cat Cookies, also known as neko cookies, are not only incredibly cute but also surprisingly simple to make. With three delicious flavors – vanilla, coffee, and chocolate – there’s a purr-fect cookie for everyone. This recipe utilizes a mini-chopper for ease and minimal cleanup, ensuring your cookies hold their delightful shape during baking. Whether you’re a seasoned baker or just starting out, these cat shaped cookies are guaranteed to bring a smile to your face and impress your friends.
 Close-up of a calico cat cookie with vanilla, chocolate, and coffee dough swirls.
Why You’ll Love This Cat Cookie Recipe
- Adorable and Appealing: Let’s face it, anything cat-shaped is instantly charming! These calico cat cookies are no exception. Their cute design makes them perfect for parties, gifts, or simply a fun baking project.
- Easy to Make: Thanks to the mini-chopper method, the dough comes together quickly and effortlessly. No need for extensive mixing or complicated techniques.
- Three Delicious Flavors: Vanilla, coffee, and chocolate offer a variety of tastes to satisfy different preferences. The combination creates a beautiful marbled effect in the cat cookies.
- Perfect for Cookie Cutters: While cat-shaped cookie cutters are ideal, you can use any shape you have on hand. Dogs, bunnies, stars – get creative and personalize your cookies!
- Great for All Skill Levels: Whether you’re a beginner or an experienced baker, this easy cat cookie recipe is straightforward and fun to follow.
 A tray of freshly baked cat cookies in vanilla, coffee, and chocolate flavors cooling on a wire rack.
Ingredients for Your Cat Cookies
This recipe yields approximately 58 delightful cat cookies.
Vanilla Cookie Dough:
- 150g Cake flour
- 75g Icing sugar
- 1/8 tsp Baking powder
- 75g Salted butter, cold and cubed (1.5 cm pieces)
- 30g Egg yolks
- 1 1/2 tsp Cold water
- 1/2 tsp Vanilla extract
Coffee Cookie Dough:
- 44g Cake flour
- 13g Icing sugar
- 1/2 tsp Instant coffee granules
- 20g Salted butter, cold and cubed (1.5 cm pieces)
- 6g Egg
- 1/4 tsp Cold water
Chocolate Cookie Dough:
- 37g Cake flour
- 6g Cocoa powder
- 13g Icing sugar
- 20g Salted butter, cold and cubed (1.5 cm pieces)
- 6g Egg
- 1/4 tsp Cold water
 Ingredients for cat cookies including flour, sugar, butter, eggs, vanilla, coffee, and cocoa powder.
Step-by-Step Guide to Baking Cat Cookies
Follow these simple steps to create your own batch of charming cat cookies.
1. Making the Vanilla Cookie Dough:
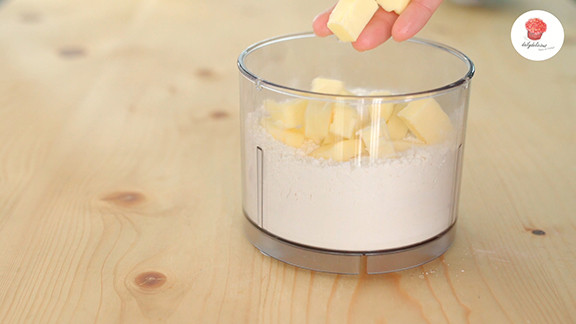
- Combine Dry Ingredients: In the bowl of your mini-chopper, add the cake flour, icing sugar, and baking powder. Process until well combined.
- Incorporate Butter: Add the cubed cold butter to the mixture. Process until the mixture resembles fine crumbs.
 Combining flour, icing sugar, and baking powder in a mini chopper for vanilla cookie dough.
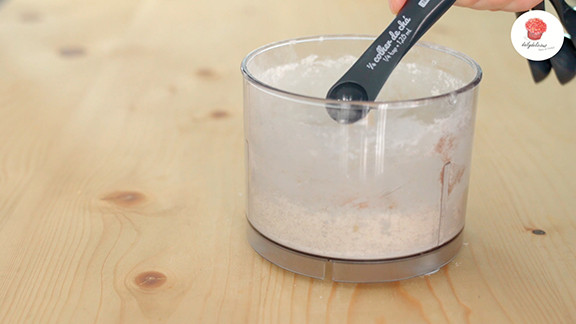
- Add Wet Ingredients: Introduce the egg yolks, vanilla extract, and cold water to the bowl.
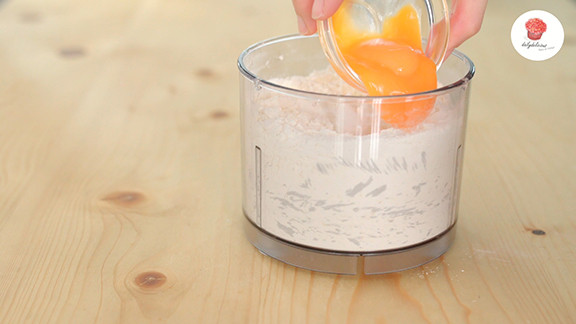 Adding egg yolks, vanilla extract, and cold water to the mini chopper for vanilla cookie dough.
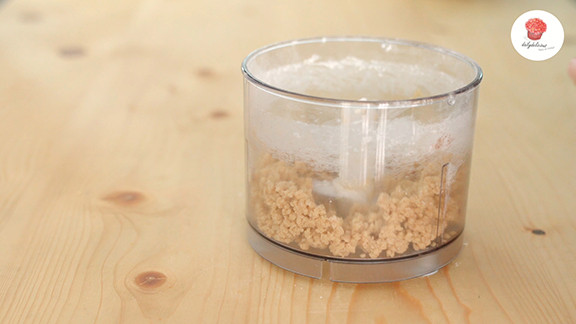
- Form the Dough: Process until a smooth dough forms. Be careful not to over-process.
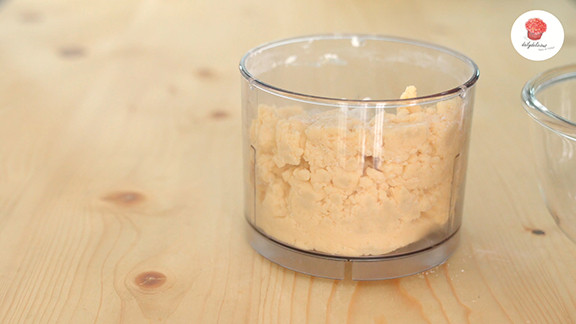 Vanilla cookie dough forming in a mini chopper.
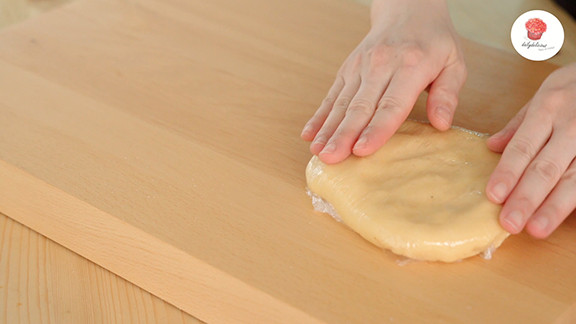
- Knead and Chill: Remove the dough from the bowl and gently knead it with the palm of your hand until it becomes smooth.
 Kneading vanilla cookie dough by hand.
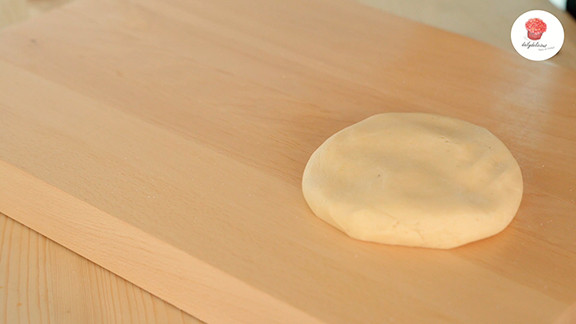 Smooth vanilla cookie dough after kneading.
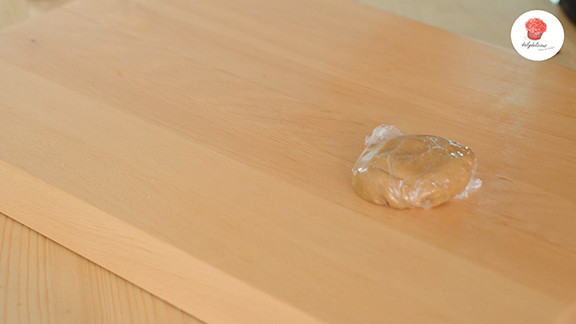
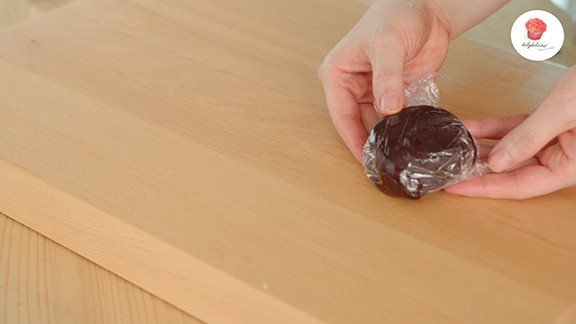
 Vanilla cookie dough wrapped in plastic wrap ready for refrigeration.
- Refrigerate: Wrap the vanilla dough in plastic wrap and refrigerate for 30 minutes.
2. Making the Coffee and Chocolate Cookie Doughs:
- Repeat the Process: Follow the same steps as for the vanilla dough to create the coffee and chocolate cookie doughs. Remember to add instant coffee granules to the coffee dough and cocoa powder to the chocolate dough along with the dry ingredients.
 Combining flour, icing sugar, and instant coffee in a mini chopper for coffee cookie dough.
 Coffee cookie dough forming in a mini chopper.
 Smooth coffee cookie dough after kneading.
 Combining flour, icing sugar, and cocoa powder in a mini chopper for chocolate cookie dough.
 Chocolate cookie dough forming in a mini chopper.
 Smooth chocolate cookie dough after kneading.
- Chill All Doughs: Wrap each dough (coffee and chocolate) in plastic wrap and refrigerate for 30 minutes.
3. Creating the Calico Effect and Cutting Cookies:
- Roll Vanilla Dough: Place the vanilla cookie dough between two sheets of baking paper. Roll it out evenly to a thickness of about 3mm.
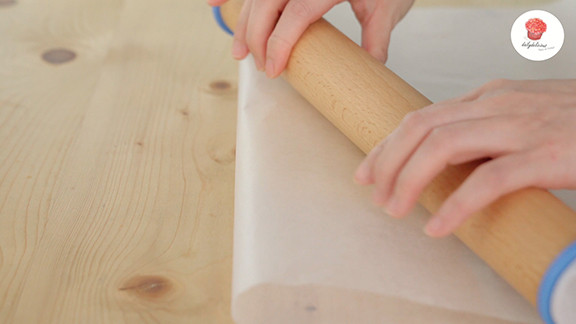 Rolling out vanilla cookie dough between baking sheets.
- Add Color Swirls: Take small pieces of chocolate and coffee dough and place them randomly on top of the rolled vanilla dough.
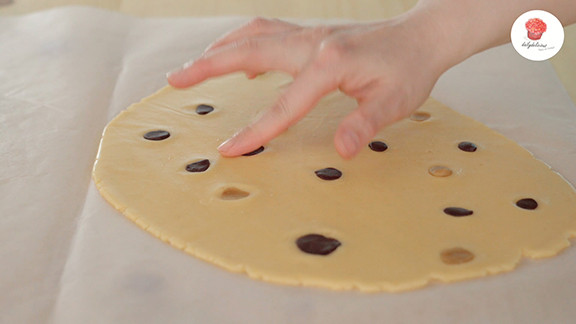 Adding small pieces of chocolate and coffee dough onto rolled vanilla dough.
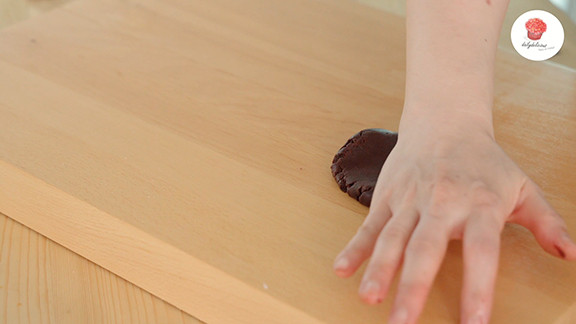
- Roll Again: Gently roll the dough again with a rolling pin until it reaches approximately 3mm thickness. This will swirl the colors together creating the calico effect.
 Rolling pin rolling over vanilla dough with chocolate and coffee dough pieces to create a marbled effect.
- Chill Rolled Dough: Refrigerate the rolled dough for another 30 minutes to make cutting easier.
 Rolled and marbled cookie dough between baking sheets ready for chilling.
- Optional – Single Flavor Cookies: If you prefer single-flavor cookies, simply roll out each dough separately to 3mm thickness.
 Rolling out chocolate cookie dough between baking sheets.
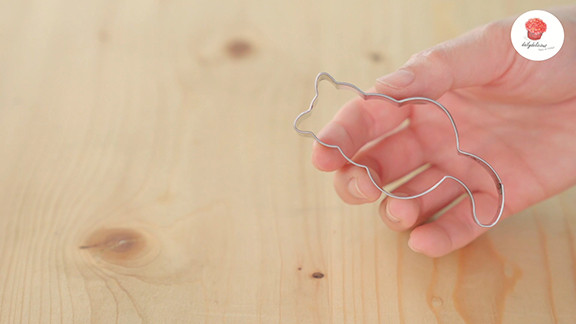
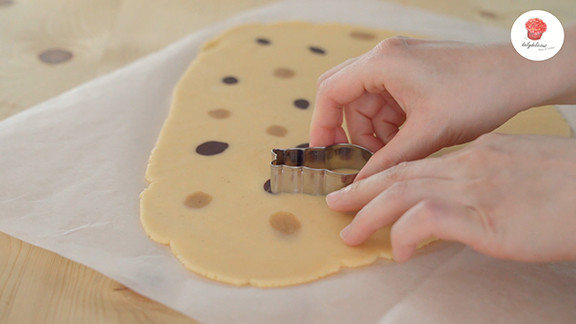
- Cut Out Cookies: Use your favorite cat cookie cutter (approximately 3.5×8 cm) to cut out the cat cookies.
 Cat shaped cookie cutter ready to cut out cookies.
 Cutting out cat cookies from rolled dough with a cookie cutter.
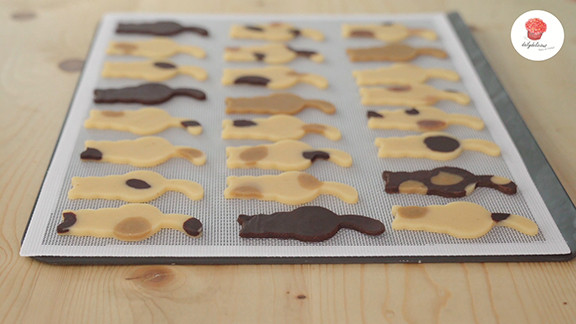
- Prepare for Baking: Place the cut-out cat cookies on a baking sheet lined with parchment paper. Refrigerate them again for 30 minutes.
- Preheat Oven: Preheat your oven to 170℃ (340°F).
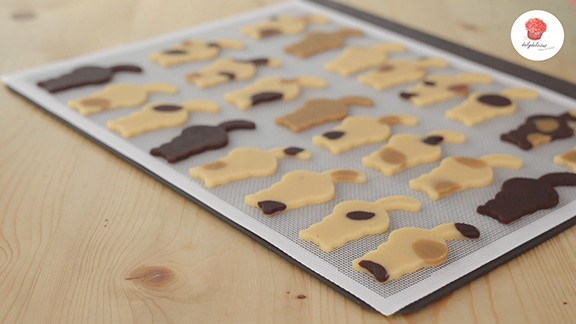 Cat cookies placed on a baking sheet ready for the oven.
4. Baking and Cooling:
- Bake: Bake in the preheated oven for 13-15 minutes. The edges should be lightly golden.
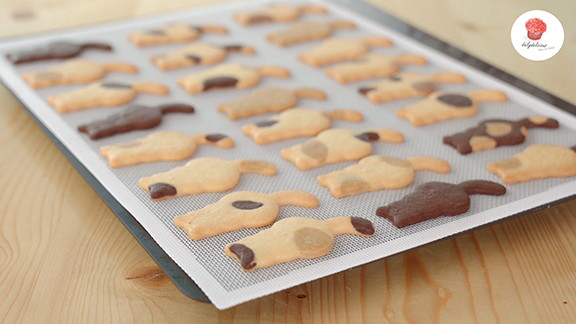 Baking cat cookies in the oven.
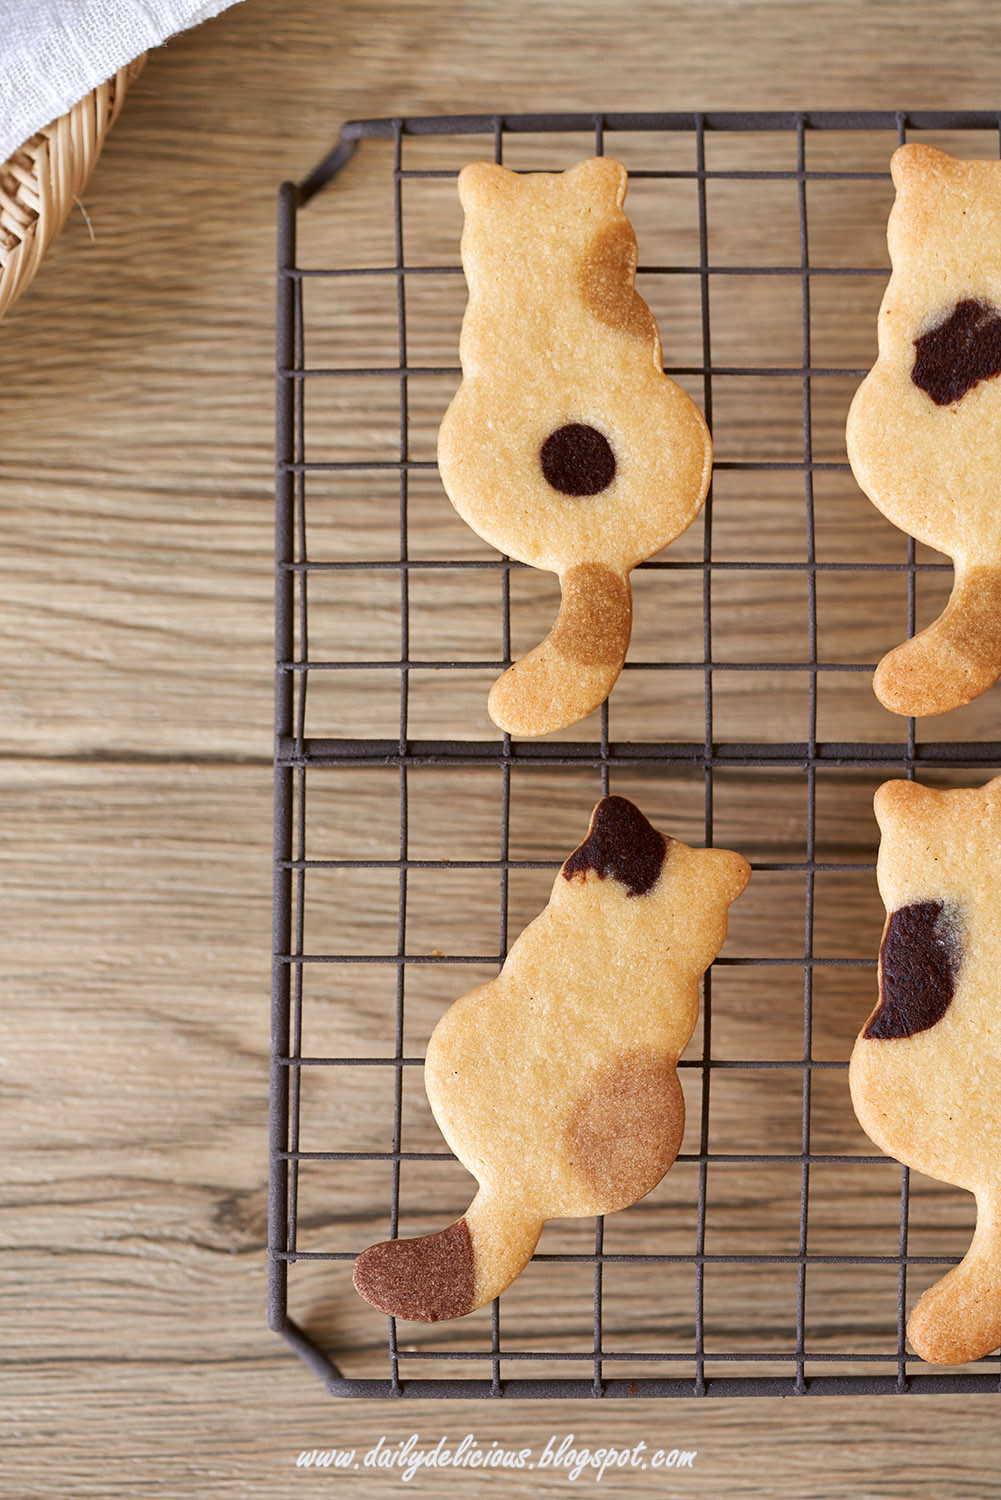
- Cool: Let the cat cookies cool completely on a wire rack. This will ensure they become crisp and perfect.
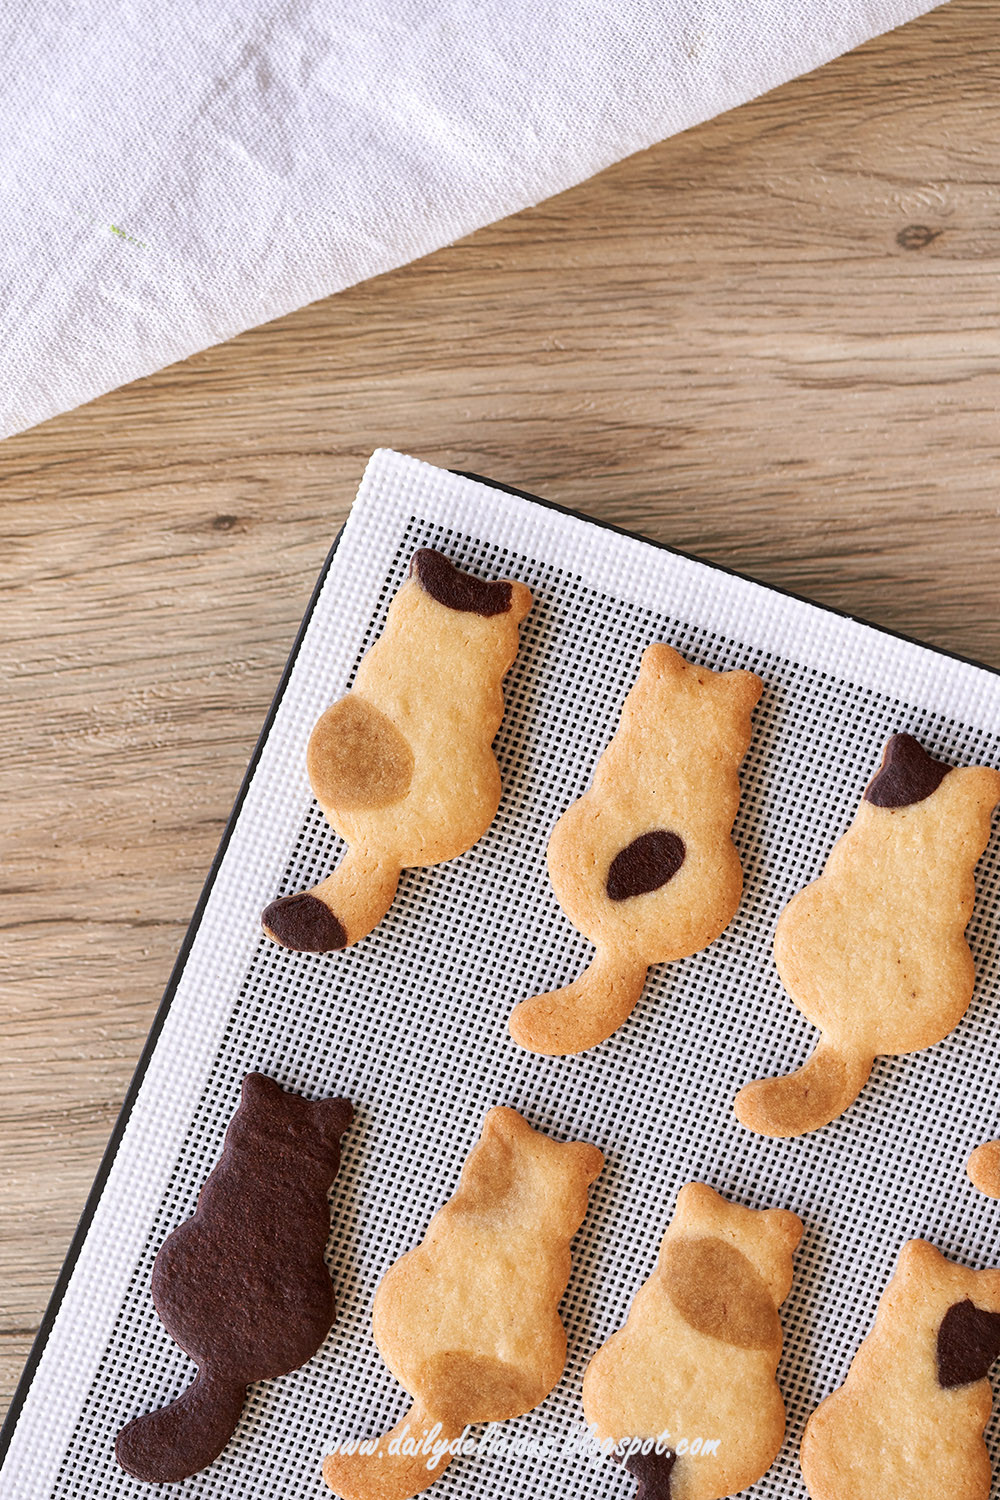
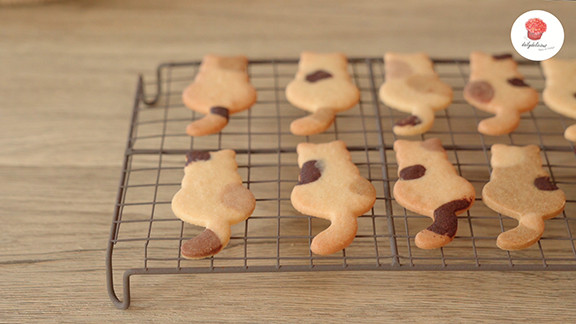 Cooling baked cat cookies on a wire rack.
Tips for Purr-fect Cat Cookies
- Keep Butter Cold: Cold butter is crucial for achieving a tender and crumbly cookie texture.
- Don’t Overmix: Overmixing the dough can lead to tough cookies. Process just until the dough comes together.
- Chill Dough Properly: Chilling the dough before rolling and cutting helps prevent spreading during baking and makes the dough easier to handle.
- Baking Time May Vary: Oven temperatures can vary, so keep an eye on your cookies and adjust baking time as needed. They are ready when the edges are lightly golden.
- Decorate Your Cookies: Once cooled, you can decorate your cat cookies with icing, sprinkles, or melted chocolate for extra flair.
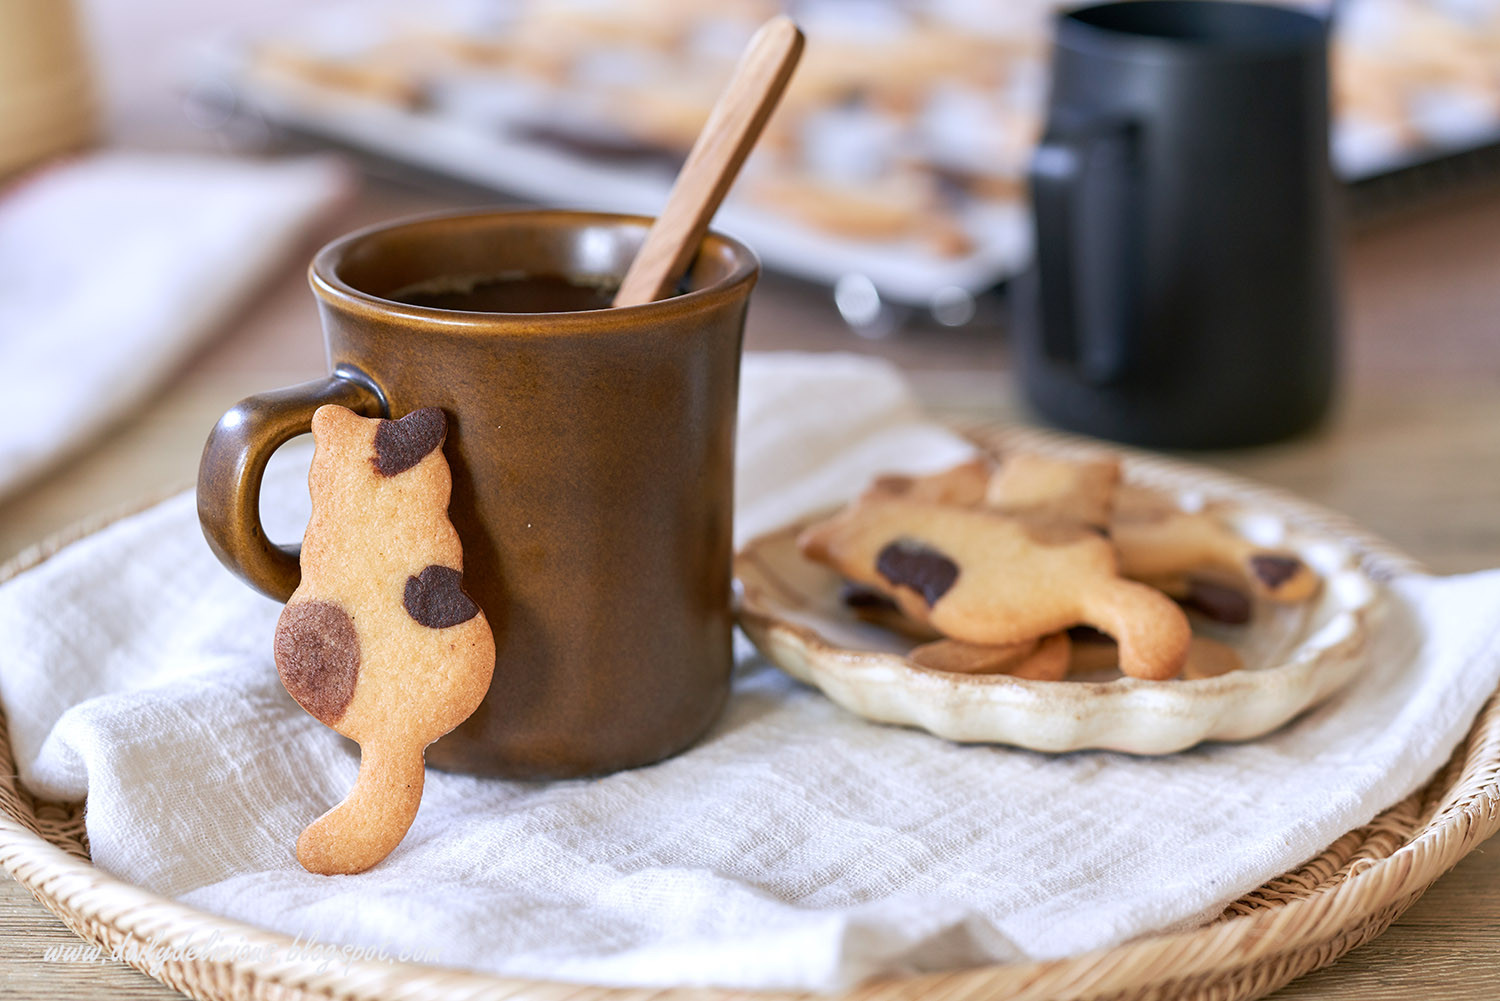
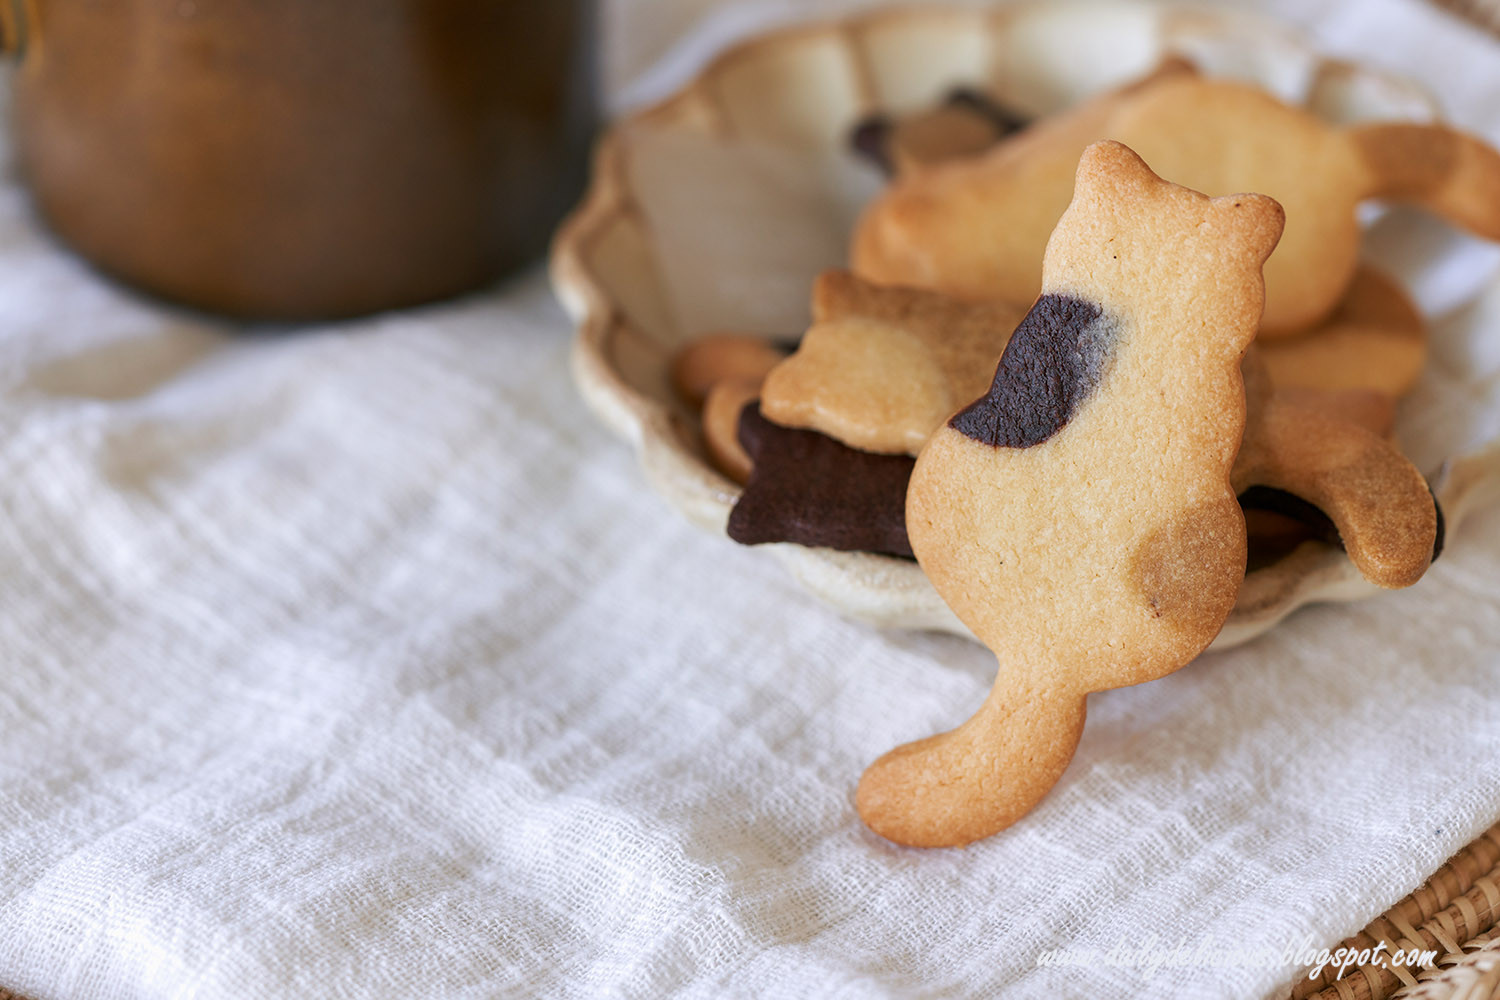 A pile of beautifully decorated calico cat cookies.
Enjoy Your Homemade Cat Cookies!
These cat cookies are not just a treat; they’re an experience! From the fun of making the dough to the joy of seeing those cute cat shapes emerge from the oven, this recipe is sure to become a favorite. So, gather your ingredients, preheat your oven, and get ready to bake up some adorable and delicious homemade cat cookies today! They are guaranteed to be a hit with cat lovers of all ages.