
Are you a cat lover and a quilting enthusiast? Combine your passions and dive into the delightful world of creating a Cat Faces quilt! This whimsical art quilt project, inspired by the original concept of Melissa Averinos, is a fantastic way to express your creativity and affection for feline friends. While I’m definitely a cat person, and perhaps edging towards “cat lady” territory with my beloved single cat, this project is purr-fect for anyone who adores cats and enjoys crafting unique quilts. Let me guide you through the process of making your very own cat faces quilt, a project that’s as fun to create as it is to display!
The genius behind the cat faces concept is the talented Melissa Averinos (http://www.melissaaverinos.com). I had the pleasure of attending a full-day workshop led by Melissa herself, and I can wholeheartedly recommend learning from her if you ever have the opportunity. Her instruction is wonderful, and her artistic vision is truly inspiring. You can explore more about Melissa and her work on her website RIGHT HERE.
My experience in Melissa’s class was not only educational but also incredibly enjoyable. Getting to learn her techniques firsthand was invaluable. This article provides a simplified overview of what her comprehensive class covers, designed to get you started on your own cat faces quilting journey. For a deeper dive and to truly appreciate the nuances of her method, I encourage you to visit Melissa’s website and explore her offerings.
Designing Your Unique Cat Faces
The first step in creating your cat faces quilt is to design the feline faces themselves. Melissa’s instruction was to keep it simple: line drawings are key! Now, I’ll be the first to admit, art tutorials focusing on drawing might not be in my future! However, the beauty of this project lies in its simplicity. The less detailed your drawing, the easier it will be to translate it into fabric. Embrace simple shapes and let your creativity flow. Think about capturing the essence of different cat personalities through basic lines – a curious cat, a sleepy cat, a playful cat.
Step-by-Step Guide to Creating Fabric Cat Faces
Once you have your simple line drawings, it’s time to bring your cat faces to life with fabric! This involves a layering process that’s both creative and surprisingly easy.
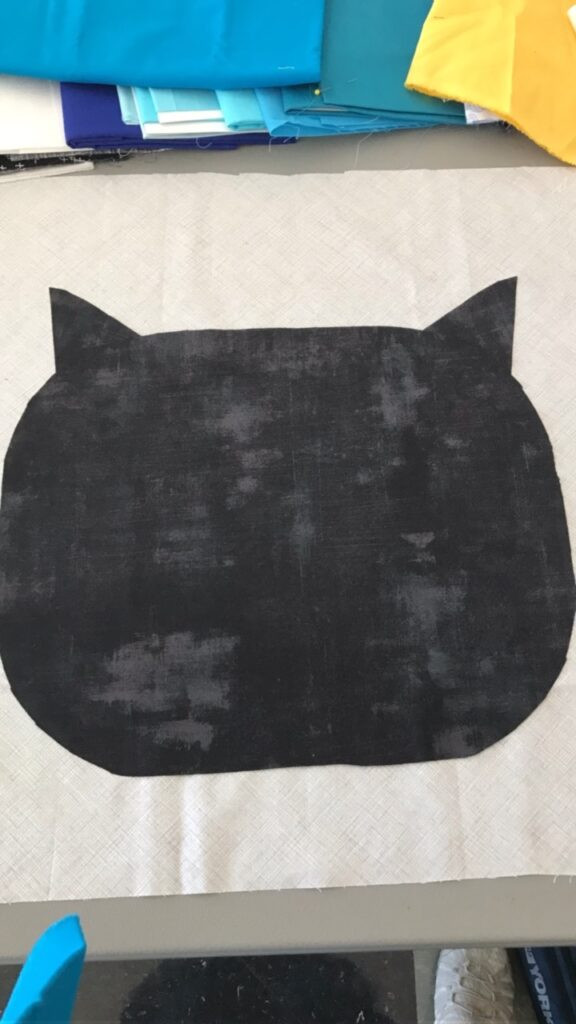 Step 1 in creating a fabric cat face for a quilt, showing fabric pieces laid out
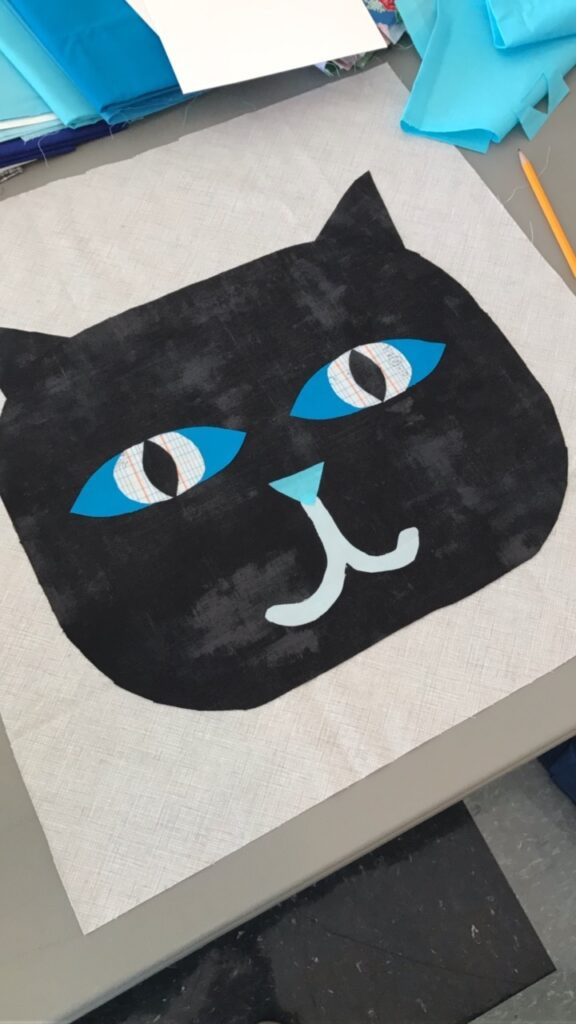 Step 3 in creating a fabric cat face for a quilt, layering more fabric pieces for detail
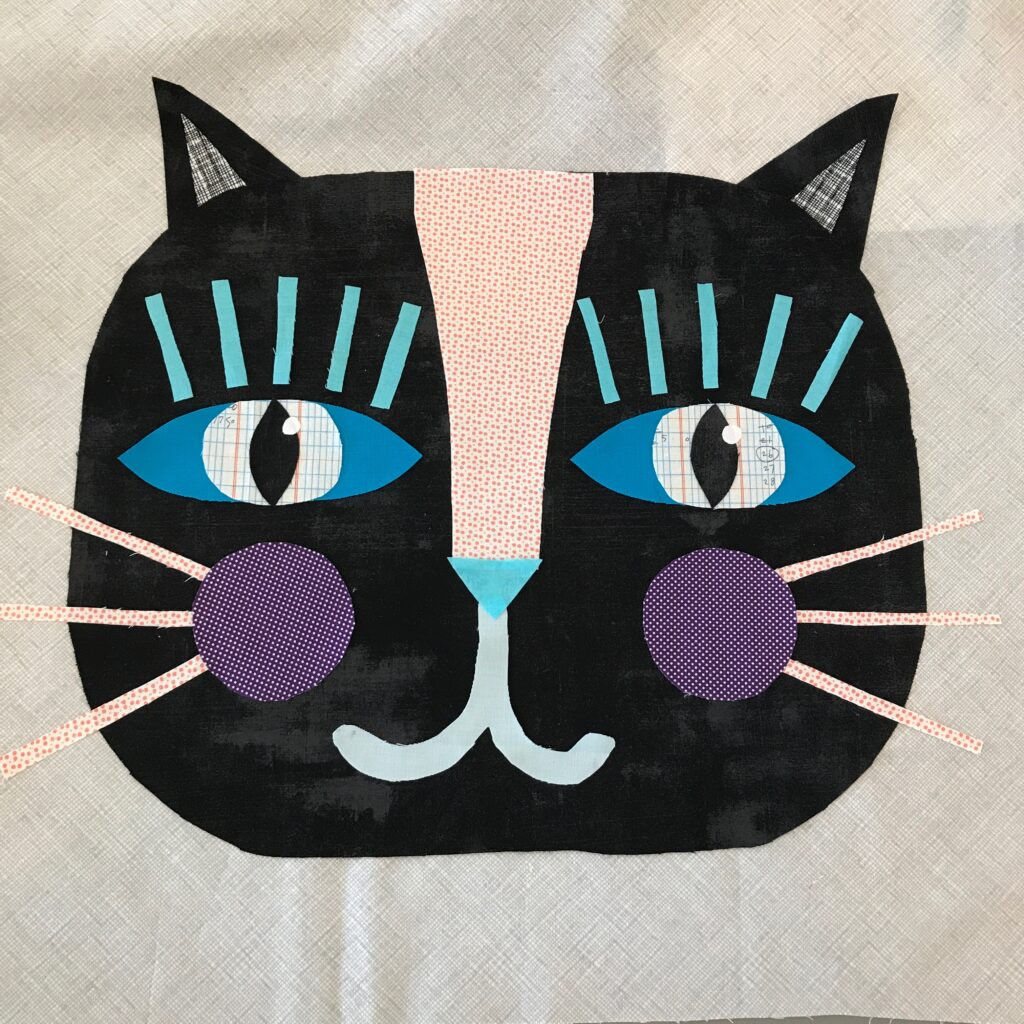 Step 5 in creating a fabric cat face for a quilt, showing the completed fabric cat face ready for quilting
I was thrilled to see how quickly this kitty came together! The process involves cutting out fabric pieces based on your drawings and layering them to build up each cat face. Initially, we used a washable glue stick to temporarily hold the fabric pieces in place. This allowed for flexibility in design and easy adjustments. For a more permanent hold, especially for quilting, I later incorporated Misty Fuse. Misty Fuse is a sheer, fusible interfacing that provides a secure bond without adding bulk, making it ideal for appliqué work.
Using a temporary adhesive like a glue stick is incredibly helpful in the design phase. It lets you experiment with the placement and arrangement of different elements of the cat face before committing to fusing them. You can see the progression of this particular cat in the images. Simply by adjusting the eyelids, the cat’s expression dramatically changes, showcasing how small tweaks can bring different personalities to your cat faces.
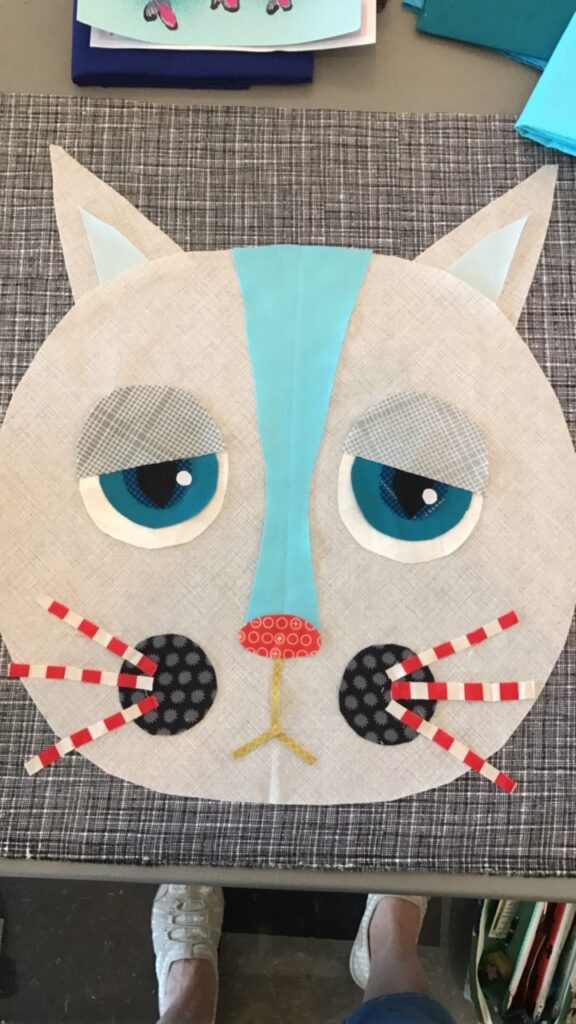 A fabric cat face with adjustable eyelids demonstrating expression changes for a quilt
Raw Edge Applique and Quilting Techniques
 Finished Cat Faces Quilt showcasing raw edge applique and quilting details
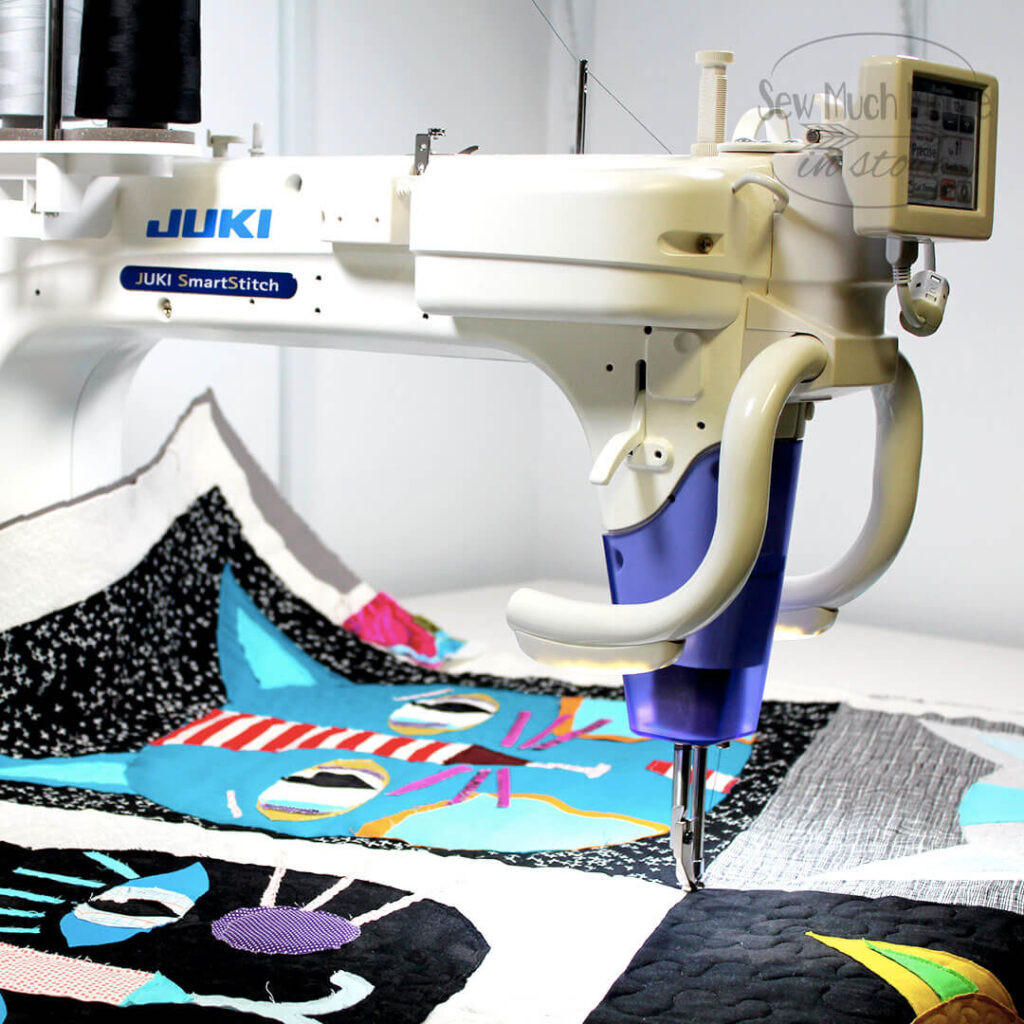
For quilting this project, I used my J-350 LongArm Quilting machine. The generous 18” throat space provided ample room to maneuver the quilt under the needle, making the quilting process much smoother.
Initially, I spent too much time pondering the quilting design. Ultimately, I decided to embrace the simplicity of raw edge applique and leave the edges of the fabric cat faces raw. My rationale was that since this is intended as a wall hanging, excessive fraying wouldn’t be a major concern. Raw edge applique gives a charming, slightly textured look and is wonderfully forgiving and quick.
This quilting machine has been a fantastic addition to my sewing space, particularly because it’s suitable for smaller studios. A wonderful feature is the removable machine head, which can be attached to a quilting frame if desired. I’m already envisioning a future where, once the kids have left for college, I can convert a spare bedroom into a dedicated quilting studio!
Throughout the quilting process, I switched between my open toe foot and ruler foot depending on the area and design I was working on. Both feet offered great control and visibility. Looking back, I realize I needn’t have spent so much time fretting about the quilting – sometimes the simplest approach is the most effective!
For a closer look at the quilting process and some helpful tips in action, be sure to watch my video tutorial.
To finish the quilt, I opted for striped binding. If you’re interested in learning more about creating striped binding, you can find a detailed tutorial HERE.
And if you’re as enthusiastic about striped binding as I am, you’ll be pleased to know I have a variety of striped fabrics available in my online shop! CHECK IT OUT!
The Finished Cat Faces Quilt: A Whimsical Masterpiece
I absolutely adore how all the cat faces came together in this quilt. The raw edge appliqué technique was not only effective but also liberating, allowing for a relaxed and enjoyable quilting experience. As this cat faces quilt is designed as an art piece for wall display, I don’t anticipate needing to wash it. However, it’s worth noting that if you do plan to wash a quilt with raw edge appliqué, some fraying is to be expected, even with stitching around the edges. Raw edge appliqué is ideally suited for wall quilts and art quilts where a touch of текстуре and a relaxed aesthetic are desired. My finished cat faces quilt measures a delightful 37″ x 42″.
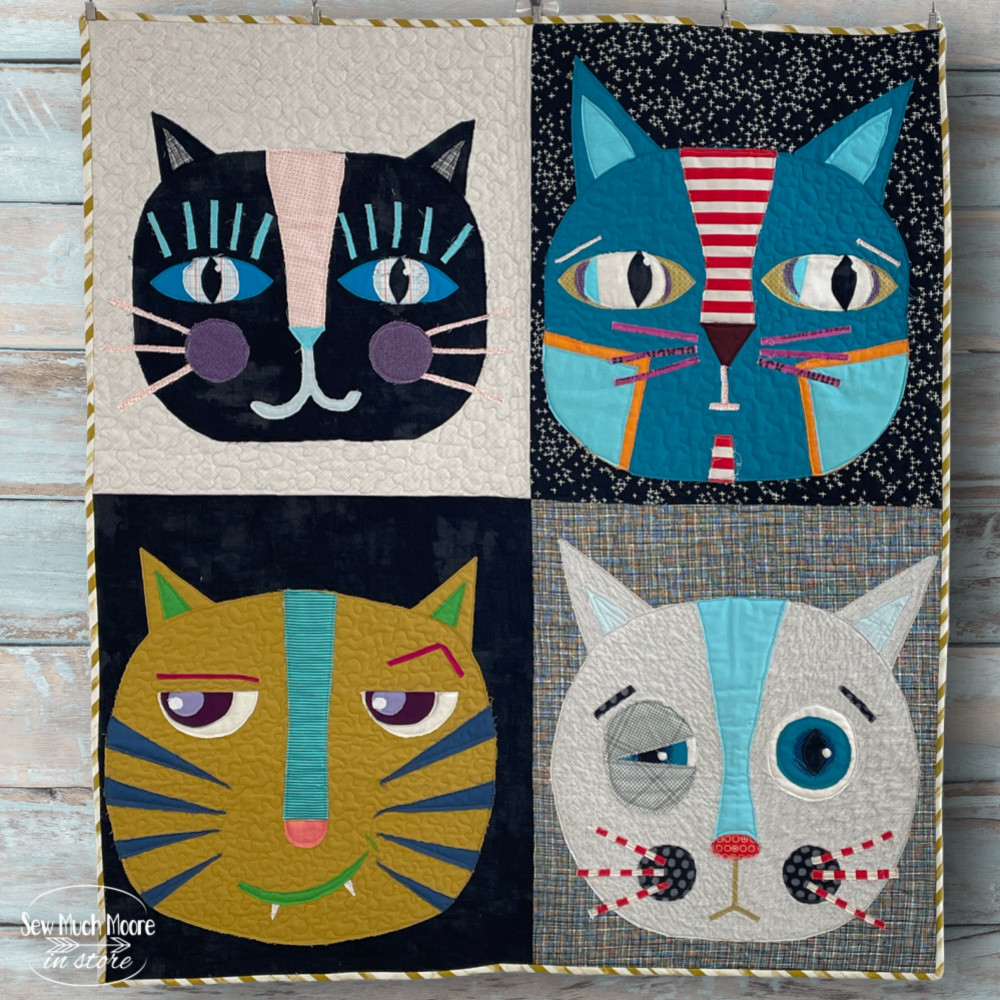 Finished Cat Faces Quilt displaying a variety of whimsical cat faces
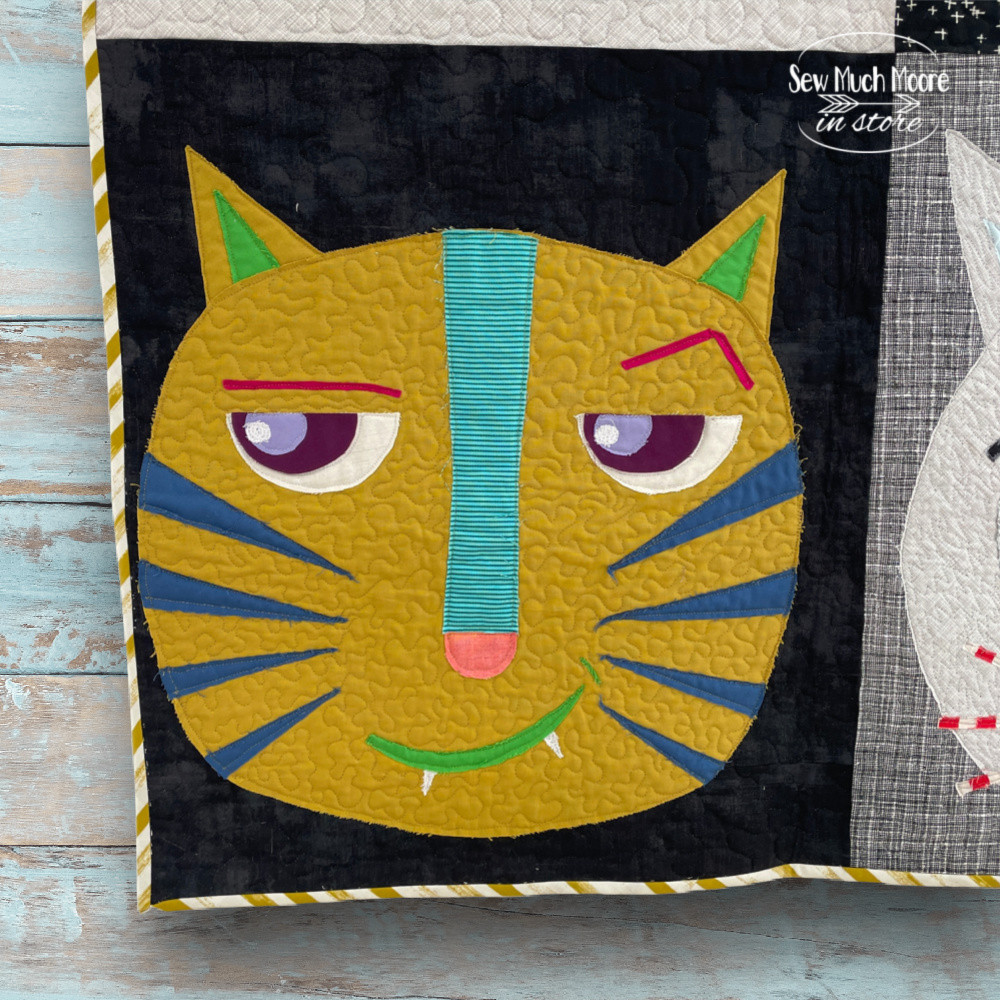
Here are a few close-ups of some of the personalities in my cat faces quilt:
Finished Cat Faces Quilt displaying a variety of whimsical cat faces Cat Fight Kitty
 Close-up of a playful looking cat face from the quilt, titled Naughty Kitty Naughty Kitty
Side Eye Kitty
Let me know in the comments below which kitty face is your favorite!
Share on Facebook Share
Share on TwitterTweet
[ Share on Pinterest Share ](javascript:pinIt(); “Share on Pinterest”)