Meet Chester, the curious Christmas Cat, ready to add a handmade touch to your holiday décor! This delightful crochet pattern allows you to create an adorable Christmas cat amigurumi that doubles as a unique stocking holder. Chester’s playful design features bendable arms and tail, thanks to hidden wires, letting you pose him peeking out of a festive stocking. This charming christmas cat is not just a decoration; it’s a functional piece where you can tuck small Christmas treats and surprises.
This free crochet pattern provides step-by-step instructions to create your own Chester, the christmas cat. Perfect for adding a whimsical touch to your mantelpiece or as a heartwarming handmade gift for cat lovers, this project brings the festive spirit and feline charm together. Follow along to craft this unique christmas cat and make your holiday season extra special.
![]() Crochet Chester the Christmas Cat Amigurumi
Crochet Chester the Christmas Cat Amigurumi
For a more convenient, ad-free experience, a beautifully formatted PDF version of this pattern is available for purchase on Etsy and LoveCrochet. The PDF includes detailed step-by-step photos across 7 pages, making it easy to follow along as you create your christmas cat.
Materials:
Note:
- Work in continuous rounds unless stated otherwise.
- For seamless color changes: Finish the last stitch in the old color until two loops remain on the hook. Yarn over with the new color and pull through both loops. Slip stitch in the next stitch with the new color, then continue single crocheting as usual with the new color.
Finished Dimensions:
- Stocking: 10″/25.4 cm long (top of fuzzy rim to bottom of toe), 10″/25.4 cm circumference at the upper stocking; 7″/17.8 cm from toe tip to back of heel.
- With cat inside: 17″/43 cm (top of curved tail to toe tip).
Stocking Pattern
Begin crocheting the stocking from the toe using white yarn and a 2.75 mm hook.
Round 1: Create a Magic Ring and work 6 single crochet (sc) stitches into it. (6 stitches)
R2: Increase (Inc) in each stitch around. (12 stitches)
R3: Repeat the sequence “Sc 1, Inc” 6 times. (18 stitches)
R4: Repeat the sequence “Sc 2, Inc” 6 times. (24 stitches)
R5: Repeat the sequence “Sc 3, Inc” 6 times. (30 stitches)
R6: Repeat the sequence “Sc 4, Inc” 6 times. (36 stitches)
R7: Repeat the sequence “Sc 5, Inc” 6 times. (42 stitches)
R8-15: Single crochet (Sc) in each stitch around for 8 rounds. (42 stitches per round)
R16: Sc 6, then switch to red yarn and Sc 36. (42 stitches)
R17-18: Sc in each stitch around for 2 rounds. (42 stitches per round)
R19: Repeat the sequence “Sc 20, Inc” 2 times. (44 stitches)
R20-24: Sc in each stitch around for 5 rounds. (44 stitches per round)
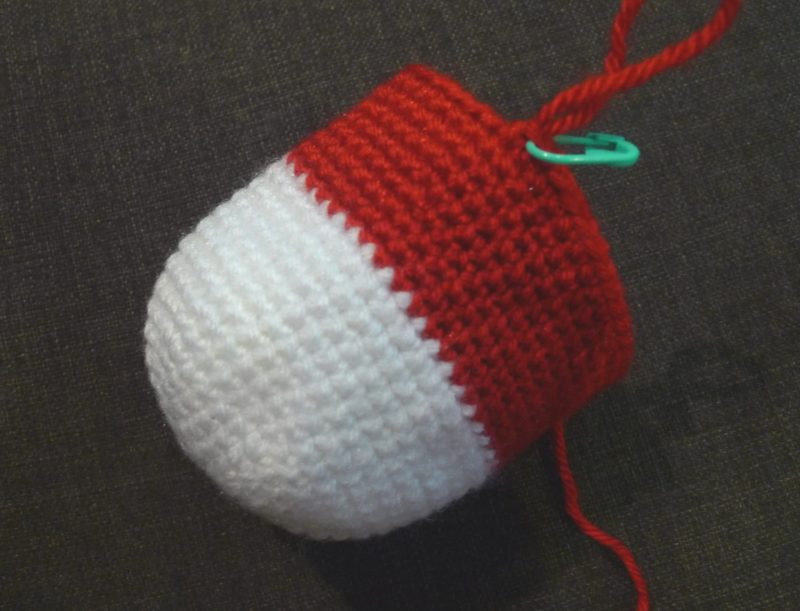 Amigurumi Christmas Cat Stocking Crochet in Red and White
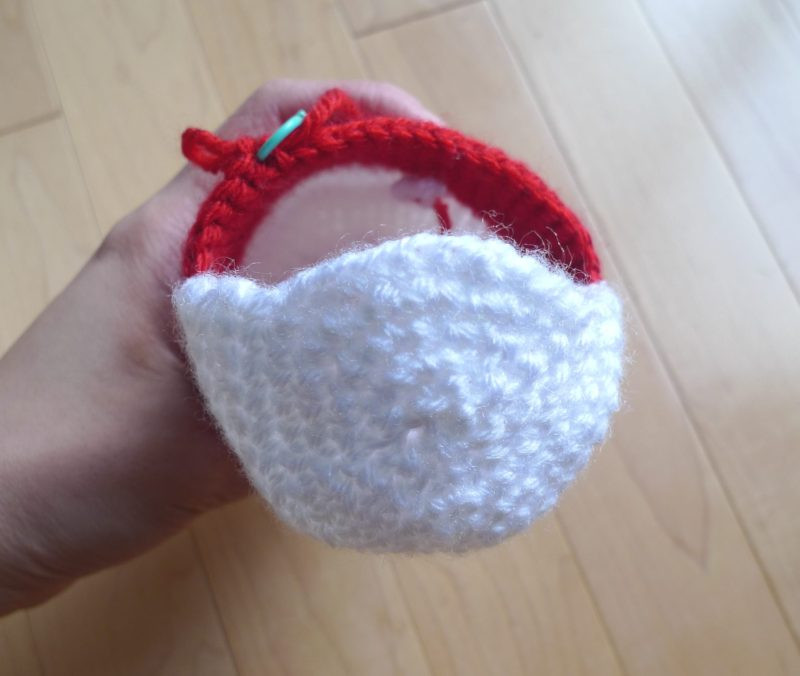
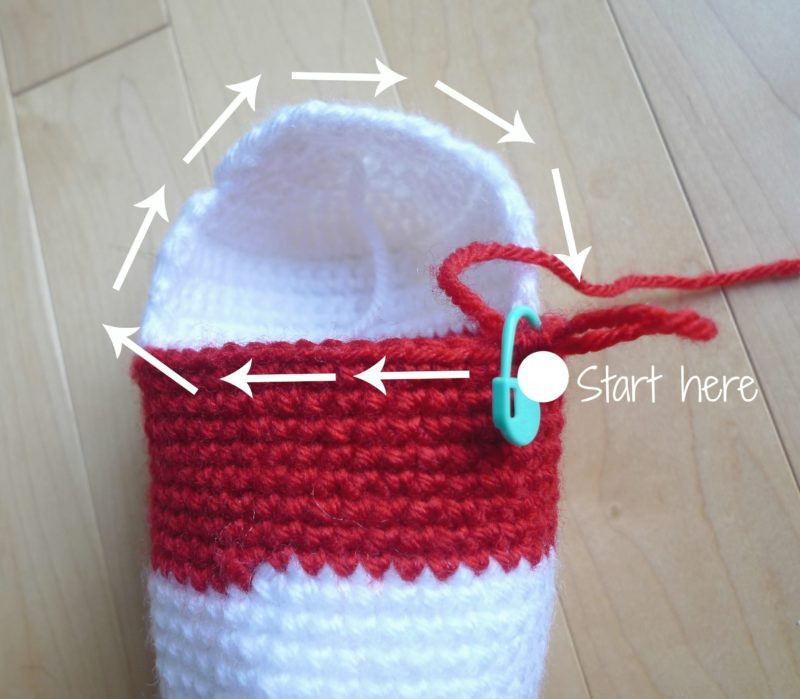
Place a stitch marker in the last stitch of this round (1st marker – green in the image below). Do not cut the red yarn as it will be used later. Count 17 stitches clockwise and place another stitch marker (2nd marker – peach in the image). The heel will be worked in turned rows starting from the 2nd marker.
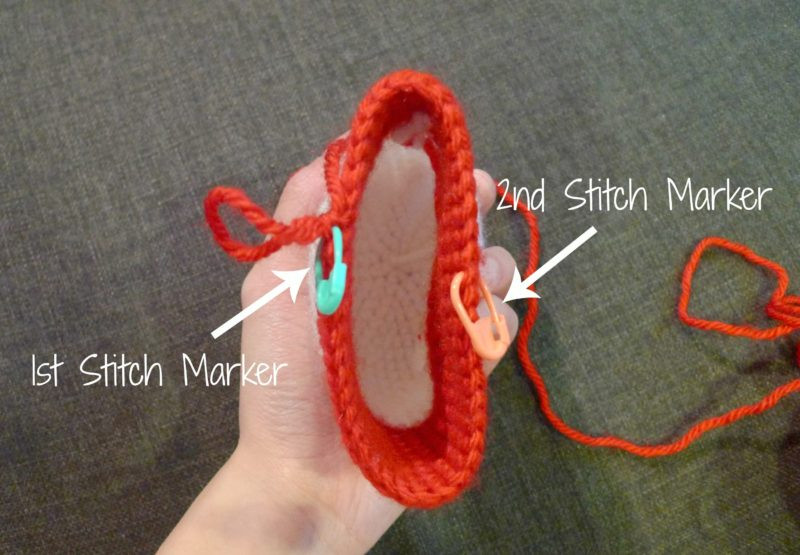 Stitch Marker Placement for Crochet Christmas Stocking Heel
Heel:
Using white yarn, join in the stitch at the second stitch marker (peach).
Row 1: Sc 22.
Rows 2-7: Chain 1, turn. Sc 22 starting from the second chain from the hook. Repeat for 6 rows.
Chain 10, then slip stitch to the first single crochet of Row 7.
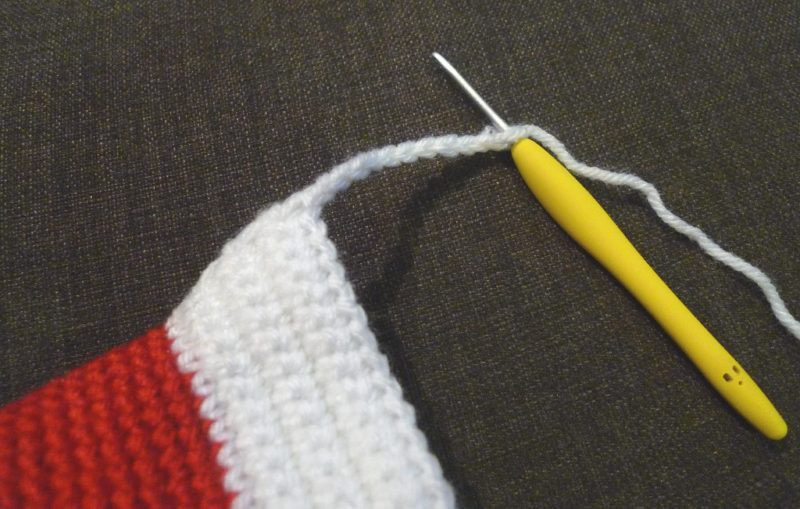 Crochet Christmas Cat Stocking Heel Construction Step 1
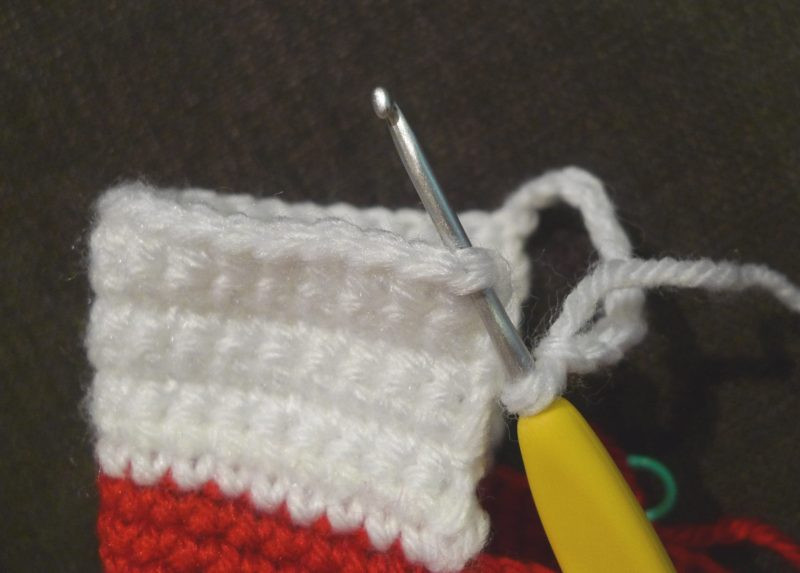 Crochet Christmas Cat Stocking Heel Construction Step 2
Back Heel:
Work in continuous unjoined rounds to form the back heel.
Round 1: Single crochet around the heel, then in the back loops of the Chain 10 (Sc 21, Sc 10 in back loops only, Sc 1). (32 stitches)
R2: Repeat the sequence “Sc 2, Decrease (Dec)” 8 times. (24 stitches)
R3: Repeat the sequence “Sc 1, Dec” 8 times. (16 stitches)
R4: Repeat “Dec” 8 times. (8 stitches)
R5: Repeat “Dec” 4 times. (4 stitches)
Fasten off and weave in ends.
 Finished Heel of Crochet Christmas Stocking
Upper Stocking Body:
Continue with continuous unjoined rounds. Start in the stitch with the 1st stitch marker (green) where the red yarn is attached.
Round 1: Sc 44 (approximately Sc 16 in red, Sc 22 in white using front loops from previous rounds, Sc 6 in red).
 Beginning the Upper Body of Crochet Stocking
R2-22: Sc in each stitch around for 21 rounds. (44 stitches per round)
Fasten off and weave in ends.
Fuzzy Stocking Rim:
Using fuzzy white yarn and a 4 mm hook.
Chain 31, slip stitch to the first chain to form a ring.
Round 1: Chain 1 (counts as 1 sc), Sc 30, slip stitch to join. (31 stitches)
R2-6: Repeat Round 1 for 5 more rounds.
Fasten off, leaving a long tail for sewing. Ensure the “wrong” side (fuzzier side) faces outwards.
Sew the fuzzy rim to the top of the stocking, overlapping the first round of the rim with the last round of the red stocking.
Optional: Brush the fuzzy yarn with a dog slicker brush for extra fuzziness.
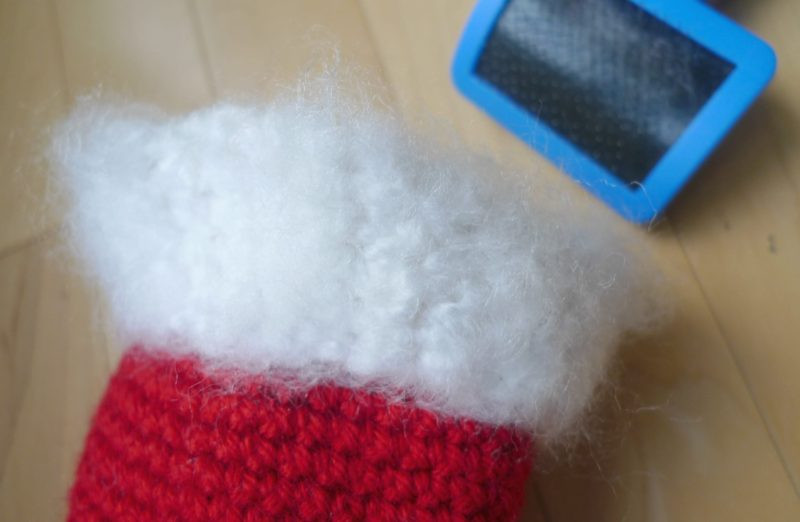 Fuzzy Rim Detail on Crochet Christmas Stocking
Stuff the stocking with fiberfill to maintain its shape.
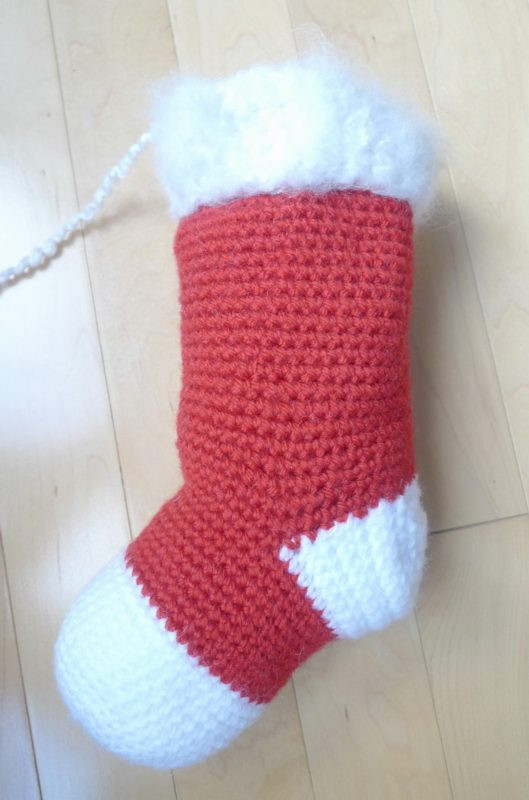 Stuffed Crochet Christmas Stocking Ready for Cat
Christmas Cat (Chester) Pattern
Head:
Using light grey yarn and a 2.75 mm hook.
Chain 7 (foundation chain).
Round 1: Starting from the second chain from the hook, Sc 6 in the back loops of the foundation chain. Turn and Sc 6 in the front loops of the foundation chain, crocheting around the chain to form an oval. (12 stitches)
For a detailed tutorial on crocheting around a foundation chain, see HERE!
R2: Inc, Sc 4, Inc x 2, Sc 4, Inc. (16 stitches)
R3: Inc x 2, Sc 5, Inc x 3, Sc 5, Inc. (22 stitches)
R4: Inc x 3, Sc 7, Inc x 3, Sc 9. (28 stitches)
R5: Sc 1, Inc x 3, Sc 11, Inc x 3, Sc 10. (34 stitches)
R6: Sc 2, Repeat “Sc 4, Inc” 6 times, Sc 2. (40 stitches)
R7-16: Sc in each stitch around for 10 rounds. (40 stitches per round)
R17: Repeat “Sc 3, dec” 8 times. (32 stitches)
Insert 9 mm safety eyes between rounds 13 and 14, approximately 8 stitches apart. Embroider a nose between rounds 13 and 14 and whiskers (2 on each side) between Rounds 13/14 and 14/15 using black embroidery floss or thin cotton yarn. Begin stuffing the head.
R18: Repeat “Sc 2, dec” 8 times. (24 stitches)
R19: Repeat “Sc 2, dec” 6 times. (18 stitches).
R20: Repeat “Sc 1, dec” 6 times. (12 stitches)
Continue stuffing firmly.
R21: Repeat “Dec” 6 times. (6 stitches)
Fasten off and close the remaining opening.
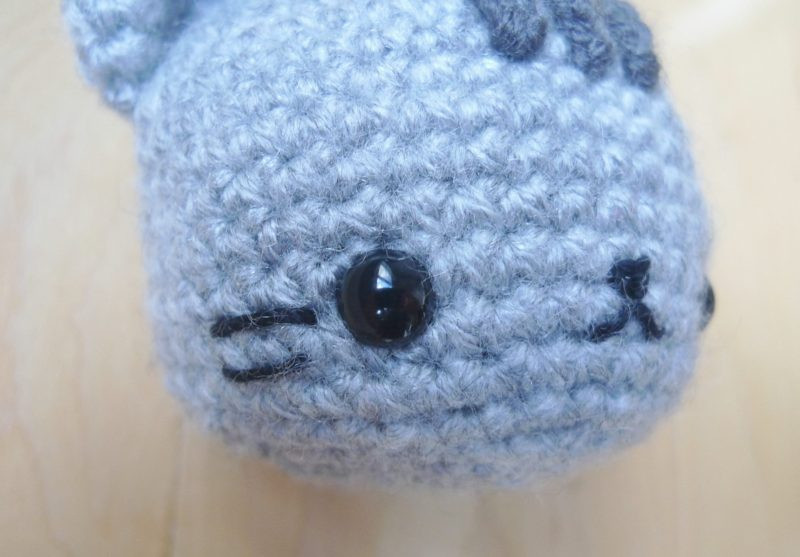 Head of Amigurumi Christmas Cat with Embroidered Details
Stripes (make 3):
Using dark grey yarn and a 2.75 mm hook.
Chain 18. Fasten off, leaving a long tail for sewing. Each stripe should measure about 3.15″/8 cm. Sew the stripes onto the top of the cat’s head, positioning the fronts between Rounds 8 and 9.
Ears (make 2):
Using light grey yarn and a 2.75 mm hook.
Round 1: Create a Magic Ring and work 4 sc stitches into it.
R2: Increase in each stitch around. (8 stitches)
R3: Repeat “Sc 1, Inc” 4 times. (12 stitches)
R4: Repeat “Sc 3, Inc” 3 times. (15 stitches)
R5: Repeat “Sc 4, Inc” 3 times. (18 stitches)
R6: Repeat “Sc 5, Inc” 3 times. (21 stitches)
Fasten off, leaving a long tail for sewing. Cut triangles from pink felt and hot glue them onto the inner ears as lining. Sew the ears onto the cat’s head.
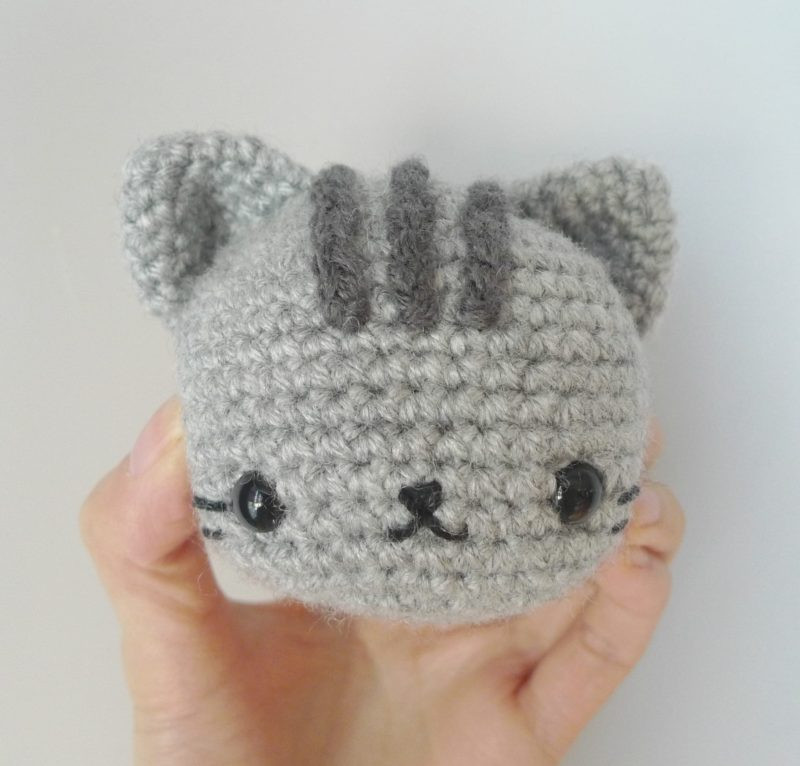 Assembling Crochet Christmas Cat Head with Ears and Stripes
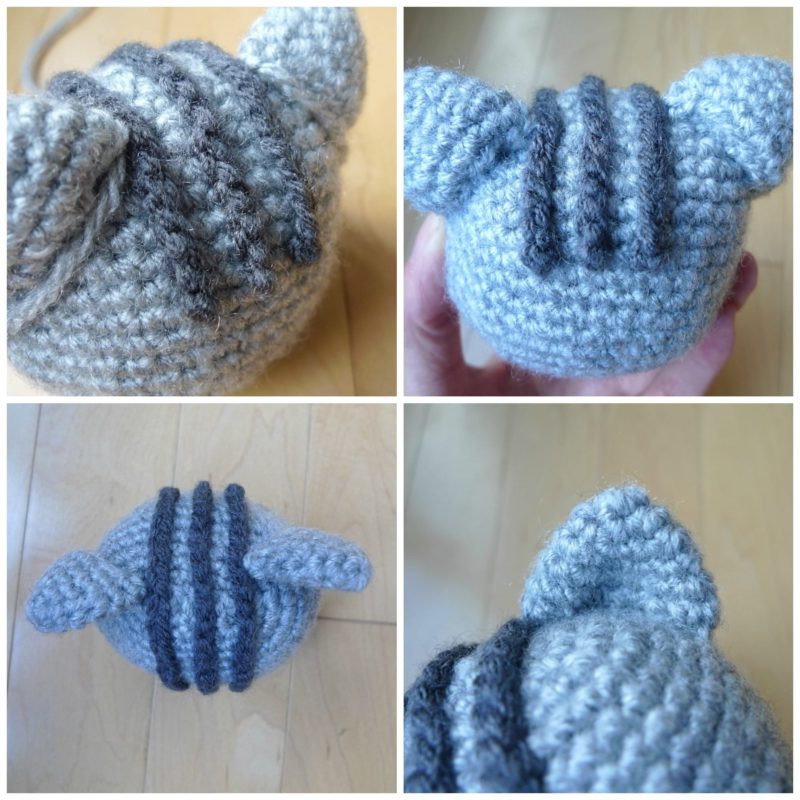 Different Angles of Crochet Christmas Cat Head
Arms (make 2):
Using dark grey yarn and a 2.75 mm hook.
Round 1: Create a Magic Ring and work 5 sc stitches into it. (5 stitches)
R2: Increase in each stitch around. (10 stitches)
Optional: Embroider three black lines onto the paws to represent claws after Round 3.
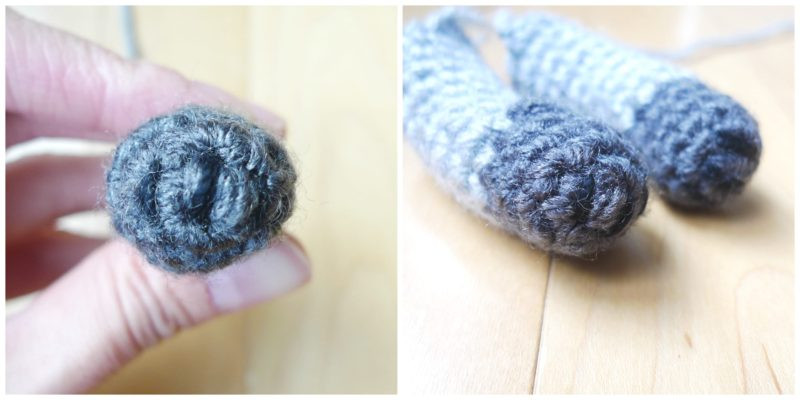 Paw Detail for Crochet Christmas Cat Arms
R3-5: Sc in each stitch around for 3 rounds. (10 stitches per round).
Switch to light grey yarn.
R6-14: Sc in each stitch around for 9 rounds. (10 stitches per round)
Fasten off, leaving a long tail for sewing. Cut floral wire, bend the tip, and insert it into the arm, ensuring the bent tip is at the paw end. Gently stuff the arms.
Attach the arms to the bottom of the cat’s head as shown.
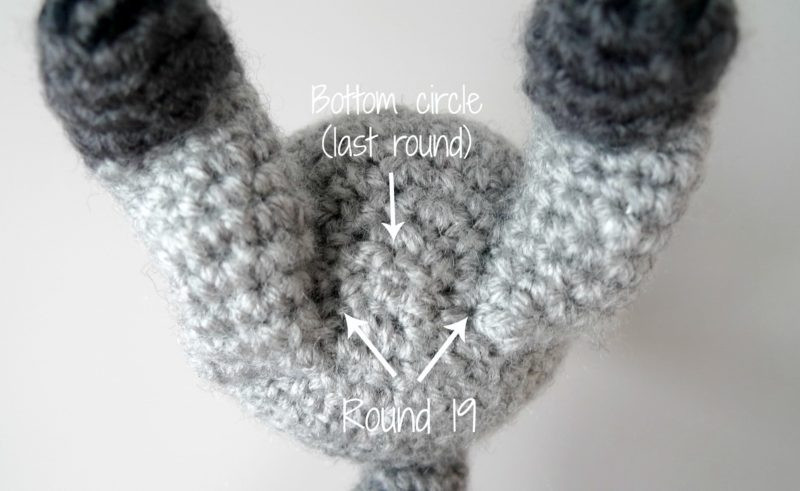 Attaching Arms to Crochet Christmas Cat Head
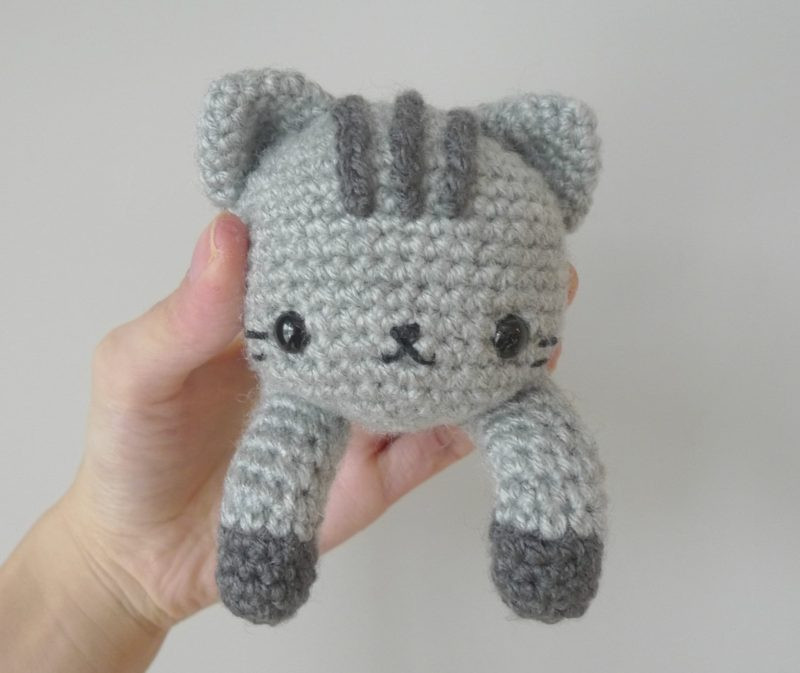 Positioning Arms on Crochet Christmas Cat
Shape the arms into a gentle S-curve to give your christmas cat a playful pose.
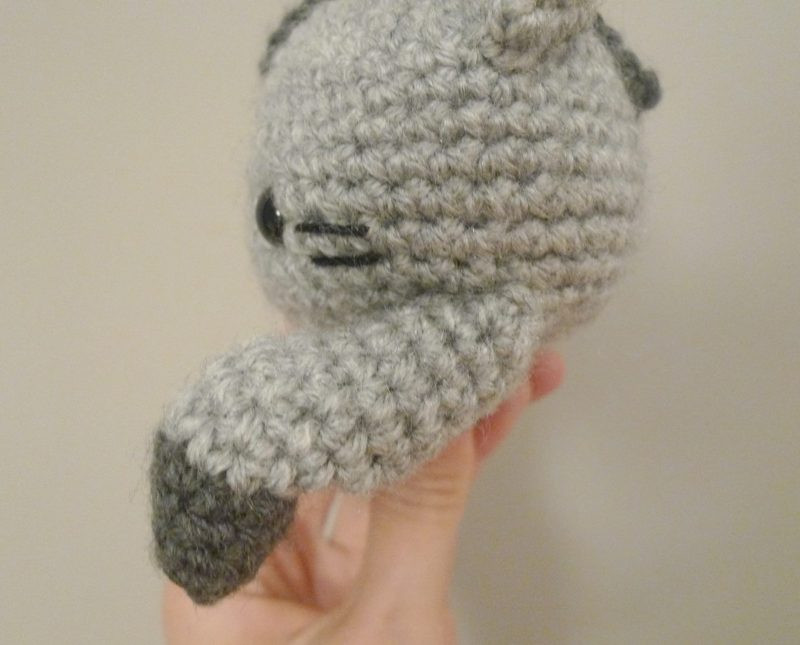 Shaping Arms of Crochet Christmas Cat Amigurumi
Tail:
Using dark grey yarn and a 2.75 mm hook.
Round 1: Create a Magic Ring and work 4 sc stitches into it. (4 stitches).
R2: Increase in each stitch around. (8 stitches).
R3-7: Sc in each stitch around for 5 rounds. (8 stitches per round).
Stuff the tail lightly as you crochet.
Switch to light grey yarn.
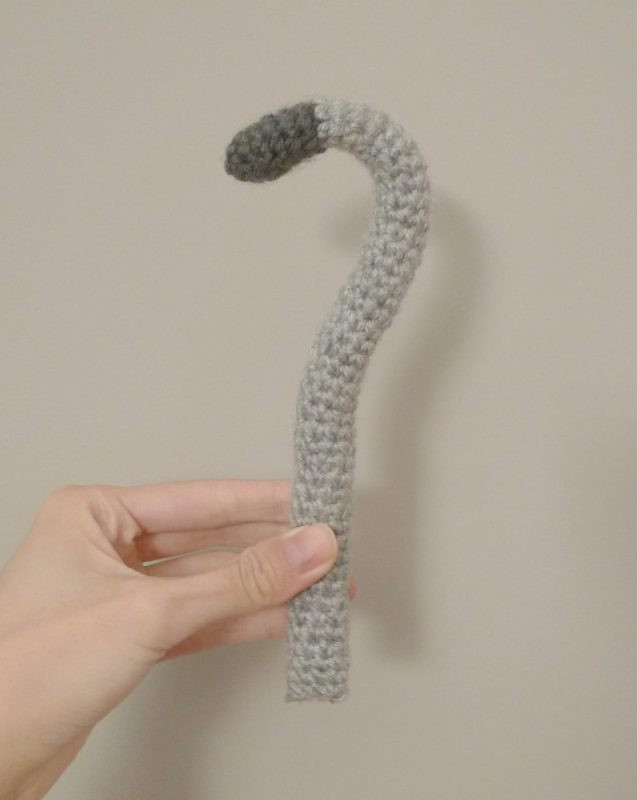
R8-47: Sc in each stitch around for 40 rounds, or until the desired tail length is reached. (8 stitches per round)
(The finished tail should measure approximately 10.5″/26.7 cm).
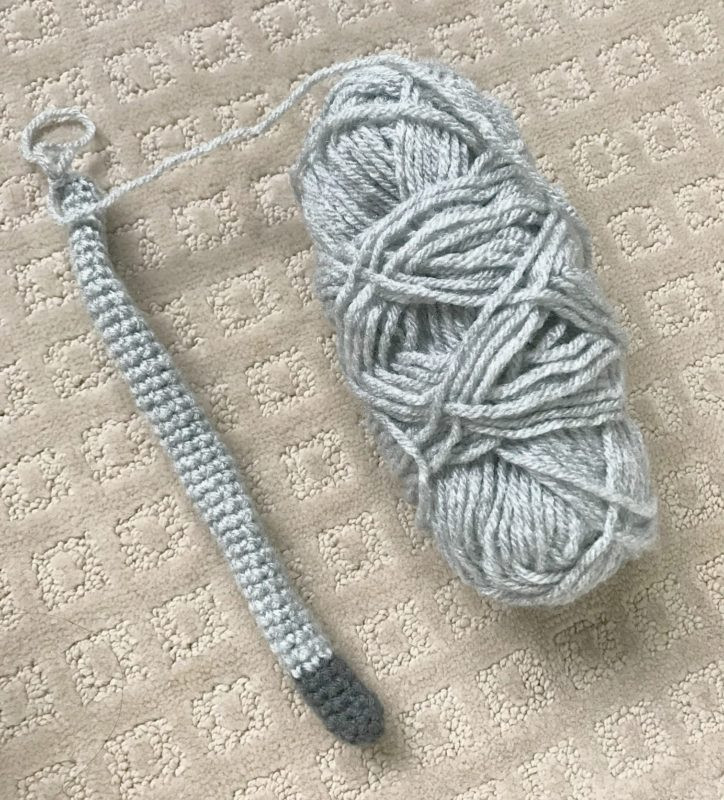 Crochet Christmas Cat Tail Detail
Fasten off, leaving a long tail for sewing. Insert floral wire into the tail for bendability.
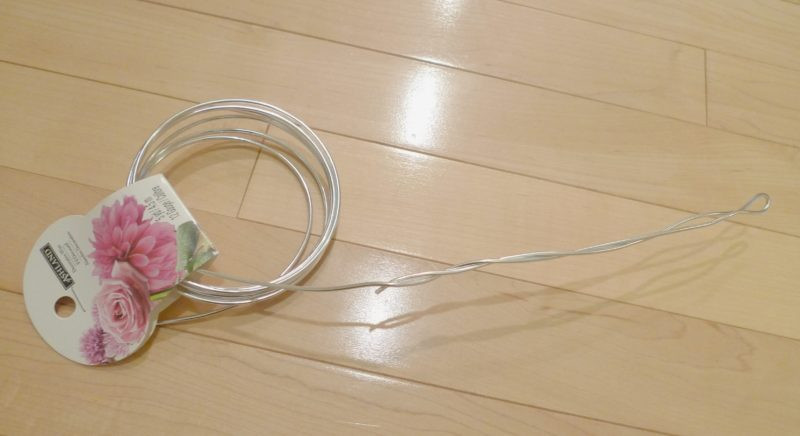 Inserting Wire into Crochet Christmas Cat Tail
 Bending Wire Inside Crochet Christmas Cat Tail
Assembly and Finishing Touches
Attach approximately 1.25″/3 cm of the tail to the inside of the stocking using fuzzy white yarn to hide the seam from the outside.
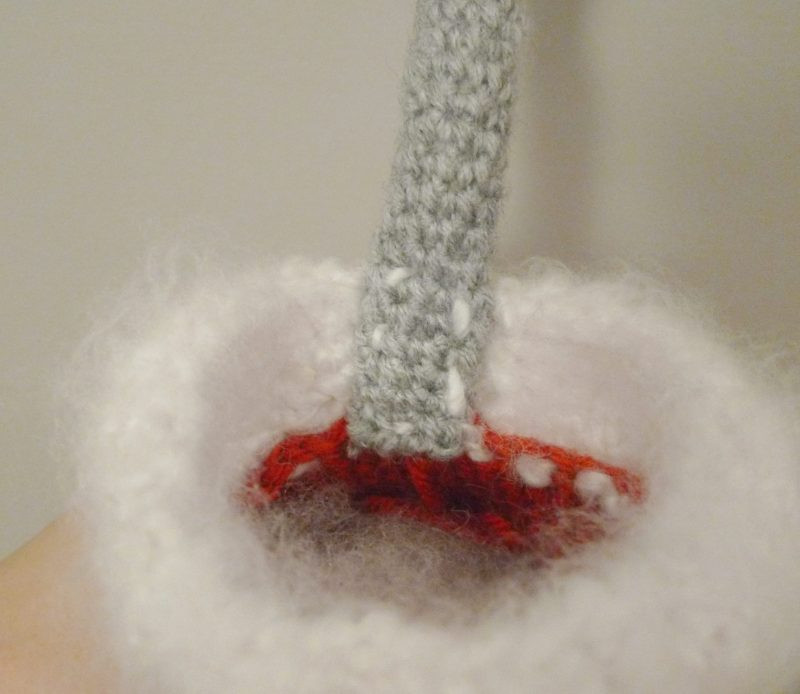 Attaching Tail to Inside of Crochet Christmas Stocking
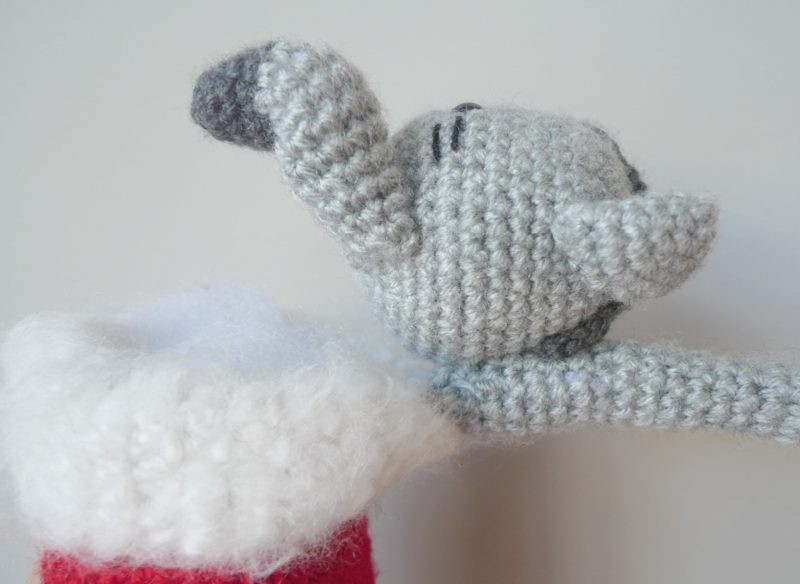
Carefully position the cat’s head onto the tail and attach about 1.5″/3.8 cm together using grey yarn. Begin the attachment around Rounds 13/14 of the head (around the same level as the safety eyes). Ensure the cat’s head and arms will comfortably cover the stocking opening when in a resting position.
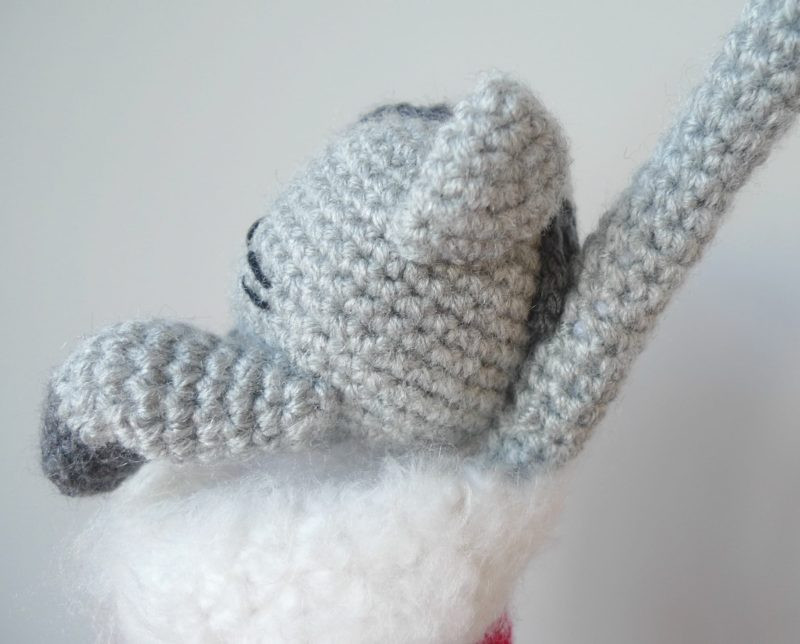 Positioning Crochet Christmas Cat Head onto Stocking
The cat’s head should be able to pivot up and down, allowing items to be placed inside the stocking.
 Pivoting Head of Crochet Christmas Cat Stocking Holder
See Chester in action in this video demonstration!
Congratulations! Your Chester christmas cat is now complete! Enjoy displaying your handmade christmas cat every holiday season, and consider making these special christmas cat stocking holders as heartwarming gifts for the cat enthusiasts in your life.
![]() Finished Crochet Chester Christmas Cat Amigurumi
Finished Crochet Chester Christmas Cat Amigurumi
{This pattern is sponsored by Lion Brand Yarn! Thank you for supporting original crochet designs!}
This pattern is an original design by Stephanie Lau of All About Ami. Please respect the designer’s work by not claiming this pattern as your own. If sharing, link to this pattern page, and do not repost the pattern on your site. For personal use only. Do not sell or distribute the pattern.
You are welcome to sell items made from this pattern. Please credit the design to Stephanie Lau of All About Ami, and link back to www.AllAboutAmi.com. Mass production and factory manufacturing are prohibited. Thank you for your understanding and respect!