Tired of overpriced cat towers that don’t quite fit your feline friend’s needs or your home’s aesthetic? You’re not alone. Walking into a pet store and seeing those elaborate cat climbing structures can be shocking – often costing hundreds of dollars. If you’re thinking, “There’s no way I’m spending that much on something my cat will probably just sniff at,” then you’ve come to the right place.
Instead of breaking the bank, why not unleash your inner DIY enthusiast and create a fantastic Diy Cat Tower yourself? Not only will you save a significant amount of money, but you’ll also gain the satisfaction of building something custom for your beloved pets.
This guide will walk you through creating a sturdy and engaging DIY cat tower, often also called a cat tree, kitty tower, cat condo, or cat gym. We’ll show you how to use readily available materials and simple tools to construct a purr-fectly functional and fun piece of cat furniture that your cats will adore. And the best part? You can likely build it for under $25!
Let’s dive into how you can create your own amazing DIY cat tower.
Before we start building, let’s gather our resources. Inspired by the expensive cat towers in pet stores, we realized they’re mostly made from basic materials like cardboard forms, wood, PVC, rope, and carpet scraps. Luckily, many of these items are likely already lurking in your garage or workshop!
Building your own DIY cat tower has numerous benefits:
- Significant Savings: Save upwards of $100 compared to store-bought towers.
- Happy Cats (and Family): Score brownie points with your family and provide your cats with enriching entertainment.
- Content Creation Opportunity: Share your DIY project online and inspire others.
- Shop Clean-up: Finally put those scrap materials to good use and declutter your workspace.
- Furniture Protection: Give your cats a dedicated scratching and climbing space, diverting their attention from your furniture.
- Personal Space: Encourage your cats to lounge and play in their own tower, maybe even a little further away from you if you need some space!
Getting Started: Your DIY Cat Tower Project
To begin, take a look at commercially available cat towers for inspiration. Observe their structure and features. Then, assess the materials you already have and sketch out a simple design. Remember, you don’t need to replicate complex curves or shapes – a functional and sturdy DIY cat tower can be built with basic flat platforms.
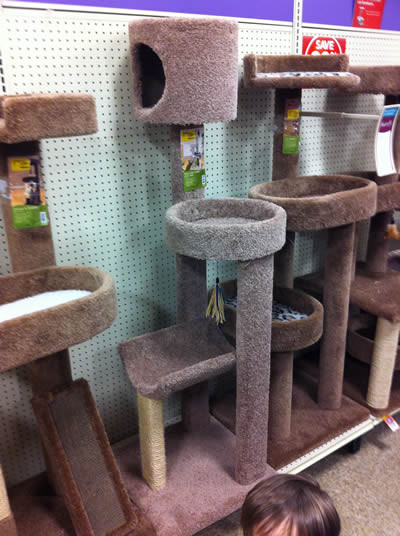 Reference image of a cat tower design
A simple sketch of a cat tower design, inspired by commercial models, to guide your DIY project.
Here’s a checklist of materials and tools to get you started on your DIY cat tower build. Check your garage first, then head to your local home improvement store for anything missing.
Materials Checklist:
- Wood Base & Platforms: 2’x4’x1/2” Plywood, Particle Board, or MDF (Medium Density Fiberboard) – MDF is cost-effective and works well.
- Support Posts: (1) 2”x4”x8’ lumber.
- Scratching Post Material: 50 ft. of ¼” or 3/8” Sisal Rope – Sisal rope is durable and cat-friendly for scratching.
- Carpet Covering: 1 Yard by 12 ft of inexpensive, natural carpet. Look for remnants or budget-friendly options.
- Fasteners: 2” Wood or Drywall Screws. Pocket hole screws are optional but provide a cleaner, stronger joint.
Tools Checklist:
- Cutting Wood: Table Saw (recommended for straight cuts) or Circular Saw.
- Drilling & Screwing: Drill/Driver.
- Pocket Hole Joinery (Optional): Pocket Hole Jig – For creating strong, hidden screw joints.
- Upholstery Stapling: 1/2” Crown Stapler (Pneumatic or Handheld).
- Carpet Cutting: Carpet Knife / Razor Knife – For precise carpet cuts.
Building Your Kitty Condo: Step-by-Step
Let’s get building! We’ll start by cutting the wood pieces for the base and platforms. MDF is a great choice for this project due to its affordability and smooth surface.
Cutting the Wood Platforms
For detailed dimensions and a cut guide, refer to downloadable DIY cat tower plans (Note: In a real scenario, you would link to plans here). However, the basic idea is to cut several platforms of varying sizes for different levels of your cat tower.
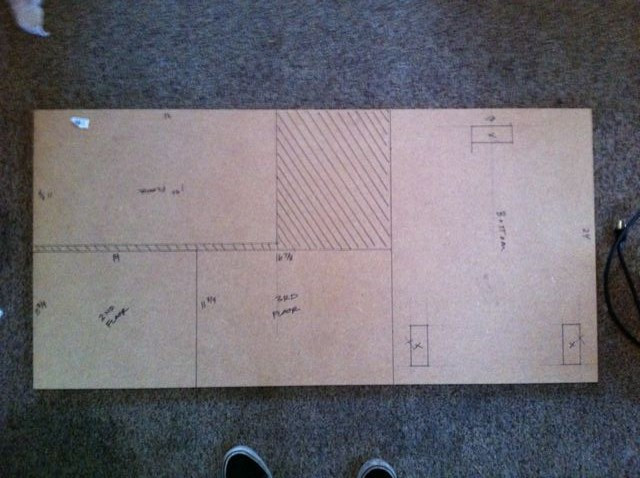 Layout of wood pieces on MDF sheet for a DIY cat tower
Visual representation of laying out and marking wood pieces on an MDF sheet to maximize material usage for a DIY cat tower project.
While precise cutting on marked lines isn’t crucial, laying out the pieces helps visualize the project and ensure you can get all the necessary components from your wood sheet. Marking the locations for the support posts also aids in assembly.
Carpet Selection and Cutting
Choose an inexpensive carpet for covering the platforms and posts. A natural, low-pile carpet is ideal. Home Depot or similar stores often have budget-friendly options or remnants.
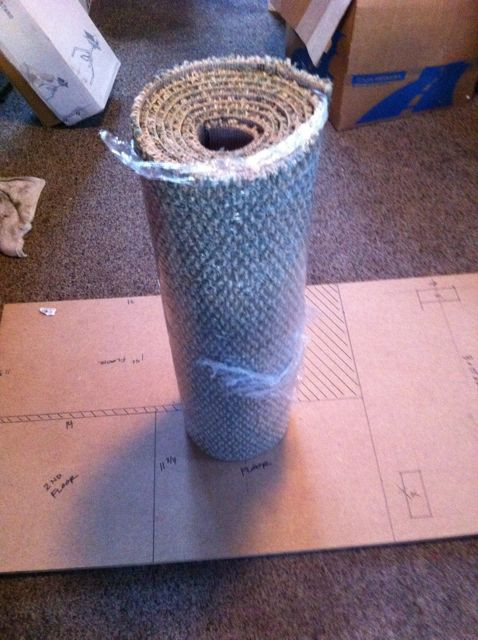 Roll of inexpensive natural carpet for covering a DIY cat tower
A roll of budget-friendly, natural carpet chosen for upholstering the DIY cat tower platforms and posts.
One yard of carpet (1 yard x 12 ft) should be sufficient to cover a basic DIY cat tower, with some leftover for other small projects like a cat mat.
Assembling the Wooden Structure
Cut the 2×4 lumber into appropriate lengths for the support posts, considering the desired height of your cat tower.
 Cut wood pieces for the DIY cat tower platforms and support posts
All the cut wood pieces for the DIY cat tower, including platforms of different sizes and support posts, ready for assembly.
Attach the support posts to the base platform, ensuring they are plumb (vertically straight). Use wood screws from the base into the uprights for a secure connection.
For attaching the upper platforms, pocket hole joinery (using a Kreg Jig) offers a clean and strong method. Pocket holes allow you to insert screws at an angle, creating a hidden joint from underneath the platforms into the support posts.
Close-up of a Kreg Pocket Hole Jig clamped onto a piece of wood, used to create angled pilot holes for hidden screw joinery in DIY projects.
Demonstration of drilling pocket holes through the Kreg Jig using a specialized drill bit, creating pilot and countersink holes in one step.
Two completed pocket holes, showcasing the angled entry point for screws that will be hidden once assembled, creating a clean joint.
If you don’t have a pocket hole jig, you can also use screws and wood cleats (small pieces of wood) for platform support.
Sanding and Prepping for Upholstery
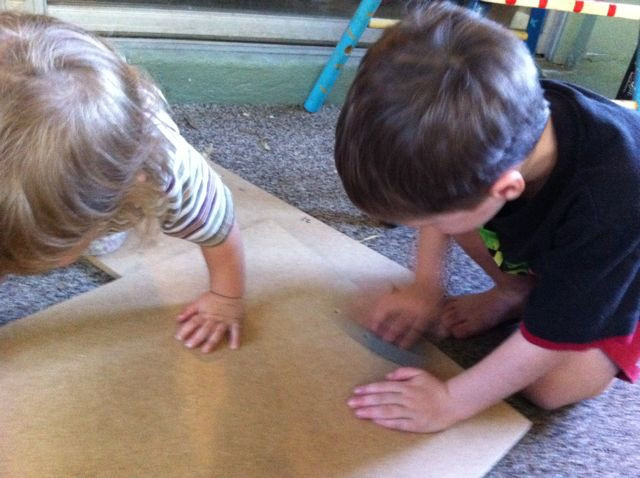
Sanding any rough edges or drilling imperfections on the wood platforms will ensure a smooth finish before carpeting.
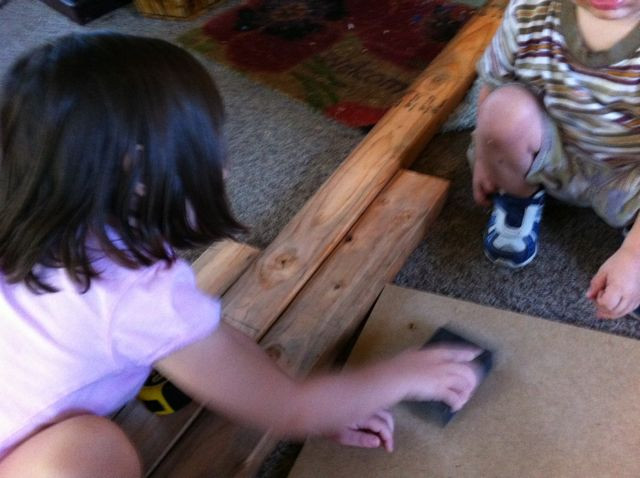 Children sanding pre-drilled holes on MDF platforms for a DIY cat tower
Children assisting with sanding the edges of pre-drilled holes on MDF platforms, smoothing surfaces for the DIY cat tower.
A child diligently sanding a wooden piece, preparing components for the DIY cat tower construction.
 Another child sanding wood for a DIY project
A young helper sanding a wooden element of the DIY cat tower project, ensuring a smooth finish before assembly.
Test Assembly and Upholstering Strategy
Before upholstering, assemble the entire wooden structure to check for fit and alignment. Remember that the carpet will add about ½” thickness to each piece, so account for this when planning.
The fully assembled wooden structure of the DIY cat tower, shown before upholstery, allowing for a fit check and pre-planning of carpet application.
Upholstering the Support Posts
Start by wrapping the support posts with carpet or sisal rope. For carpeted posts, cut a piece of carpet slightly wider than the post circumference. Staple one edge of the carpet to the post, wrap it tightly around, and staple the other edge, creating a seam. Trim any excess carpet for a clean finish.
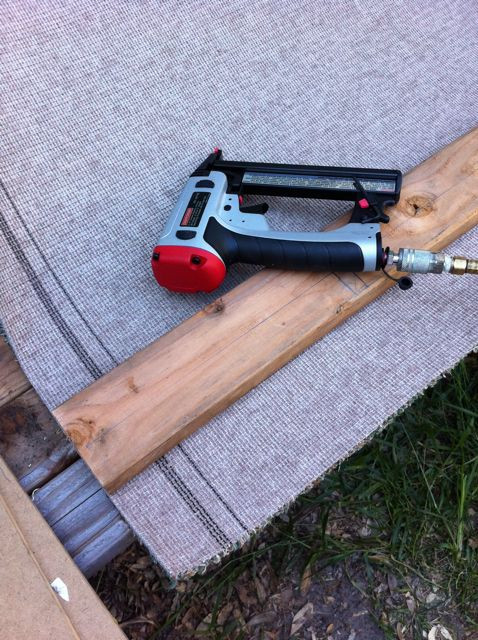 Starting to staple carpet onto a support post for a DIY cat tower
Beginning the process of upholstering a support post by stapling the carpet edge to the wood, preparing to wrap the post.
For posts intended as scratching posts, wrap them tightly with sisal rope. Secure the rope by stapling it to the back of the post every few wraps.
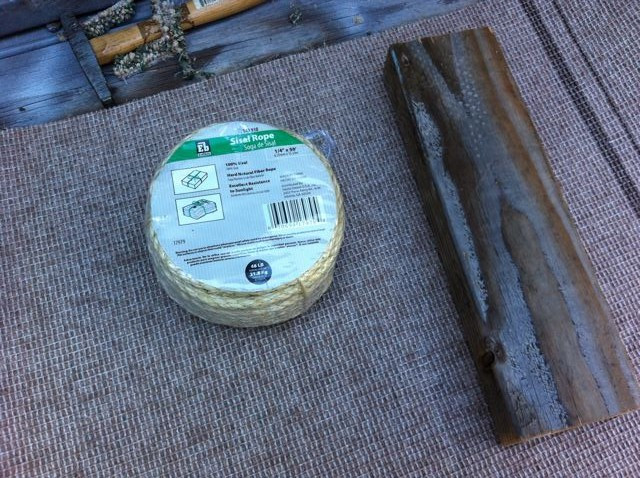 Wrapping a support post with sisal rope for a scratching surface
A support post being wrapped with durable sisal rope to create a scratching surface for the DIY cat tower.
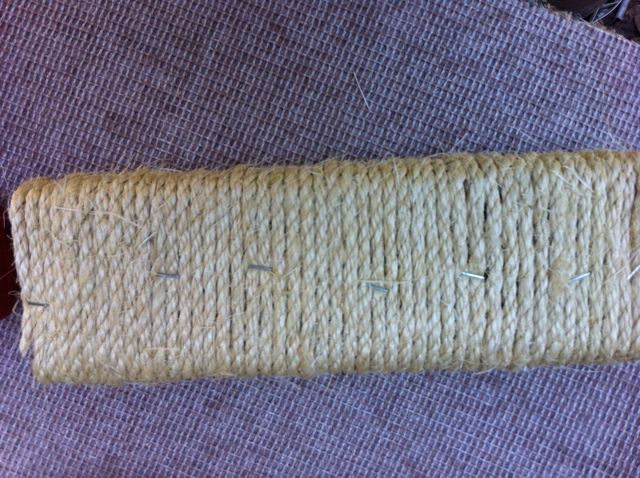 Securing sisal rope with staples on the back of a support post
Stapling the sisal rope to the back side of the support post to secure the scratching material in place on the DIY cat tower.
Upholstering the Platforms
Cut carpet pieces for each platform, allowing for a 2-3” overlap on all sides. Start by stapling one side of the carpet to the underside of the platform, working from the middle outwards to about 2” from each corner.
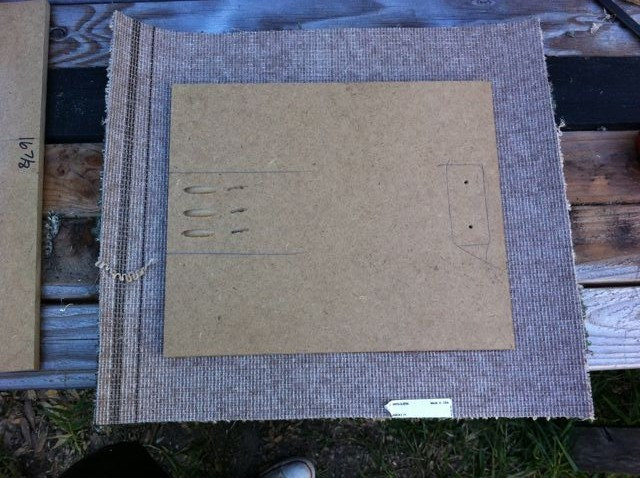 Preparing to staple carpet onto a platform for the DIY cat tower
Preparing a carpet piece to be stapled onto a platform, ensuring overlap for wrapping and upholstering the DIY cat tower level.
Fold over the edges and staple, neatly folding the corners for a professional look. For thicker carpets, you may need to seam the corners for a cleaner finish.
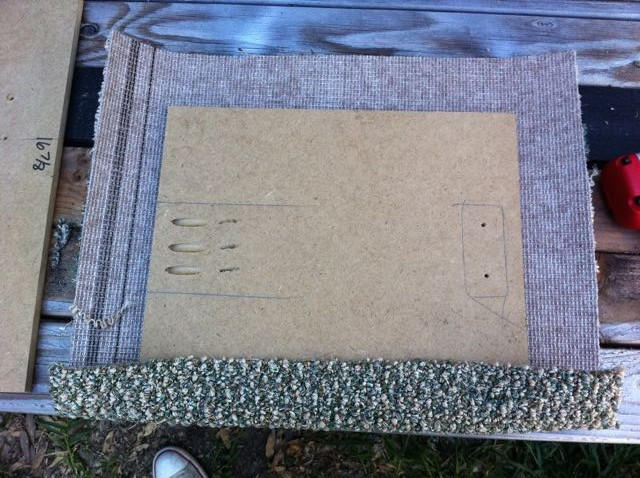 Stapling one side of the carpet onto a platform, leaving corners open
Stapling the carpet to the underside of a platform, working inwards and leaving the corner areas unstapled for neat folding.
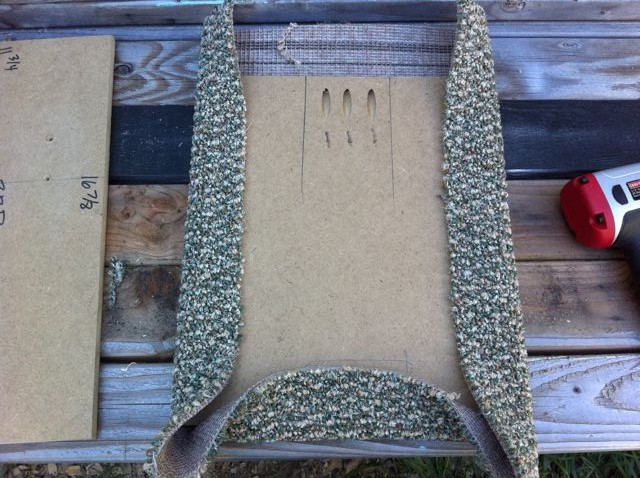 Three sides of a platform upholstered with carpet, corners remaining to be finished
Three sides of the platform are now upholstered, with the corners still open, ready for a corner wrapping technique to complete the carpet application.
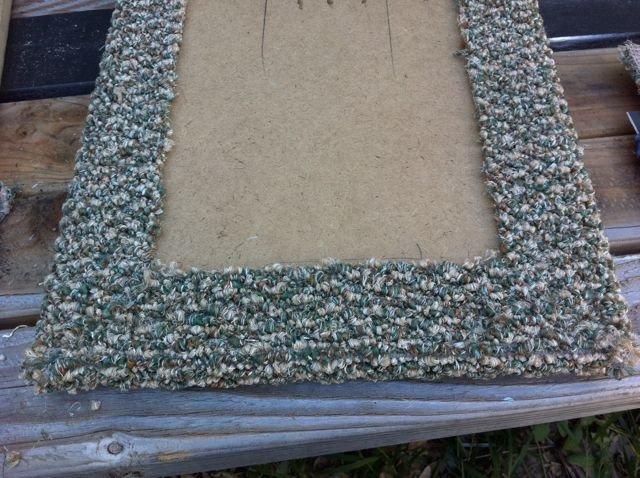 Finished carpeted platform for the DIY cat tower
A fully upholstered platform, demonstrating the clean and finished look achieved after wrapping and stapling the carpet for the DIY cat tower.
For corner finishing with thicker carpet, trim and seam the corner to reduce bulk and create a neater fold.
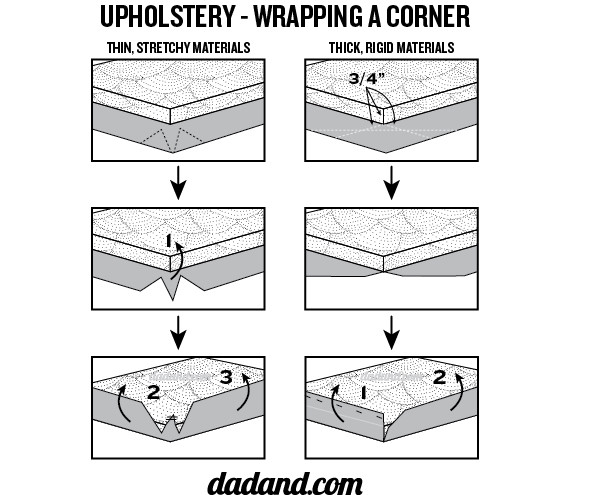 Diagram illustrating two methods for wrapping carpet corners
A diagram showing two corner upholstery techniques: a standard fold and a seamed corner method for thicker carpets, for a professional finish on the DIY cat tower.
Once the platforms are upholstered, cut out carpet sections on the underside where the support posts will attach, allowing for flush mounting.
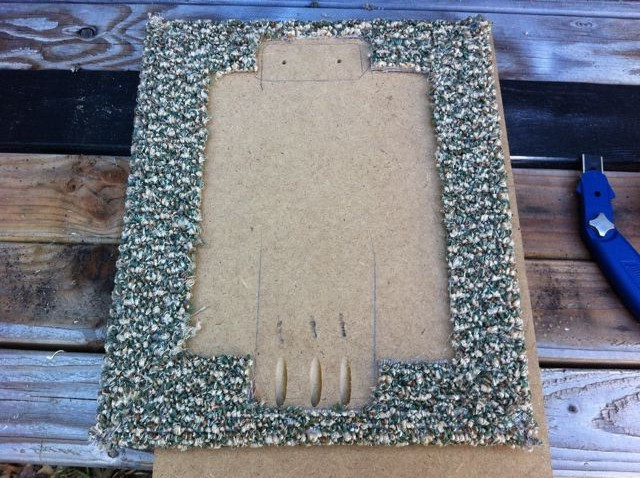 Cutting out carpet sections on the back of an upholstered platform
Cutting away carpet from the underside of an upholstered platform to expose the wood, preparing for attachment to the support posts of the DIY cat tower.
Final Assembly
With all pieces upholstered, move to a well-ventilated area for final assembly. Reassemble the DIY cat tower, attaching the platforms to the support posts using screws. Drive screws through the carpet from the top of the platforms into the support posts for secure fastening.
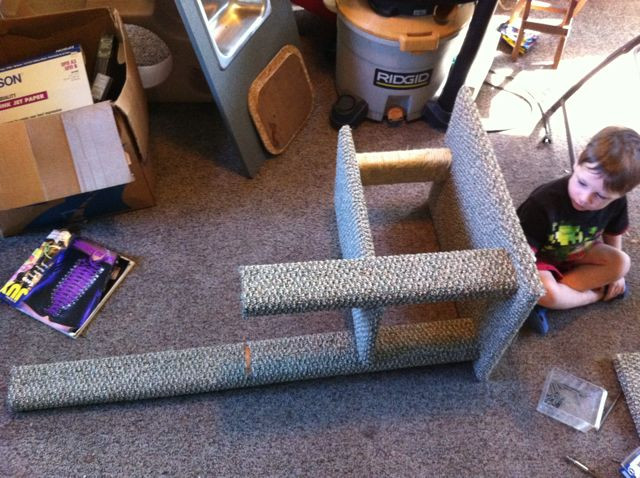 Final assembly of the upholstered DIY cat tower structure
Final assembly stage of the DIY cat tower, attaching upholstered platforms to support posts to complete the structure.
Enjoy Your DIY Cat Tower!
Congratulations! You’ve built your own fantastic DIY cat tower for a fraction of the cost of a store-bought one. Place it in your home and watch your cats explore their new playground.
 Completed DIY cat tower with a cat exploring it
The finished DIY cat tower in a home setting, with a cat already enjoying and exploring its new climbing structure.
To encourage your cats to use the tower, you can place catnip or their favorite toys on the platforms. You can also add a cozy cat bed on the top level to make it an inviting lounging spot.
Now you have a durable, custom-built DIY cat tower that will provide your feline companions with hours of entertainment and scratching satisfaction, while saving you money and adding a personal touch to your home. Enjoy watching your cats climb, play, and relax on their new tower!