As a content creator for solcat.net, I understand the importance of creating a home that caters to all members of your family, including the furry ones. If you’re navigating the world of baby proofing while also cherishing your feline companions, you’ve likely encountered the dilemma of gates. Traditional baby gates can inadvertently imprison your cats, restricting their access around the house. That’s where the brilliance of a Gate With Cat Door comes into play.
This guide will walk you through creating your own stylish and functional gate with cat door. We’re going beyond the basics of baby safety to ensure your cats maintain their freedom and comfort within your home. Whether you’re concerned about stairs, doorways, or simply keeping little ones contained in specific areas, a DIY gate with cat door offers a perfect solution.
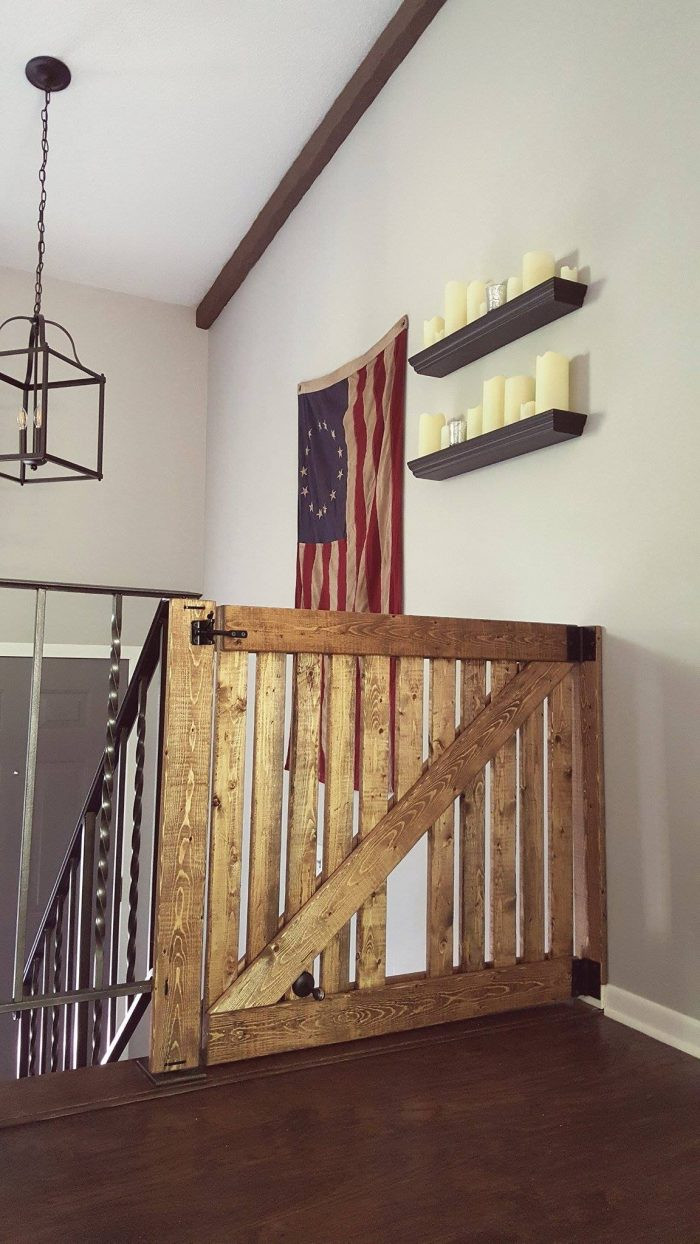
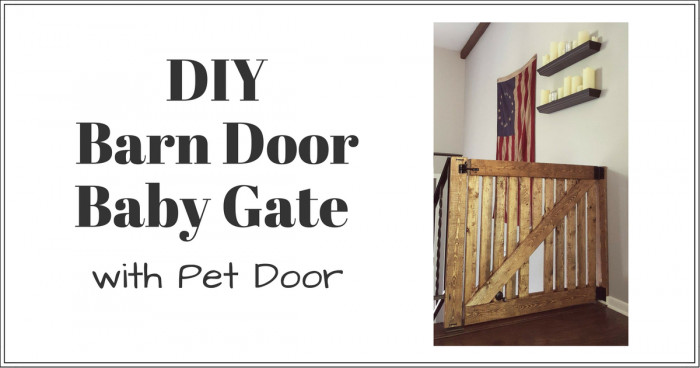 DIY barn door baby gate with pet door instructions
Why Choose a Gate with Cat Door?
For households with both babies or toddlers and cats, a gate with cat door isn’t just a convenience; it’s a necessity. Here’s why:
- Pet Freedom: Cats are creatures of habit and territory. Restricting their movement can cause stress and behavioral issues. A gate with cat door allows them to move freely, accessing food, litter boxes, and their favorite spots without impediment.
- Baby Safety: The primary function of any gate is to keep babies and toddlers safe from hazards like stairs or off-limit areas. A sturdy gate with cat door maintains this safety while adding pet-friendly functionality.
- Reduced Stress for Everyone: Imagine the frustration of a cat constantly blocked by a baby gate or a toddler trying to chase a cat through a regular pet door. A dedicated gate with cat door minimizes these stressful interactions, creating a more peaceful home environment for everyone.
- Customization & Style: Store-bought gates with pet doors can be functional but often lack aesthetic appeal. DIYing your own gate with cat door allows you to customize the design to match your home décor, ensuring it’s both safe and stylish. You can even create a beautiful barn door style, as we’ll demonstrate.
Design Considerations for Your DIY Gate with Cat Door
Before diving into the building process, consider these design elements to ensure your gate with cat door is both safe and effective:
Safety First
- Baby Safety Standards: While building your own gate offers customization, it’s crucial to adhere to safety guidelines for baby gates. Ensure the spacing between slats is narrow enough to prevent babies from squeezing through or getting limbs stuck. A general guideline is less than 2 3/8 inches for children under 2 years old.
- Sturdy Construction: Your gate with cat door must be robust enough to withstand pressure from a determined toddler. Use quality materials and secure construction techniques to ensure it remains firmly in place.
- Secure Latching Mechanism: Choose a reliable gate latch that is easy for adults to operate but difficult for children to open.
- Height: The height of the gate should be sufficient to prevent toddlers from climbing over it. A standard height is around 30-36 inches.
Pet Door Dimensions
- Cat Size: Consider the size of your cat when designing the pet door opening. It should be large enough for them to pass through comfortably but not so large that a baby could potentially fit through. A width of around 4-6 inches is often suitable for cats.
- Placement: Position the cat door opening at a height that is easily accessible for your cat. Avoid placing it too low to the ground, as this might encourage babies to interact with it.
Style and Materials
- Match Your Home: Think about the existing style of your home when choosing materials and finishes for your gate with cat door. Wood offers a warm, customizable option that can be stained or painted to complement your décor.
- Barn Door Aesthetic: A barn door style gate with cat door adds a rustic and charming touch to your home. This design is not only visually appealing but also structurally sound.
- Material Choices: Pine wood is a cost-effective and readily available option for DIY projects. Consider using different board widths (like 1x4s and 1x3s) to create visual interest and a sturdy frame.
- Finishes: Stain or paint your gate with cat door to match your home’s color scheme and protect the wood. Choose non-toxic finishes, especially if they might be accessible to children.
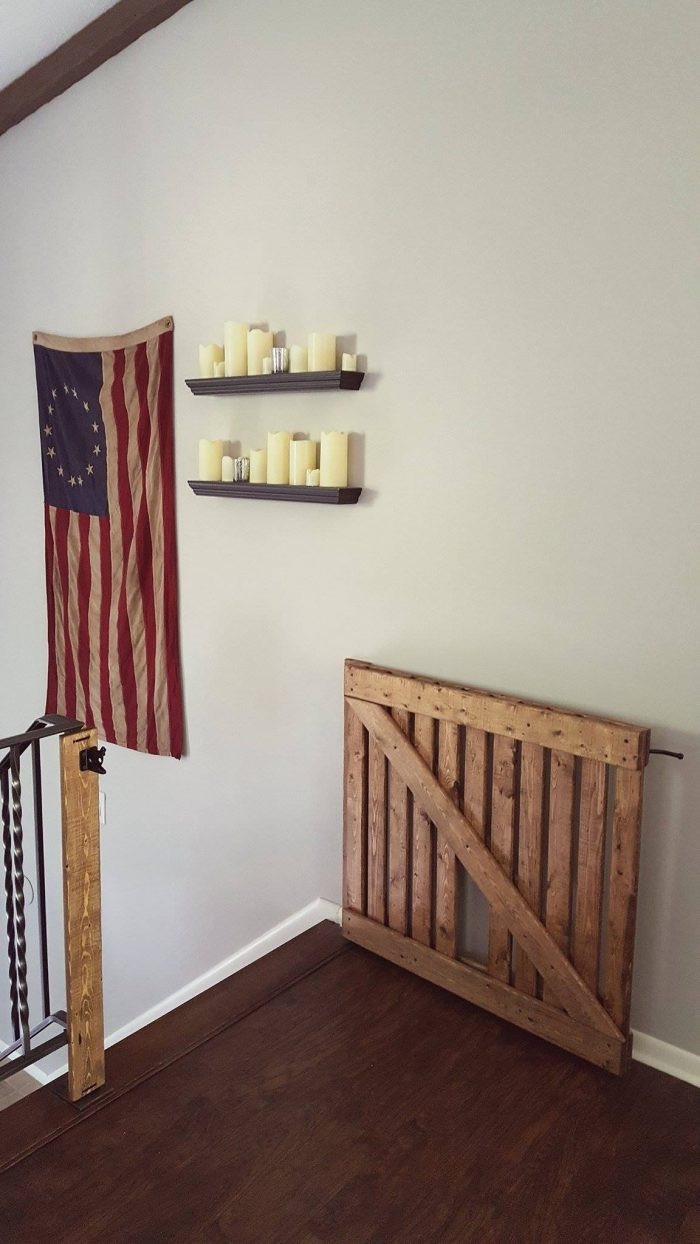
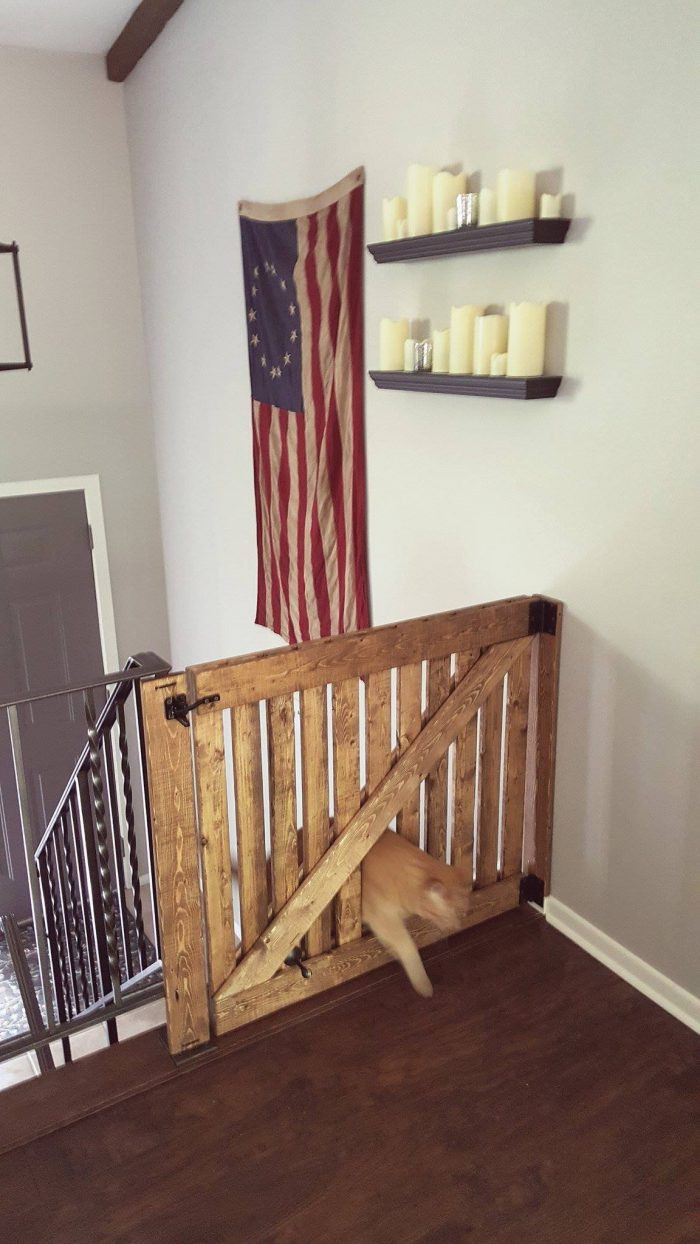
 DIY barn door baby gate with pet door instructions
DIY Barn Door Gate with Cat Door: Step-by-Step Instructions
Ready to build your own gate with cat door? This tutorial provides detailed instructions, inspired by a charming barn door design, to guide you through the process.
Project Time: Approximately 2-3 hours
Skill Level: Beginner to Intermediate DIY
Estimated Cost: $40 – $60 (excluding tools, costs may vary based on lumber prices)
Tools You’ll Need
- Measuring Tape: Essential for accurate measurements. A 25-foot tape measure is a versatile choice.
- Drill with Drill Bits and Driver Set: For drilling pilot holes and driving screws. A cordless drill offers flexibility. Consider a drill and driver combo set for convenience.
- Circular Saw: For making straight cuts in lumber. Ensure you use safety glasses and follow safety guidelines for power tool operation.
- Safety Glasses: Protect your eyes from sawdust and debris. Always wear safety glasses when working with power tools.
- Dust Mask: Important for sanding and cutting wood to prevent inhalation of dust particles.
- Level: To ensure your gate and frame are straight and plumb. A 2-foot level is a good all-around size.
- Palm Sander (Optional): Speeds up sanding and creates smoother finishes. Sanding blocks and sandpaper are alternatives if you don’t have a palm sander.
- Square: Helps create accurate 90-degree angles for cutting and assembly.
- Bar Clamps (Optional): Useful for holding pieces together while gluing or screwing.
Materials List
- 1″x4″ Pine Boards: Four 8-foot boards for the frame and diagonal supports. (Actual dimensions are typically 0.75″ x 3.5″).
- 1″x3″ Pine Boards: Six 8-foot boards for the gate slats. (Actual dimensions are typically 0.75″ x 2.5″).
- 1.5″ Wood Screws: Choose a color that complements your stain or paint. Approximately 50 screws should be sufficient.
- Gate Latch: Select a child-resistant gate latch.
- 2 Gate Hinges: 3-inch hinges are suitable for 1×4 boards.
- Heavy-Duty Drywall Anchors (If attaching to drywall): 50lb drywall anchors provide secure mounting.
- Heavy-Duty Zip Ties (If attaching to railings): Choose black or a color that blends with your décor.
- Wood Stain or Paint: Select your desired color and finish. “Early American” stain provides a classic rustic look.
- Foam Brush: For applying stain or paint smoothly.
- Rags or Paper Towels: For wiping off excess stain.
- Magnetic Door Stop (Optional): To hold the gate open when not in use.
Step-by-Step Building Instructions
Step 1: Measure Your Opening
- Accurately measure the width and height of the opening where you’ll install your gate with cat door.
- Consider the placement of hinges and the latch when measuring to ensure proper gate swing and closure.
- Standard gate heights are around 36 inches, but adjust to fit your specific needs.
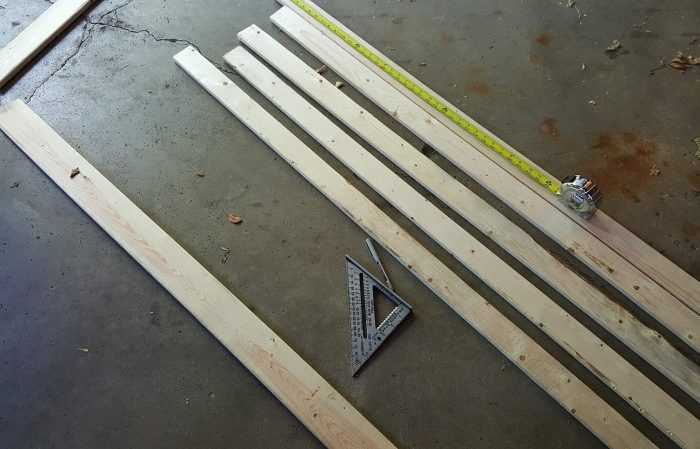
Step 2: Calculate Lumber Needs
- Based on your measurements, calculate the number of 1×4 and 1×3 boards you’ll need.
- Remember to account for the frame, slats, and diagonal supports.
- It’s always wise to purchase an extra board or two of each size to account for mistakes or miscalculations.
Step 3: Cut the Frame Boards
- Cut the 1×4 boards to create the top, bottom, and side pieces of your gate frame, according to your measured opening.
- If attaching to a banister, pre-drill holes in the side frame board for zip ties to wrap around the banister securely.
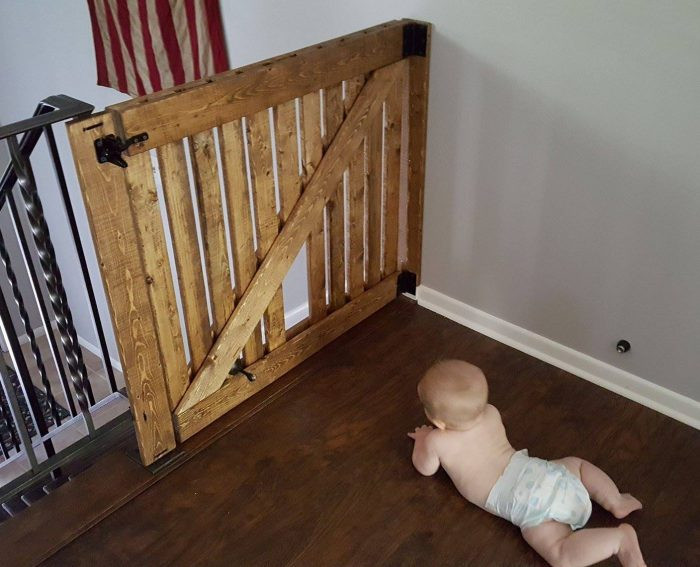
 DIY barn door baby gate with pet door instructions
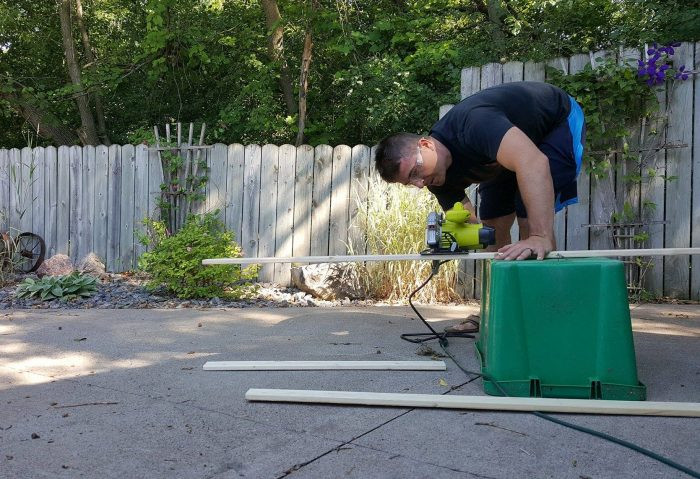
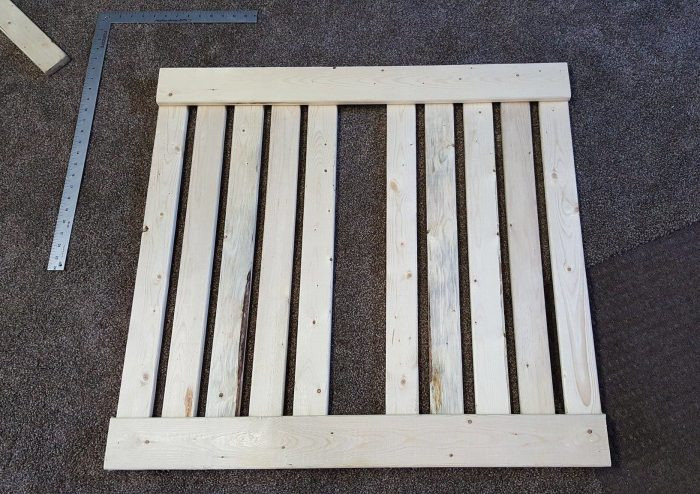
Step 4: Assemble the Gate Frame
- Assemble the rectangular gate frame by attaching the top and bottom frame pieces to the side pieces using wood screws.
- Use a square to ensure corners are at 90 degrees and the frame is perfectly square.
Step 5: Cut the Gate Slats
- Measure and cut the 1×3 boards into slats for the gate infill. Determine the height of your slats, leaving a small gap (around 0.5 inch) at the bottom for floor clearance.
- For a standard 33-inch wide gate, you might need around 11-12 slats, but adjust based on your desired spacing.
Step 6: Determine Slat Spacing and Cat Door Opening
- Lay out the top and bottom frame pieces and arrange the slats to determine your desired spacing.
- Aim for spacing that is safe for babies (under 2 3/8 inches) but also visually appealing.
- Decide on the location and size of your cat door opening. A 4-inch wide opening is typically sufficient for cats. This is achieved by omitting one slat and considering the gaps on either side.
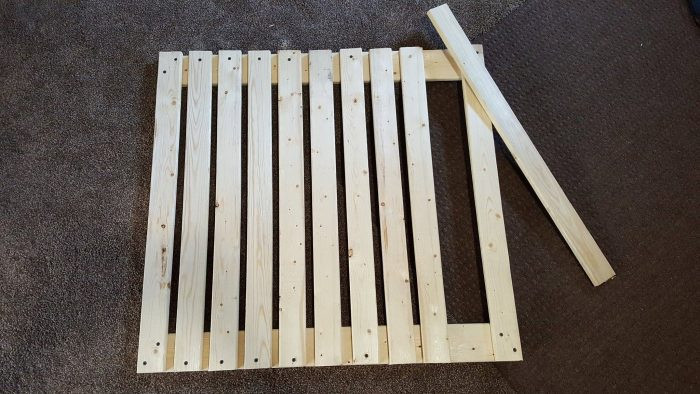
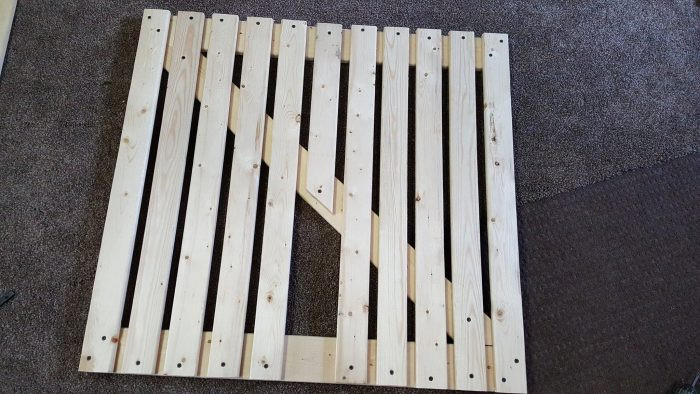
Step 7: Assemble the Gate Slats
- Attach the slats to the top and bottom frame pieces using wood screws.
- Maintain consistent spacing between slats as you attach them.
- Omit the slat where you plan to create the cat door opening.
 DIY barn door baby gate with pet door instructions
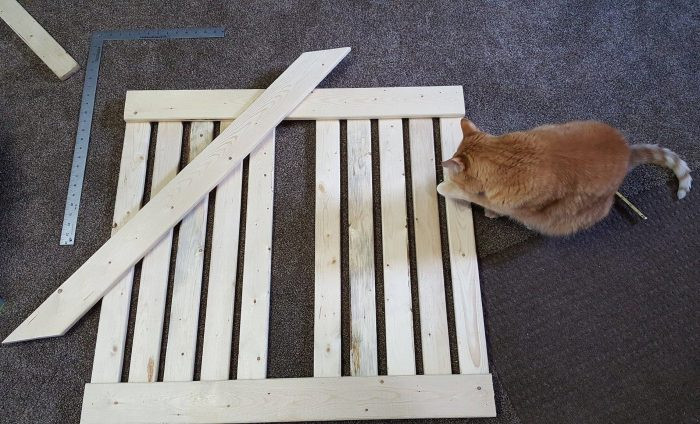
Step 8: Cut Diagonal Support Boards
- Cut two 1×4 boards diagonally to create the barn door style cross pieces.
- To determine the angle, lay a board corner-to-corner across the gate and mark the cutting line.
- Use a palm sander or sandpaper to fine-tune the angle for a perfect fit.
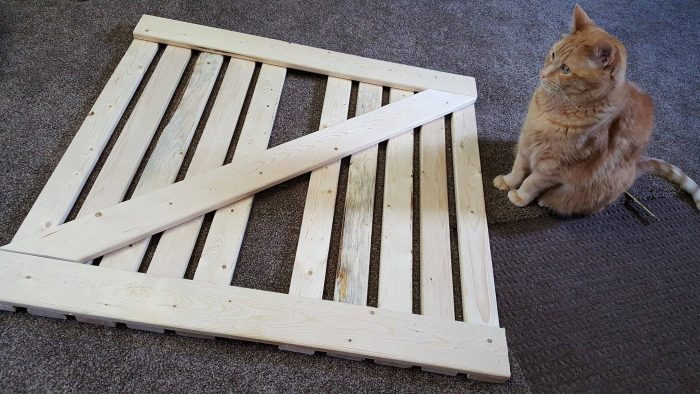
Step 9: Attach Front Diagonal Support
- Position one diagonal support board across the front of the gate, underneath the slats.
- Use bar clamps to hold it securely in place.
- Pre-drill pilot holes and screw the diagonal board to the slats.
 DIY barn door baby gate with pet door instructions
Step 10: Cut and Attach Cat Door Slat (If Applicable)
- If creating a gate with cat door, cut the omitted slat to fit the angled opening created by the diagonal support.
- Attach this angled slat to complete the cat door opening. If you don’t need a cat door, simply install a regular slat in this position in Step 7.
Step 11: Sand All Edges
- Thoroughly sand all cut edges and surfaces of the gate with cat door and remaining frame pieces.
- This creates a smooth finish and prepares the wood for staining or painting.
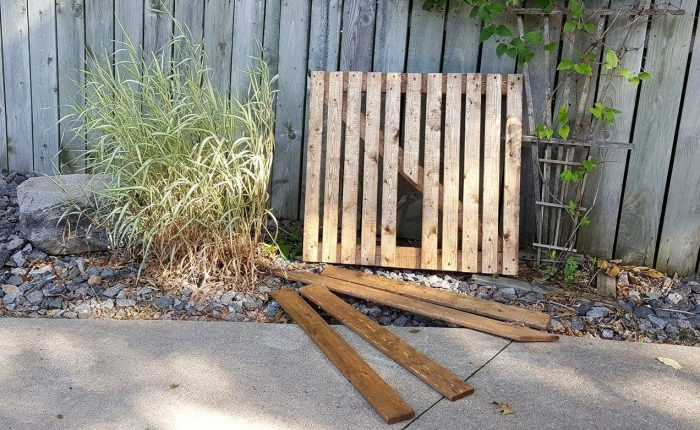
Step 12: Stain or Paint the Gate
- Apply your chosen stain or paint to all pieces of the gate with cat door and frame.
- Use a foam brush for even application and wipe off excess stain with a rag.
- Allow the stain or paint to dry completely according to the manufacturer’s instructions.
 DIY barn door baby gate with pet door instructions
Step 13: Attach Back Support Pieces
- Attach the remaining 1×4 boards to the back of the gate horizontally (top and bottom) and diagonally to add extra stability and complete the barn door look.
- Pre-drill pilot holes and screw these back supports into place.
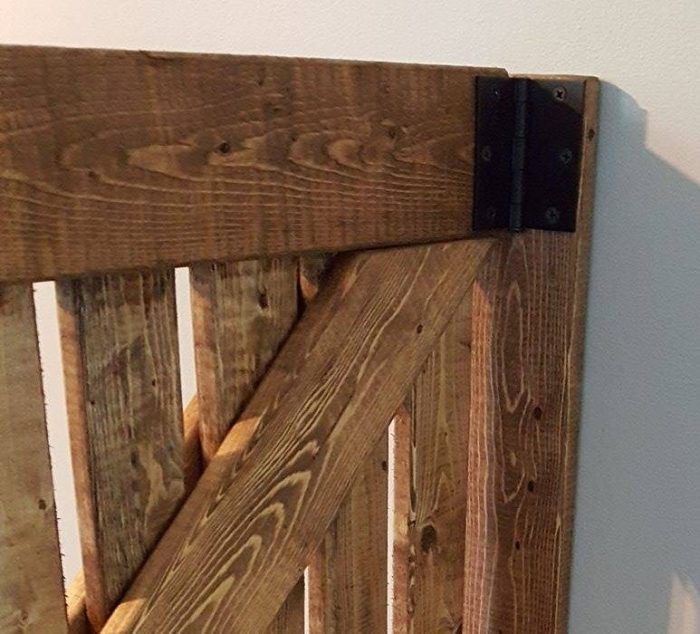
Step 14: Install Hinges on the Gate
- Mark the hinge locations on the gate frame and pre-drill pilot holes.
- Attach the hinges to the gate using wood screws.
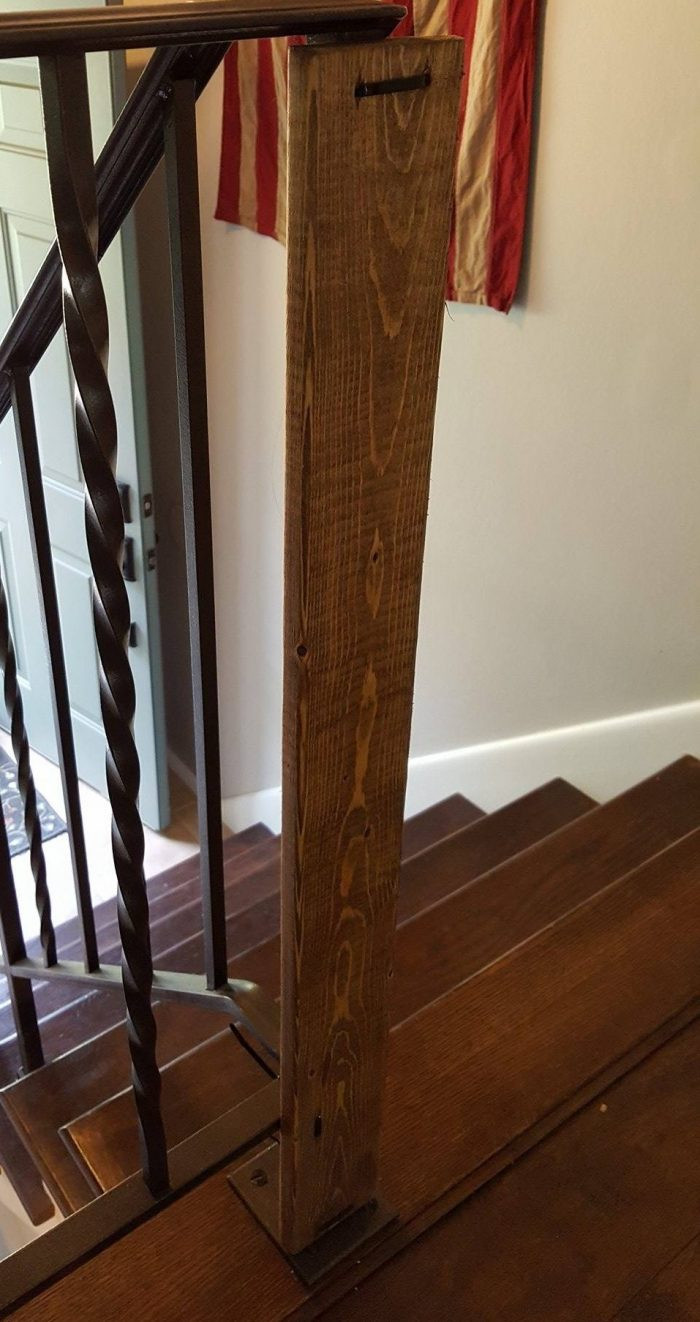
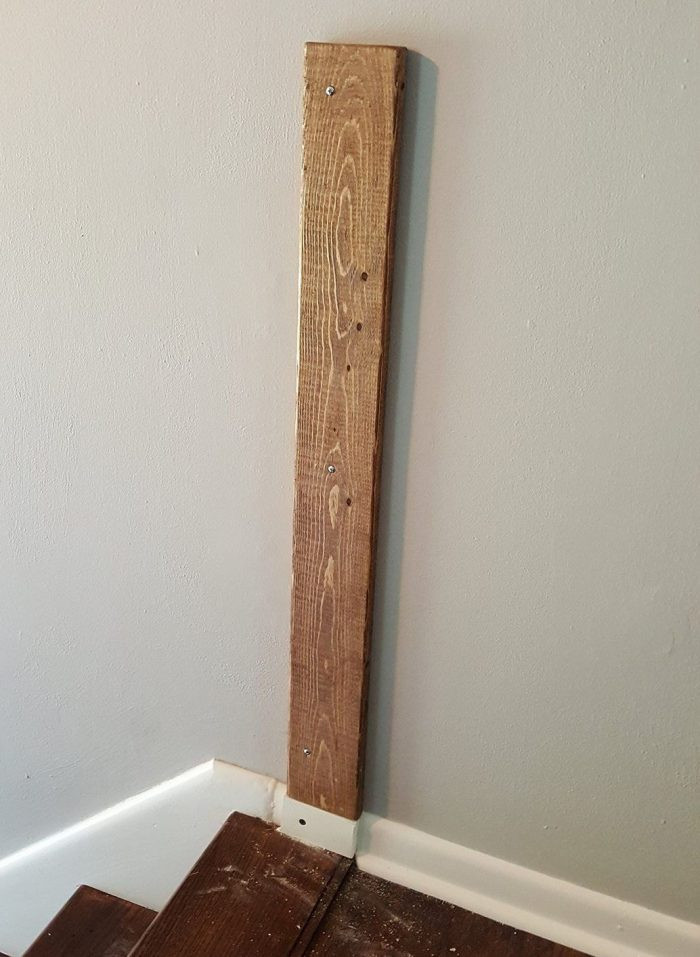
Step 15: Install Door Frame Boards
- Position the side frame boards on either side of your opening (wall, banister, etc.).
- Use a level to ensure they are plumb and aligned.
- If attaching to drywall, mark pilot hole locations, install drywall anchors, and then screw the frame boards into place.
- If attaching to a banister, use heavy-duty zip ties to securely fasten the frame board to the banister.
 DIY barn door baby gate with pet door instructions
Step 16: Attach Gate to Frame
- Align the gate with the door frame and mark hinge locations on the frame boards.
- Pre-drill pilot holes and attach the gate hinges to the frame using wood screws.
- Ensure the gate swings smoothly and freely.
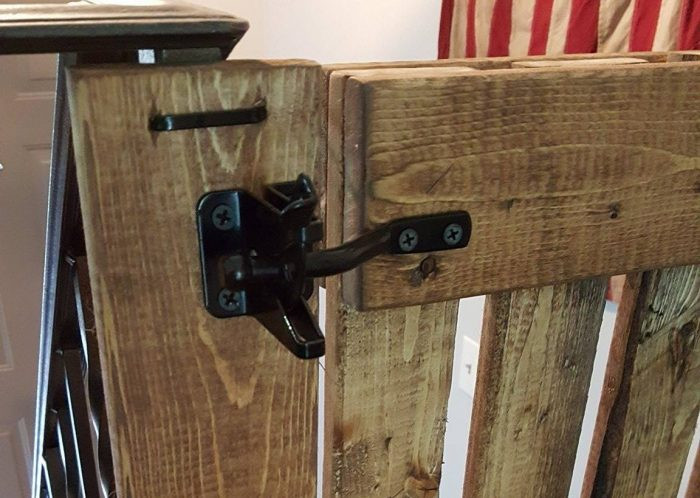
Step 17: Install Gate Latch
- Position the latch components on the gate and frame so they align when the gate is closed.
- Mark screw locations, pre-drill pilot holes, and attach the latch using wood screws.
- Test the latch to ensure it is secure and easy to operate for adults.
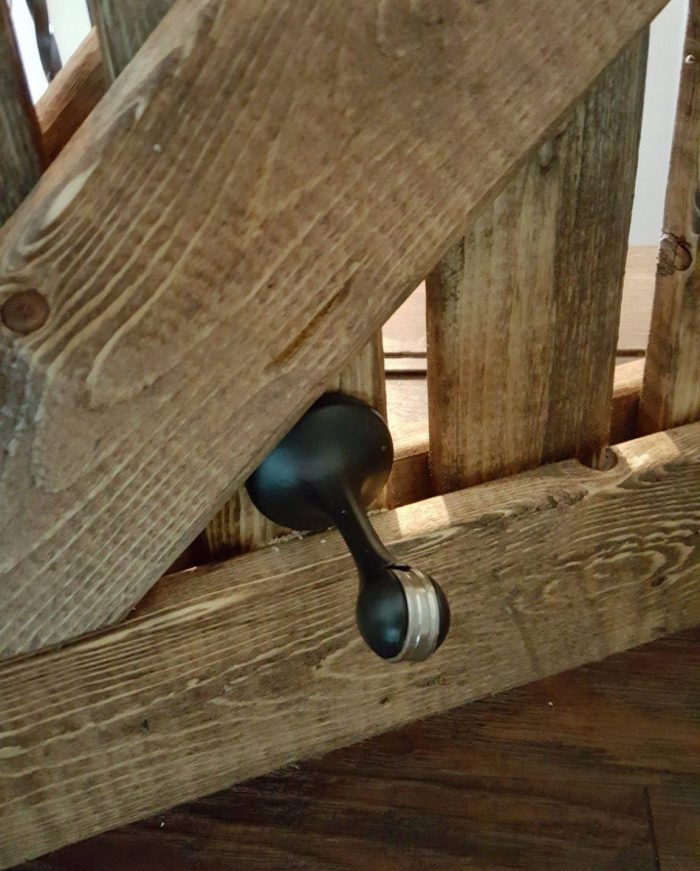
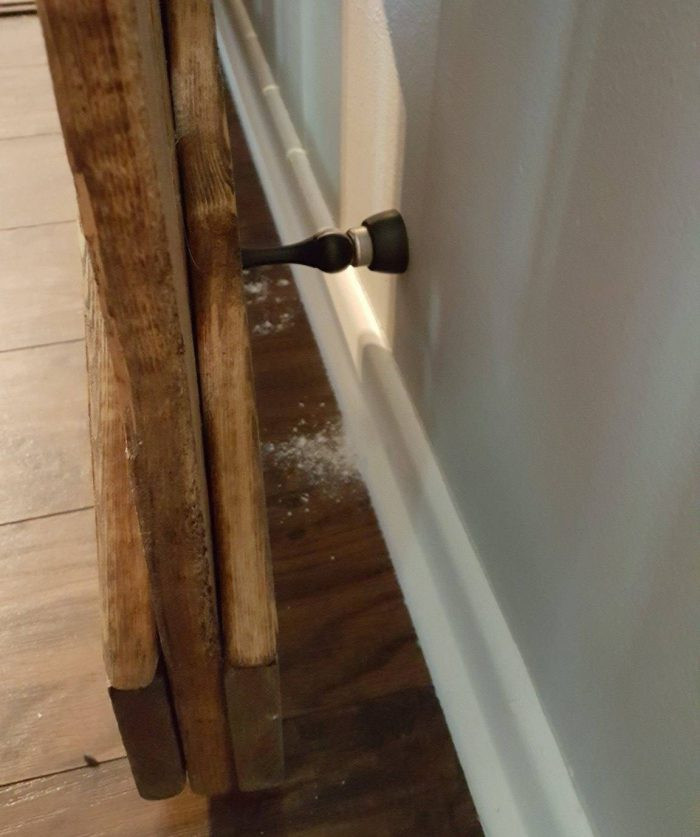
Step 18: Add Magnetic Door Stop (Optional)
- Install a magnetic door stop to hold the gate with cat door open when desired.
- Follow the manufacturer’s instructions for installation and ensure it aligns properly to hold the gate securely open.
 DIY barn door baby gate with pet door instructions
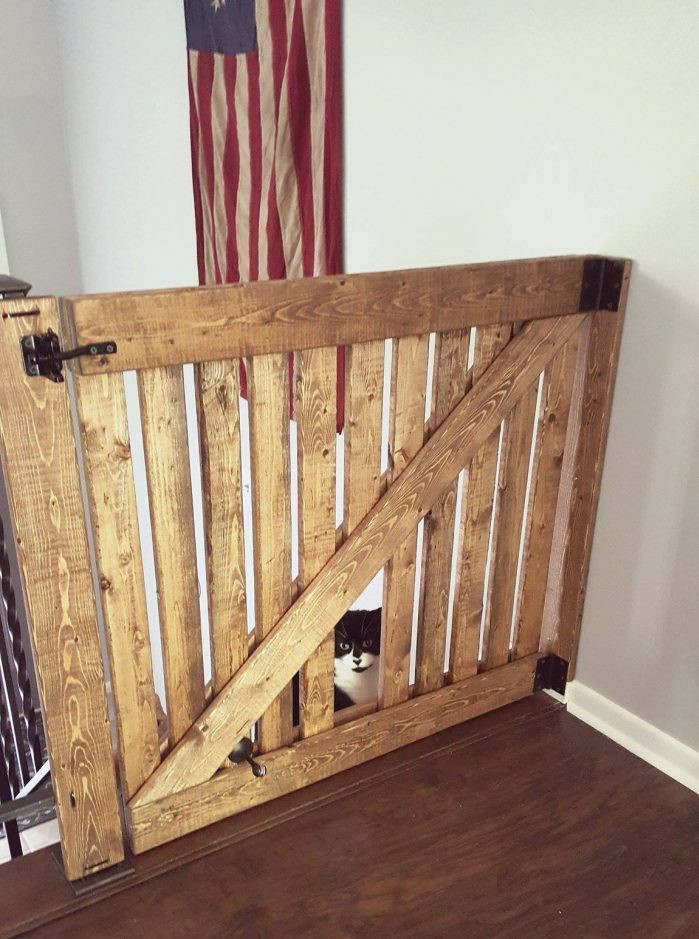
Enjoy Your Completed Gate with Cat Door!
Congratulations! You’ve built a beautiful and functional gate with cat door that enhances both safety and pet freedom in your home. This DIY project not only provides peace of mind but also adds a touch of personalized style to your living space.
Building your own gate with cat door is a rewarding experience. You’ve created a safe space for your baby while ensuring your feline family members remain comfortable and unrestricted. This blend of practicality and aesthetics makes this DIY project a true win-win for homes with both babies and cats.
 DIY barn door baby gate with pet door instructions
 DIY barn door baby gate with pet door instructions
 DIY barn door baby gate with pet door instructions
 DIY barn door baby gate with pet door instructions
 DIY barn door baby gate with pet door instructions
 DIY barn door baby gate with pet door instructions
 DIY barn door baby gate with pet door instructions
 DIY barn door baby gate with pet door instructions
 DIY barn door baby gate with pet door instructions
 DIY barn door baby gate with pet door instructions
 DIY barn door baby gate with pet door instructions
 DIY barn door baby gate with pet door instructions
Share your own DIY gate with cat door projects in the comments below! We’d love to see your creative adaptations and how you’ve balanced baby safety and pet happiness in your home.