
Does your feline friend yearn for outdoor adventures, or perhaps they simply enjoy the freedom to move between rooms without your assistance? If you find yourself constantly playing doorman for your cat, it might be time to consider a purr-fect solution: installing a cat door.
Benefits of Installing a Cat Door:
- Unleash Independence: Grant your cat the liberty to explore the outdoors safely or access indoor spaces at their own pace.
- Say Goodbye to Doorman Duty: Reclaim your time and eliminate the constant need to open and close doors for your furry companion.
- Variety of Options: Choose from manual, electronic, and microchip cat doors to suit your home and security needs.
If you’re tired of being on call for your cat’s every whim, investing in a quality cat door or cat flap is a game-changer.
Why Should You Install a Cat Door?
As a devoted cat owner, you’ve likely faced the common dilemma: leaving your cat indoors might mean potential furniture scratching and door damage, while leaving them outside could expose them to dangers. What’s a loving pet parent to do?
While a cat sitter might seem like the ideal solution, the costs can quickly add up. Instead of breaking the bank or becoming your cat’s personal door attendant, consider the smart and convenient alternative: a cat door. Cat doors are an excellent investment, providing your cat with the freedom they crave while maintaining the security of your home.
The best part? Installing a cat door is a surprisingly straightforward DIY project. With the right tools and clear instructions, you can have a brand new cat door ready for your feline friend in no time. This guide will walk you through each step, making the installation process smooth and stress-free.
Cat doors aren’t limited to exterior doors either. Consider installing one in your garage door, laundry room door, or even a closet door to give your cat easy access to their food, litter box, or a cozy retreat. For indoor cats, a cat door on a bedroom or basement door can provide them with access without needing constant door management.
No matter where you envision your cat door, this comprehensive guide will equip you with the knowledge to install it successfully. Let’s dive in and get started!
Pre-Installation Prep: What You Need Before You Begin
Before you grab your tools, a little preparation will make the installation process much smoother. Here are essential steps to take before you start installing your cat door:
Measure Your Cat: Size Matters!
Before you even think about browsing cat doors, measuring your cat is non-negotiable. This crucial step ensures you choose a door that’s the right size for your pet. A door that’s too small will be unusable, while one that’s too large could become an entry point for unwanted critters.
To measure your cat accurately, measure from their feet to their shoulders when they are standing. Also, consider their width and the distance from their belly to their head. Visualizing the opening size is helpful – you can even create a cardboard cutout of the dimensions you’re considering to see if your cat can comfortably pass through.
Pro-Tip: Aim for a door opening that is at least two inches wider and taller than your cat’s measurements. This provides comfortable clearance and accommodates for growth or thicker winter coats. Choosing a slightly larger door ensures your cat won’t get stuck and eliminates the need to replace the door as your cat grows.
 Diagram illustrating how to measure your pet for a pet door, showing height and width measurements.
Choosing the Right Cat Door: Door Types and Features
With your cat’s measurements in hand, it’s time to explore the wide world of cat doors! You’ll find a variety of options, including single-flap, double-flap, self-framing, and frameless models. You can even choose between basic manual doors, electronic doors, and microchip-activated doors for enhanced security. For interior walls, specialized cat doors are also available.
Some popular and reliable cat door options include the PetSafe Electronic Smart Door, the Cat Mate Elite Electronic door, and the Ideal Pet Products E-Cat Door. Electronic and microchip doors are excellent for keeping out stray animals and ensuring only your cat can enter. However, it’s worth noting that microchip cat doors typically operate on frequencies that are not suitable for larger animals like dogs.
When selecting a cat door, consider these key factors:
- Your Pet’s Measurements: Ensure the door opening is appropriately sized for your cat.
- Door Thickness: Match the door frame depth to the thickness of your door for a secure fit.
- Installation Feasibility: Consider your DIY skills and the type of door you’ll be installing into (solid core, hollow core, exterior, interior).
- Durability and Weather Resistance: Especially important for exterior doors, choose a durable, weather-resistant door to withstand the elements.
Pro-Tip: For interior doors, especially those with hollow cores, self-framing cat doors are highly recommended. They simplify installation, provide a clean finish, and protect the hollow core from potential damage. Self-framing doors also offer a more polished and professional look to your DIY project.
Selecting the Ideal Location for Your Cat Door
Deciding where to place your cat door is another important pre-installation step. You might choose to install one cat door in a main exterior door for outdoor access. You could also add interior cat doors to give your cat free movement between rooms they frequently use, such as the kitchen, laundry room, or bedroom. Strategic placement ensures your cat has easy access to their essential areas, both inside and outside your home.
Gather Your Tools: The Essential Toolkit
Having the right tools at hand will make the installation process significantly easier and safer. Here’s a comprehensive list of tools you’ll likely need:
- Measuring tape: For accurate measurements.
- Pencil: For marking cut lines and positions.
- Ruler or straight edge: To ensure straight lines when marking.
- Drill: Essential for creating pilot holes and screw holes.
- Drill bits: Various sizes for pilot holes and potentially larger holes for jigsaw access.
- Earmuffs or earplugs: Hearing protection when using power tools.
- Dust mask: To avoid inhaling dust particles during cutting and drilling.
- Jigsaw: For cutting the cat door opening in the door.
- Safety glasses: Eye protection is crucial when using power tools.
- Screwdriver: For tightening screws when installing the cat door frame.
- Utility knife: For scoring lines or trimming materials.
- Workbench (optional): Provides a stable surface for working on the door if you remove it.
- Cat door kit: Ensure it includes the door itself, screws, and potentially a template.
- Masking tape: To protect the door surface and provide clean cut lines.
Step-by-Step Guide: Installing Your Cat Door
With your preparations complete and tools ready, it’s time to get to the actual installation! Follow these step-by-step instructions for a successful cat door installation:
Step 1: Mark the Purr-fect Position
Using your measuring tape, ruler, and pencil, carefully mark the desired location for your cat door on the door. Ensure the marking is level. A standard height for a cat door is typically 10-12 inches from the floor, but adjust based on your cat’s size and comfort.
Many cat door kits include a template – use this template if provided as it simplifies the marking process and ensures accurate dimensions.
Pro-Tip: For easier handling and a more stable work surface, consider removing the door from its hinges before you begin the installation process. This can make cutting and drilling much easier, especially for heavier doors.
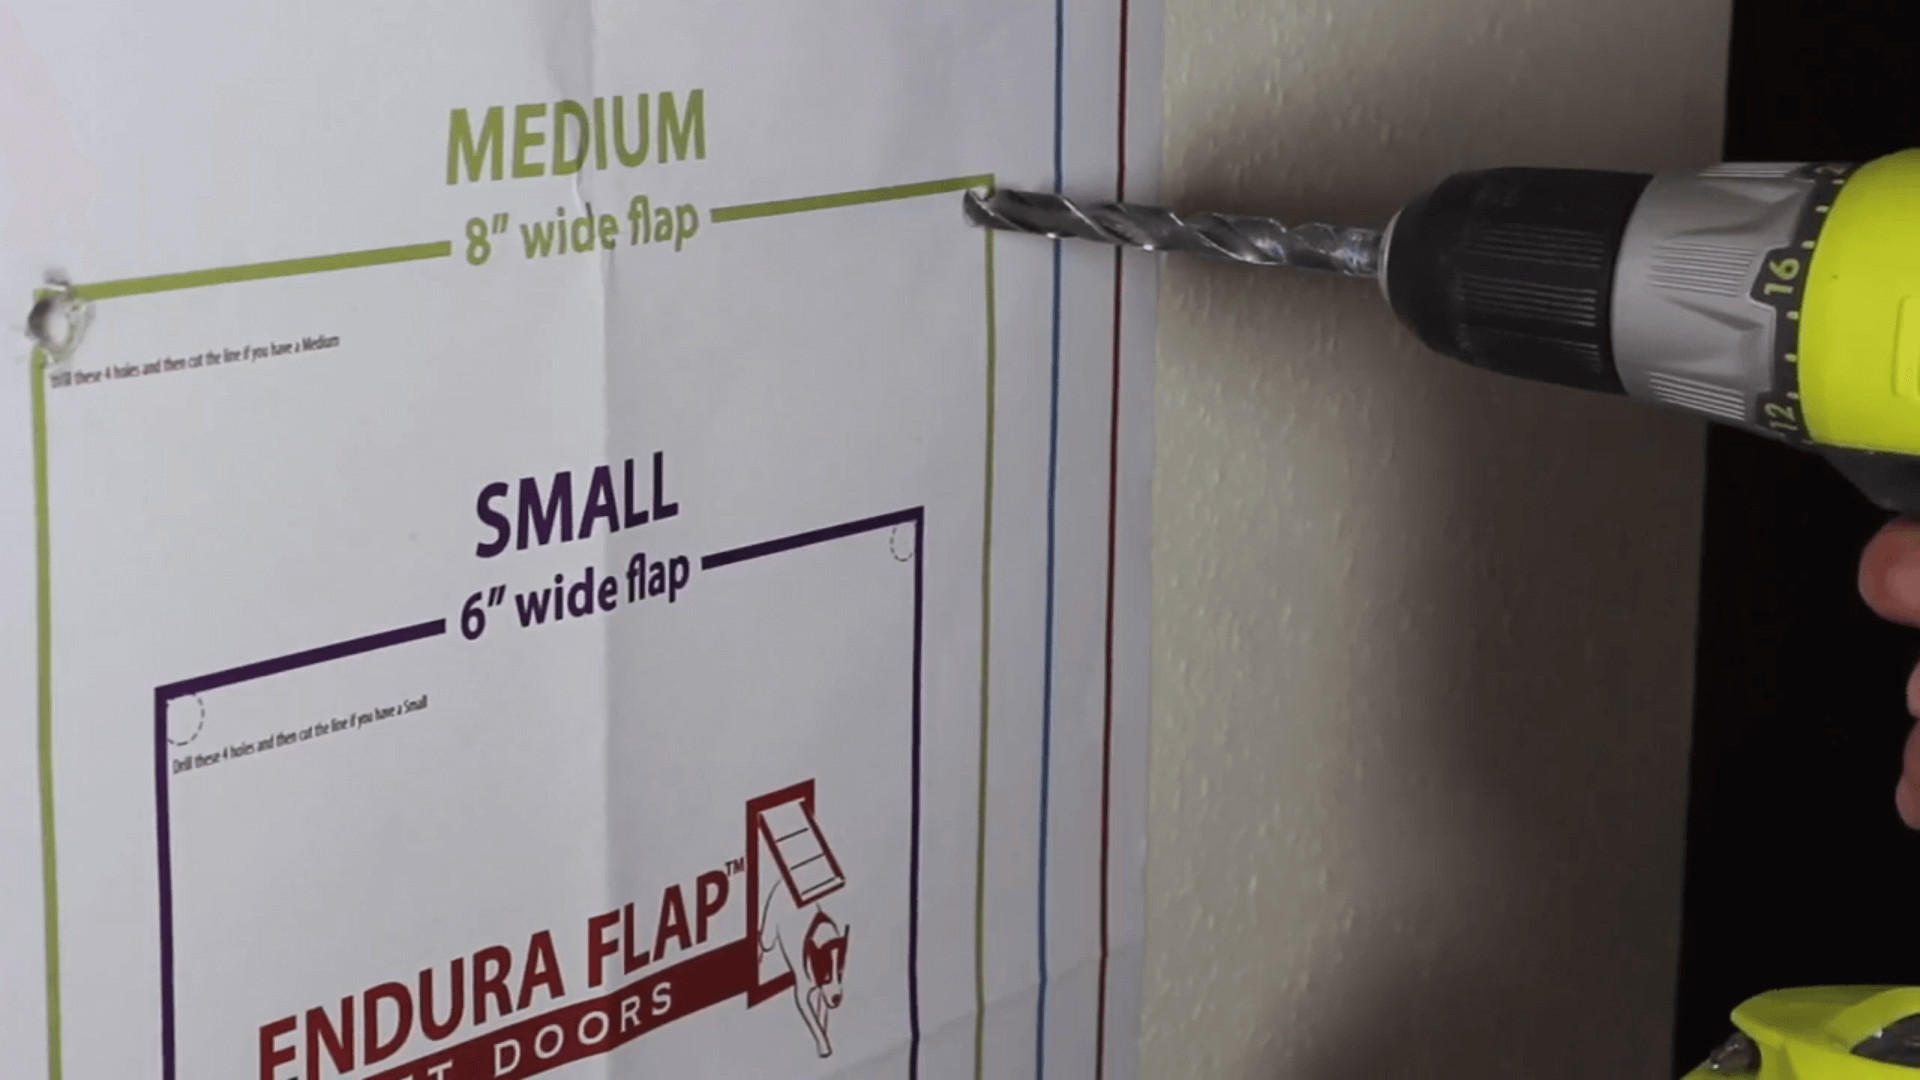 Image showing paper template guides for drilling holes for cat door installation.
Step 2: Drill Pilot Holes
As a safety precaution and to create starting points for your jigsaw, apply masking tape around the marked template area. This helps prevent splintering and provides a cleaner cut. Then, using your drill and a suitable drill bit, drill pilot holes at each corner of the marked template. These holes will serve as entry points for your jigsaw blade.
Step 3: Carefully Cut the Opening
Now comes the cutting phase. Put on your safety glasses, dust mask, and earmuffs for protection. Insert the jigsaw blade into one of the drilled pilot holes. Carefully and steadily follow the marked template lines to cut out the opening for your cat door. Maintain a firm grip on the jigsaw and let the tool do the work, avoiding forcing it. Take your time to ensure a clean and accurate cut along the template lines.
Step 4: Secure the Cat Door Attachment
If you’ve chosen a self-framing cat door, the installation is now quite straightforward. Carefully position the cat door into the hole you’ve just cut. Align the frame with the opening and use the provided screws to securely attach both sides of the cat door frame to the door. Tighten screws firmly, but avoid over-tightening which could damage the door or frame.
Dealing with Hollow Core Doors and Frameless Doors: Creating Your Own Frame
If you have a hollow core door and opted for a frameless cat door, you’ll need to create a frame to provide stability and a secure attachment point. Here’s how:
- Measure the Hole: Carefully measure the interior dimensions of the cat door hole you have cut in the door.
- Cut Frame Pieces: Cut four pieces of wooden plank (or similar framing material) according to your measurements. These pieces will form the frame that lines the inside of the hole.
- Assemble the Frame: Apply wood glue to the edges of the wooden planks to create a rectangular frame that fits snugly within the cat door hole.
- Clamp and Dry: Use clamps to hold the frame pieces together tightly while the glue dries completely.
- Insert and Align: Once the frame is dry, carefully insert it into the cat door hole in your door. Ensure the homemade frame aligns perfectly with the cut opening.
- Proceed to Step 4: With your frame in place, you can now proceed to step 4 and attach your frameless cat door to the newly installed wooden frame.
What Happens After Installation? Training Your Cat
Congratulations, your cat door is installed! Now, it’s time to introduce your feline friend to their new entryway. Be patient – it might take a few tries and some gentle encouragement for your cat to get used to using the door. Use positive reinforcement, like treats and praise, to reward them as they explore the door. You can also gently guide them through the door initially.
With a little time and patience, your cat will become a pro at using their new door, happily flapping in and out with newfound independence.
Ready to ditch your doorman duties and give your cat the freedom they deserve? Explore these highly-rated cat door recommendations:
Endura Flap Cat Door for Doors
