
Literary Character Day at school is always a fun opportunity for kids to express their favorite book characters. When my boss asked for help creating a Pete The Cat Shirt for his daughter, I was thrilled to jump in! Pete the Cat, with his cool demeanor and groovy buttons, is a beloved character, and making a DIY shirt seemed like a perfect, personalized touch for the occasion. This guide will show you how to create your own Pete the Cat shirt, complete with his iconic buttons and tail, using simple crafting techniques.
 Pete the Cat shirt inspiration
What You’ll Need to Make Your Pete the Cat Shirt
Creating this Pete the Cat shirt is easier than you might think and requires just a few materials. Here’s what you’ll need to get started:
- Plain T-shirt (Blue is ideal to match Pete the Cat, but any color works!)
- Printable Iron-on Transfer Paper for Light Fabrics
- Inkjet Printer
- Cricut or Scissors (Cricut recommended for precision, but scissors can work too)
- Iron or Heat Press (like an EasyPress)
- Parchment Paper or Teflon Sheet
- Images of Pete the Cat’s Buttons (easily found online)
- Image of Pete the Cat’s Tail (also easily found online)
- Computer with Design Software (like Cricut Design Space – free version available)
DIY Pete the Cat Shirt: Groovy Buttons and Tail Tutorial
Let’s dive into the step-by-step process of making your own Pete the Cat shirt. We’ll focus on creating Pete’s signature groovy buttons and his cool tail to make a recognizable and fun shirt for any Pete the Cat fan.
Getting Pete’s Groovy Button Images Ready
To start your Pete the Cat shirt, you’ll need images of his four colorful buttons. A quick online search for “Pete the Cat buttons” will provide plenty of options. Once you’ve found suitable images, save them to your computer. For best results, look for clear, well-defined button images that resemble the illustrations from the Pete the Cat books.
Designing Your Pete the Cat Shirt in Cricut Design Space
Cricut Design Space is a fantastic tool for this project, allowing for precise cutting. If you don’t have a Cricut, you can adapt these steps for hand-cutting.
-
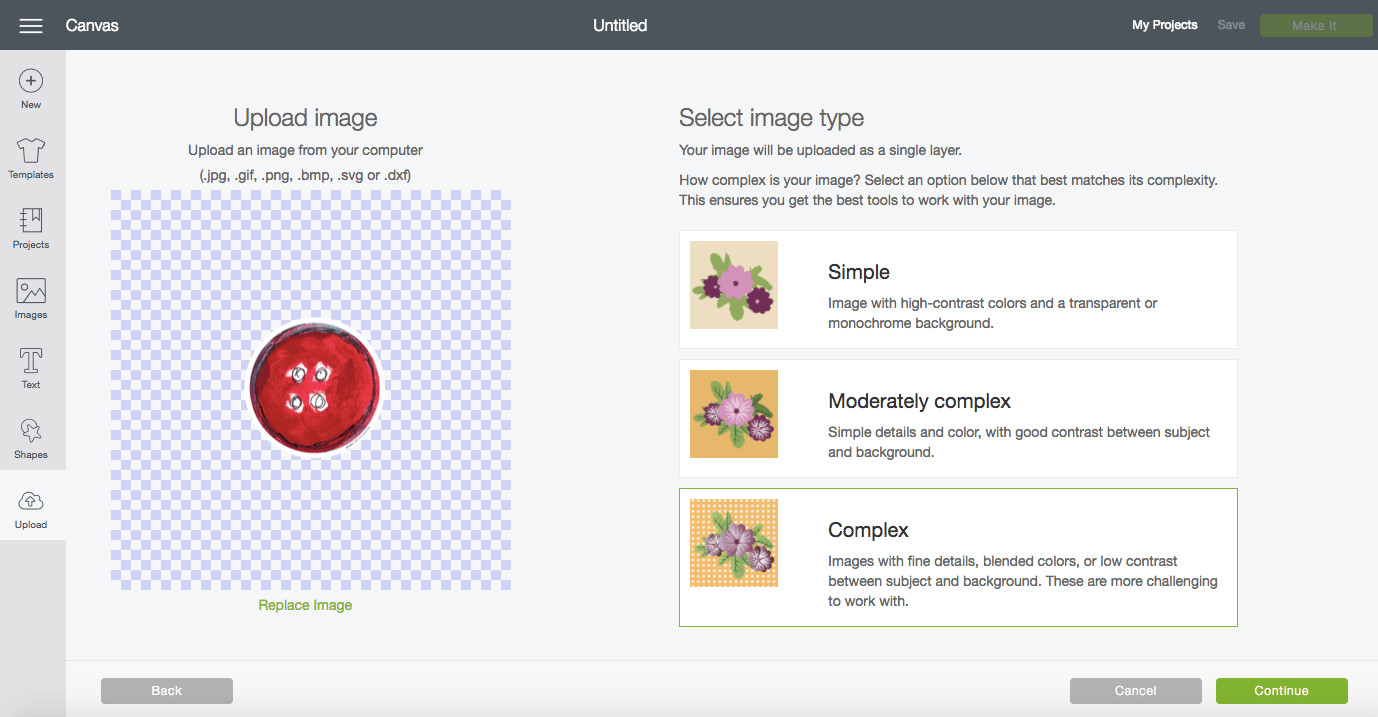
Upload Button Images: Open Cricut Design Space and upload each of the button images you saved. Select “Complex” image type and remove any background if necessary. Save them as “Print Then Cut” images.
 Uploaded Pete the Cat button images in Cricut Design Space
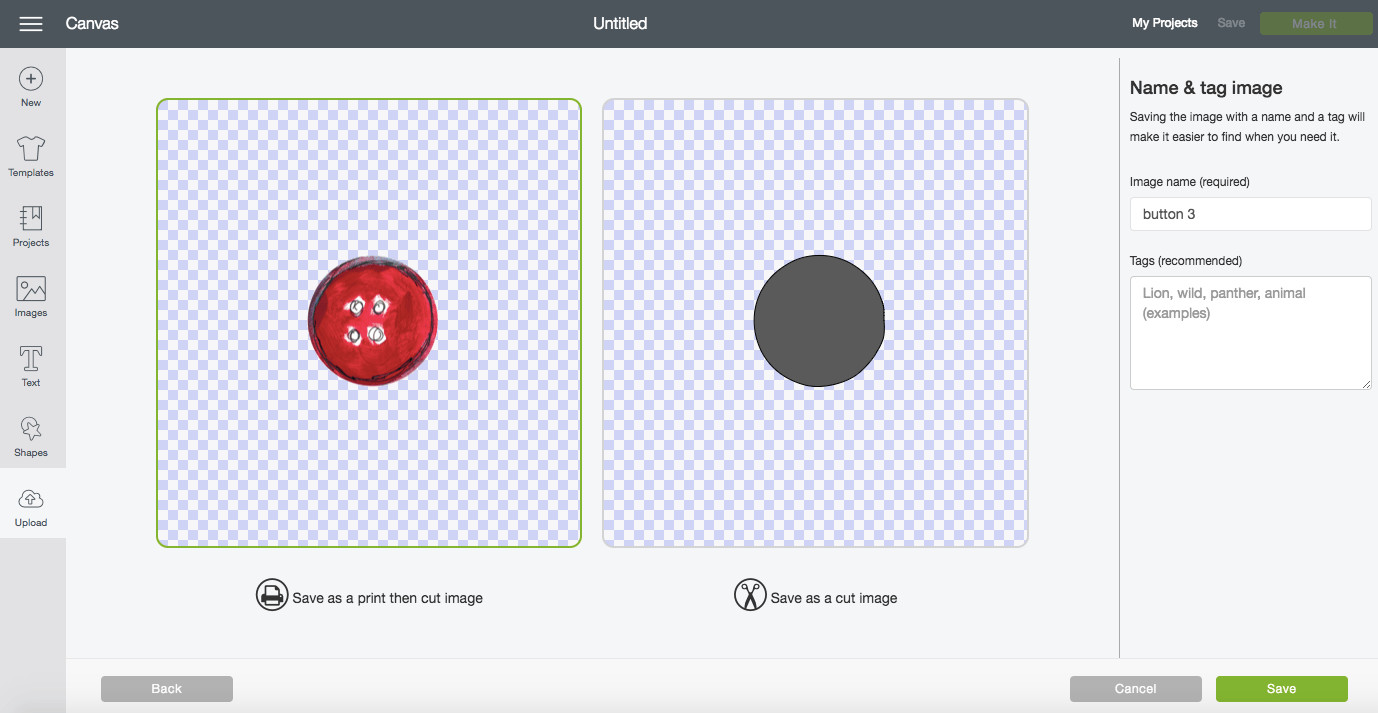 Pete the Cat button image after background removal in Cricut Design Space
 -
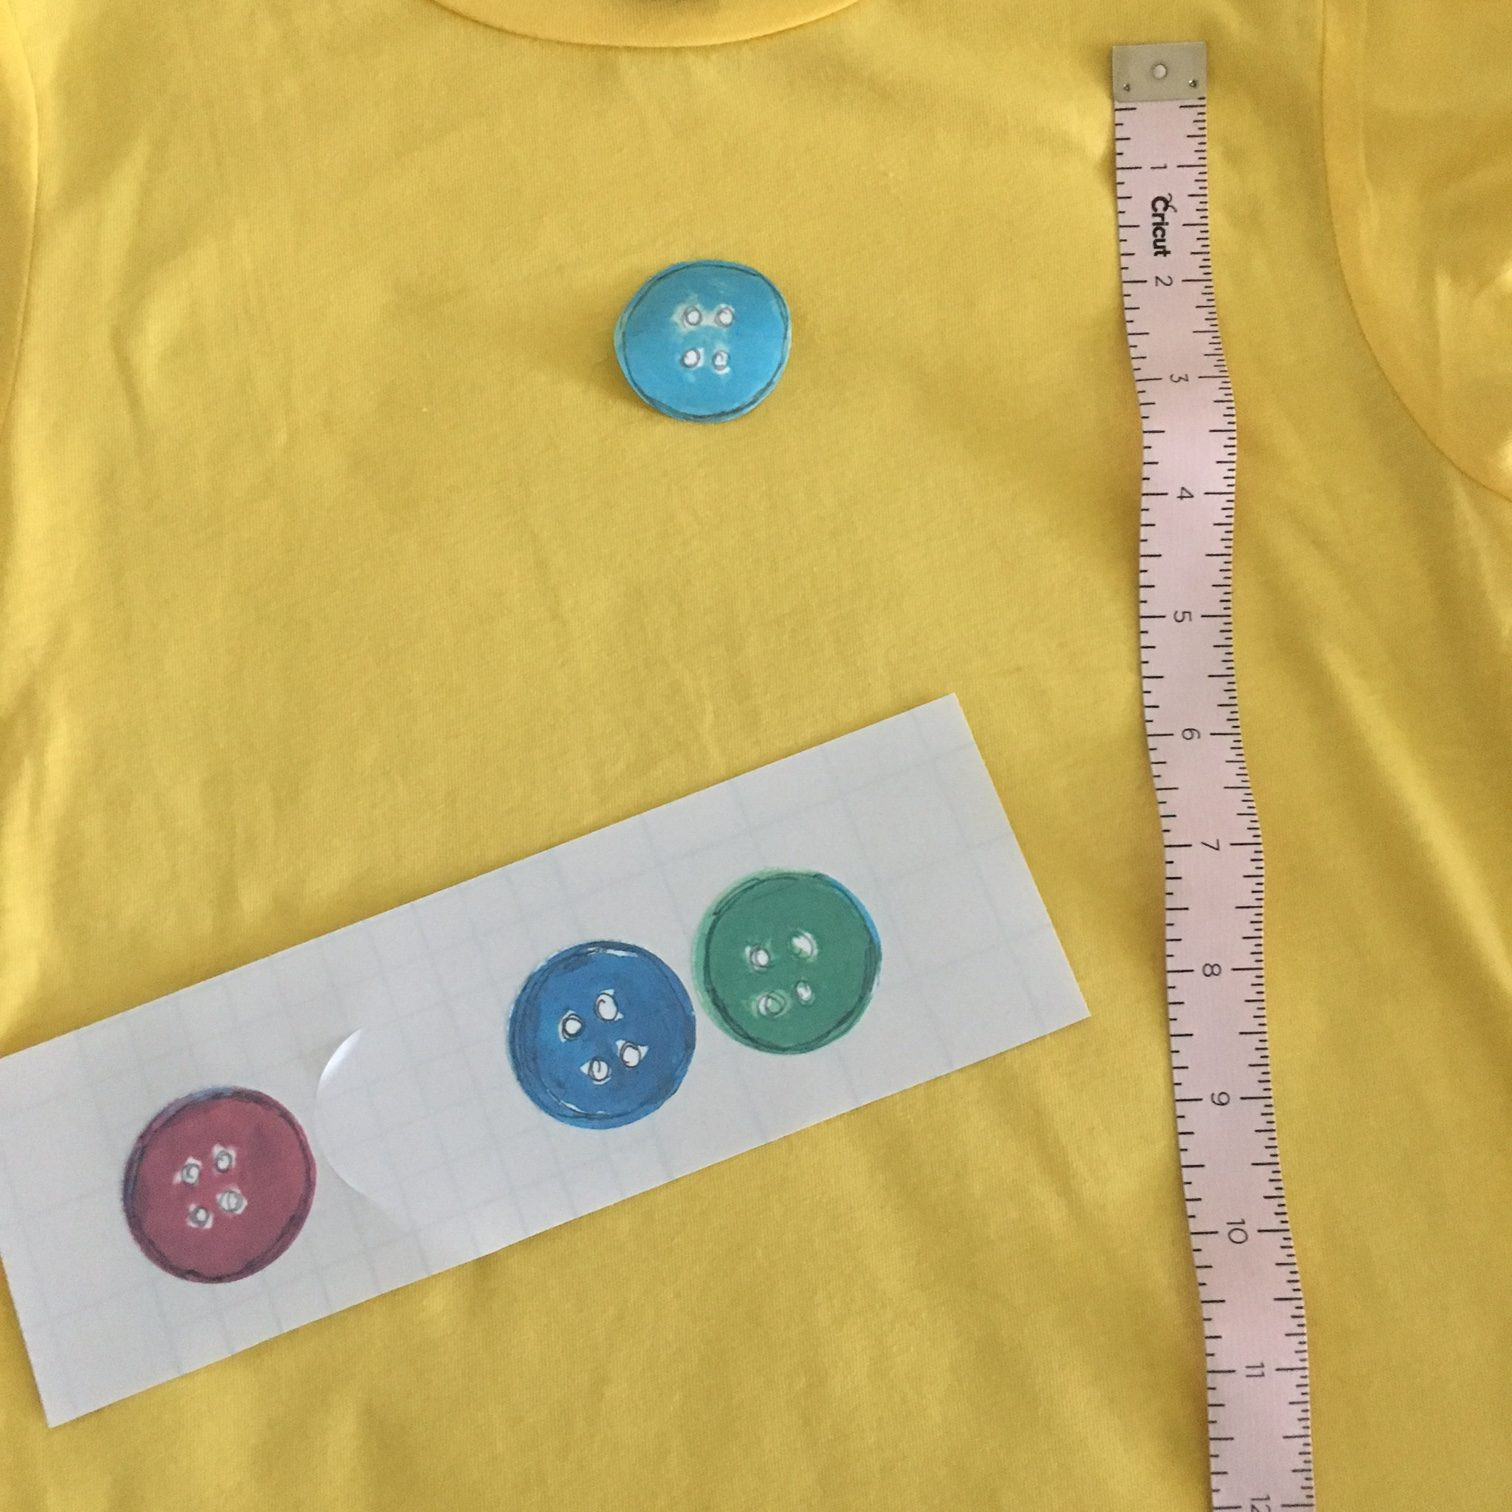
Size the Buttons: Measure the t-shirt to determine the best size for the buttons. A good starting point is around 1.5 inches tall for each button. Resize each button image in Design Space to your desired size.
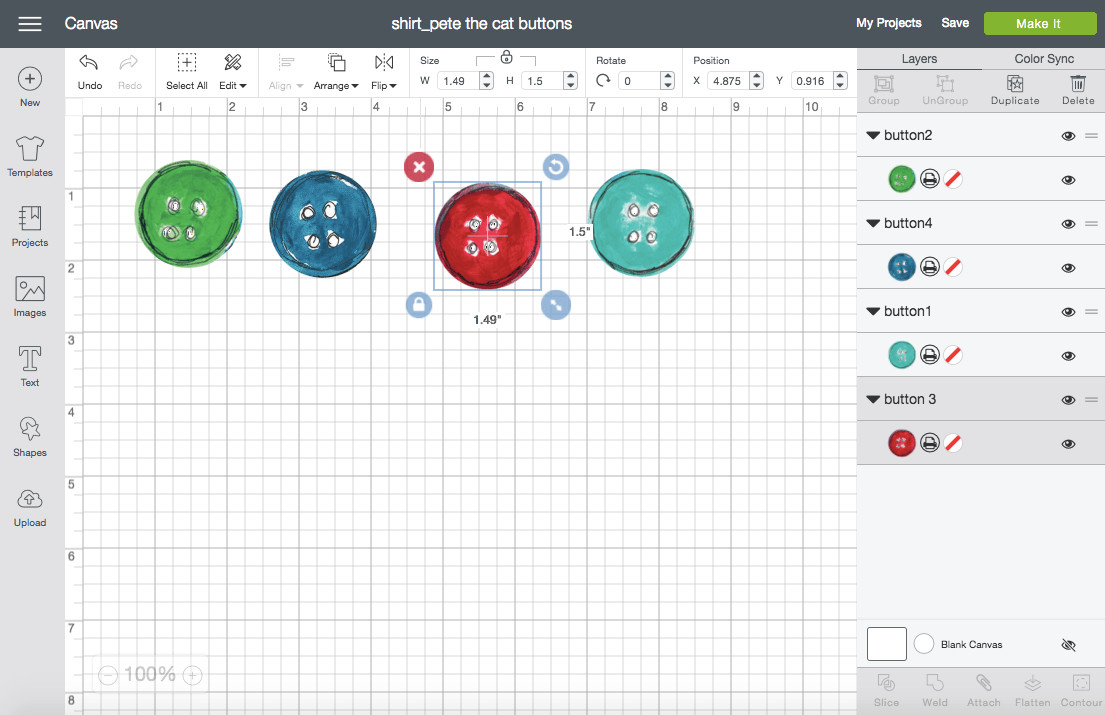 Sized Pete the Cat button images in Cricut Design Space
Preparing Pete’s Cool Cat Tail Design
No Pete the Cat shirt is complete without his tail! Find an image of Pete the Cat with his tail visible. Save this image and upload it to Cricut Design Space, again selecting “Complex” and “Print Then Cut.”
-
Isolate the Tail: Use the “Erase” tool in Design Space to carefully remove everything from the image except Pete’s tail. You want to be left with just the tail outline.
 Pete the Cat image for tail extraction in Cricut Design Space
 -
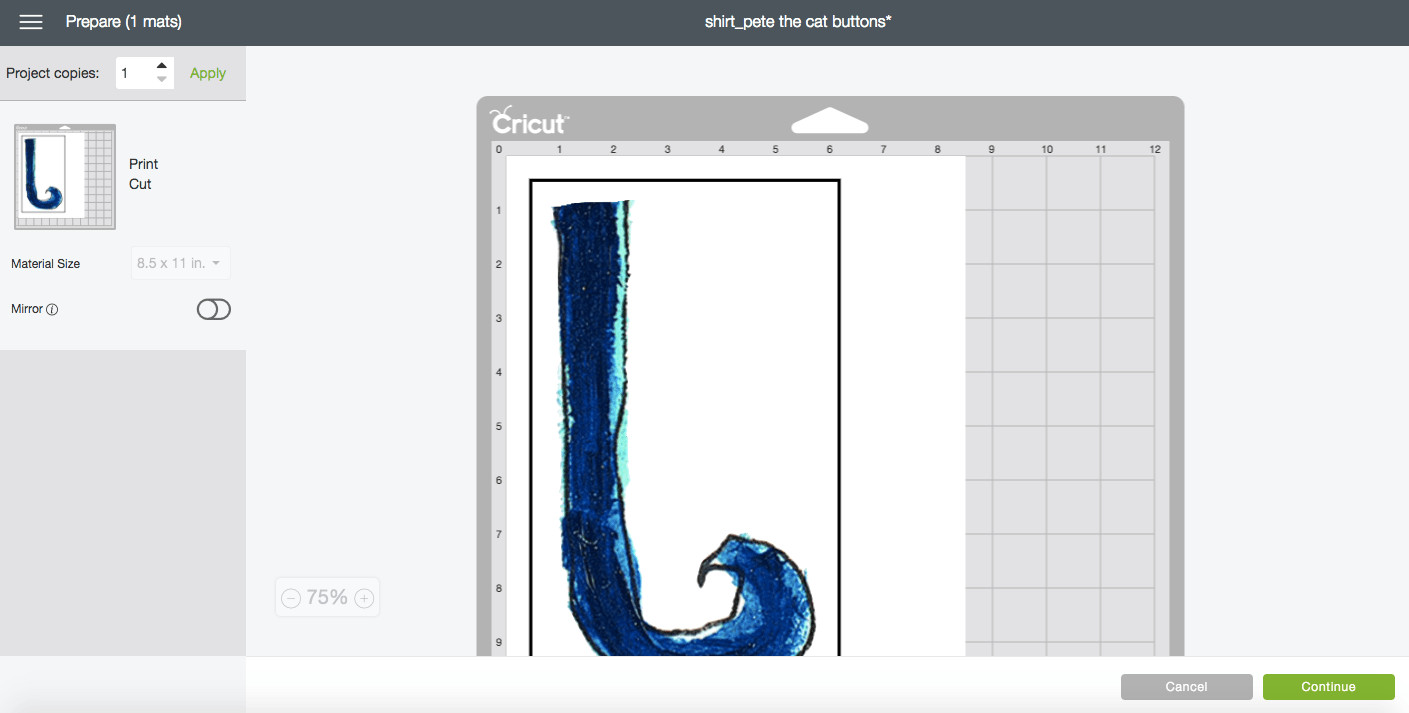
Size the Tail: Resize the tail to be a good length for the back of the shirt. Maximize the size within the “Print Then Cut” limitations (9.25″ x 6.75″). A height of around 9 inches works well.
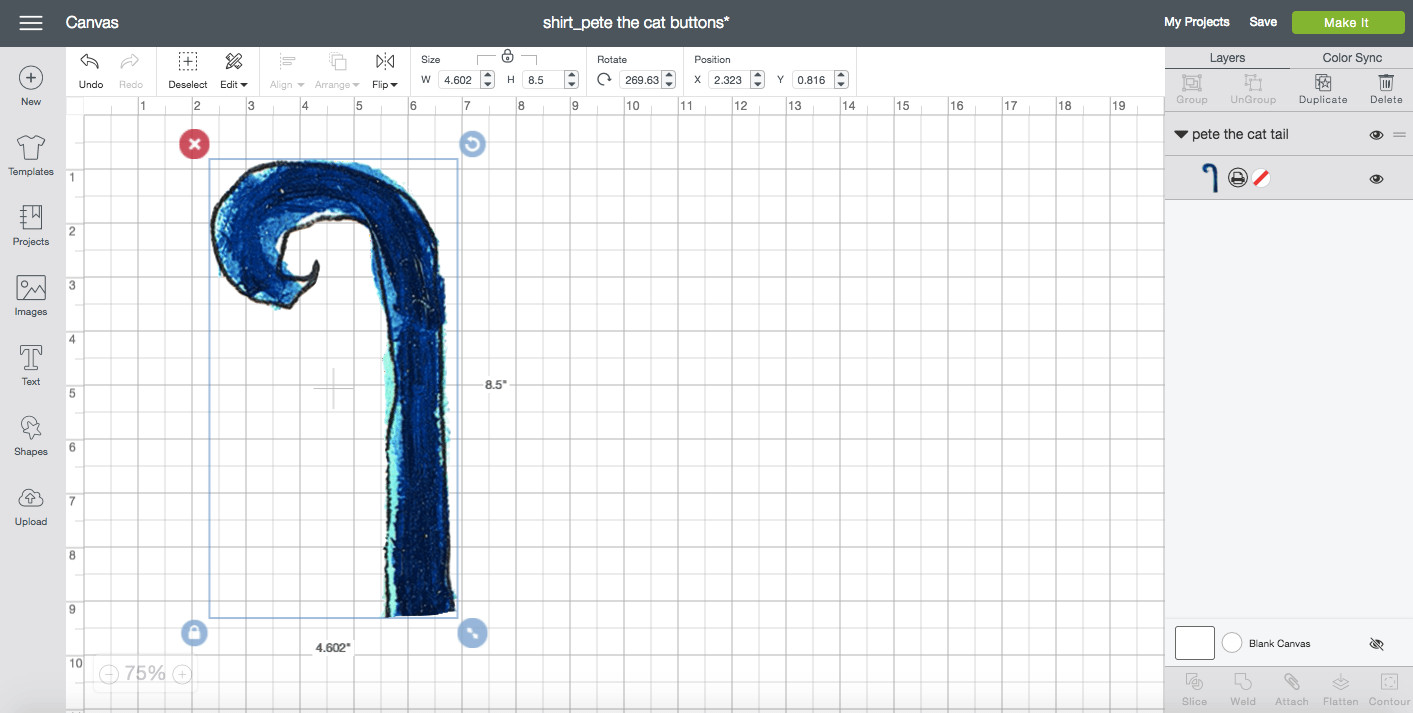 Sized Pete the Cat tail image in Cricut Design Space
Printing and Cutting Your Pete the Cat Shirt Designs
Now that your button and tail designs are ready in Design Space, it’s time to print and cut them onto the iron-on transfer paper.
-
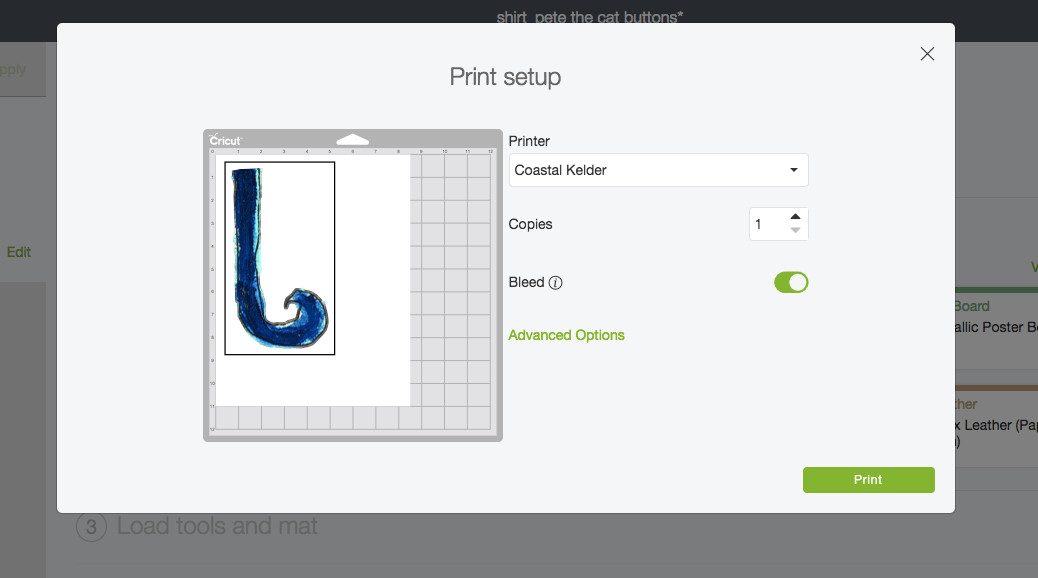
Print Your Designs: Click “Make It” in Design Space. Follow the prompts to print your designs onto the iron-on transfer paper. Make sure to load the paper correctly into your printer (usually printable side down).
 Printing Pete the Cat shirt designs
 -
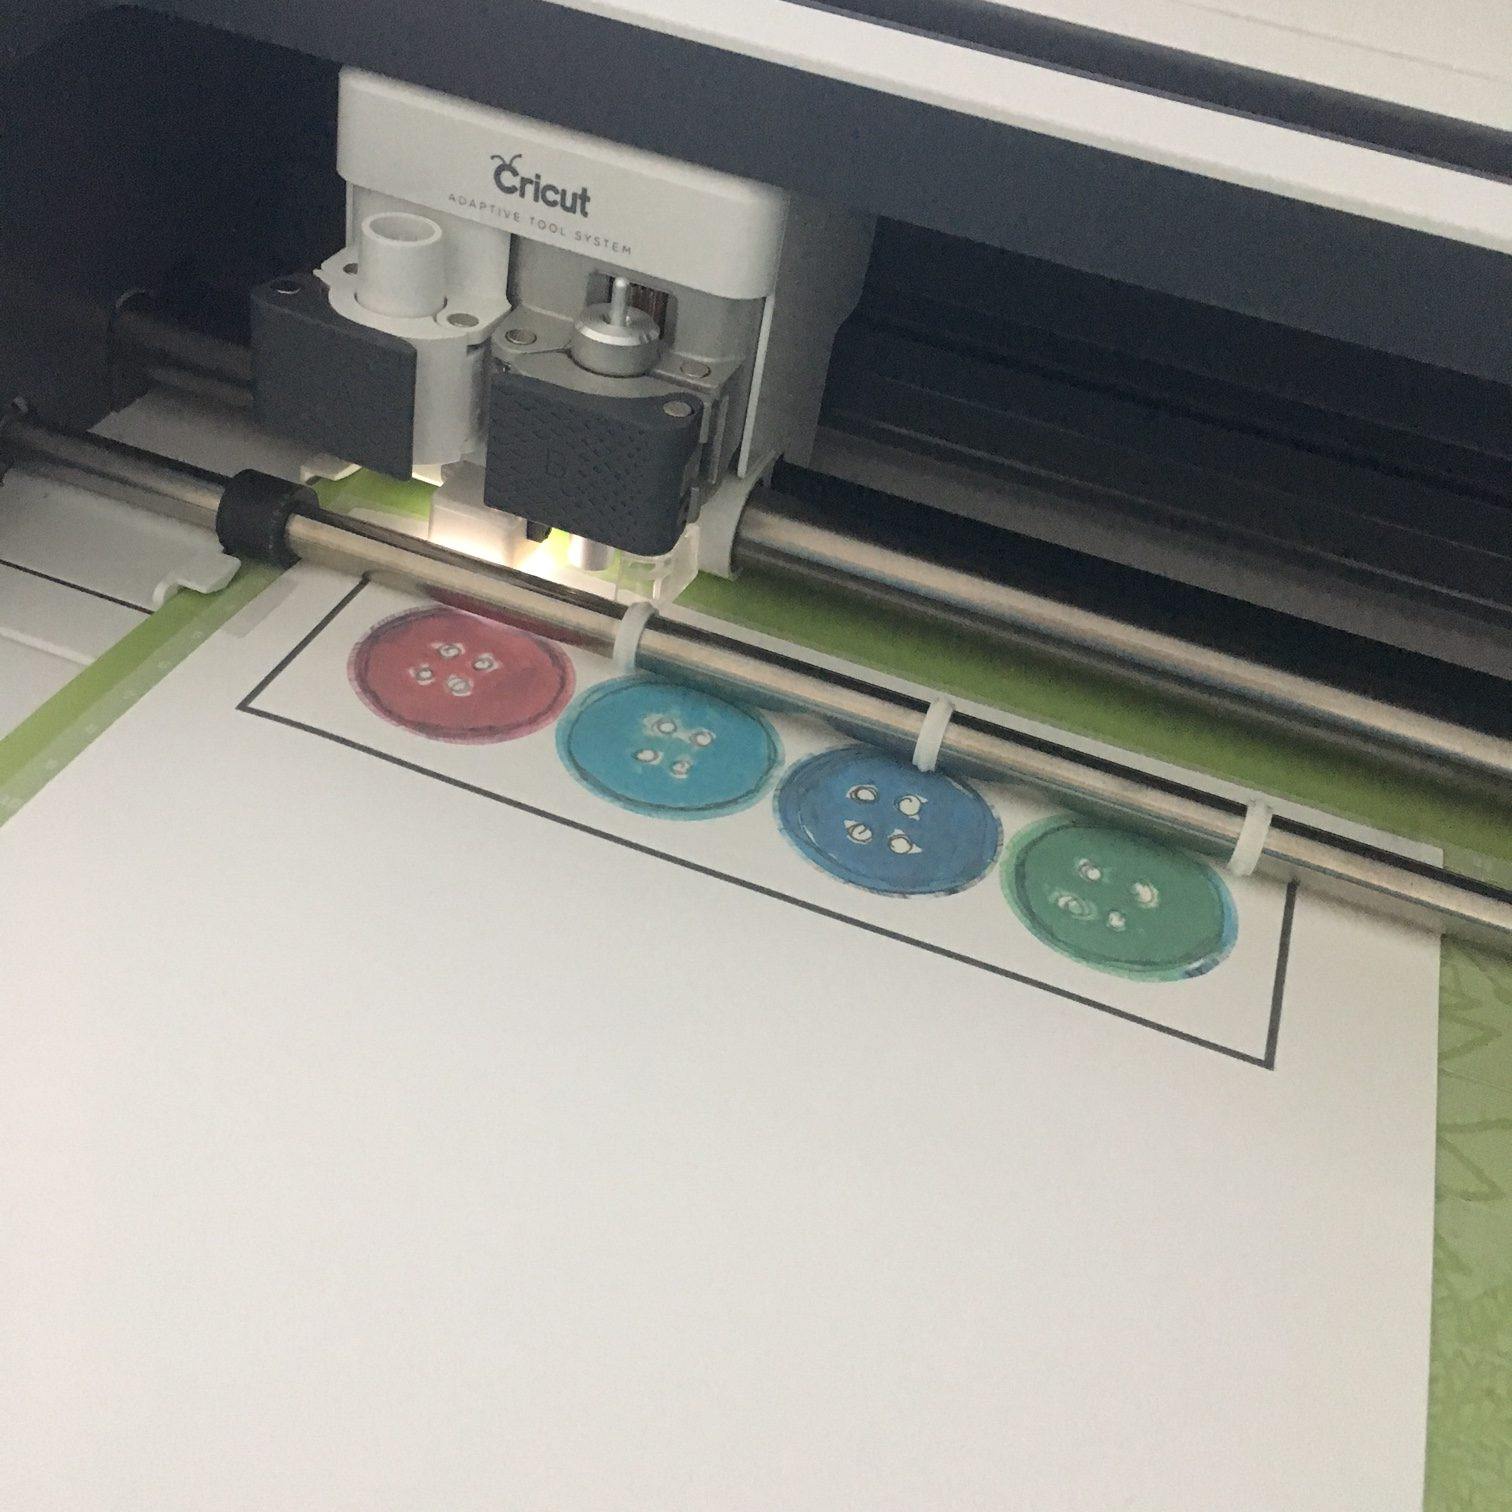
Cut Your Designs: Place the printed iron-on sheet onto your Cricut cutting mat. Select “Printable Iron-On” as your material setting and load the mat into your Cricut machine. Let the Cricut precisely cut out your buttons and tail. If you are cutting by hand, carefully cut around each printed design with scissors.
 Cricut cutting Pete the Cat shirt designs
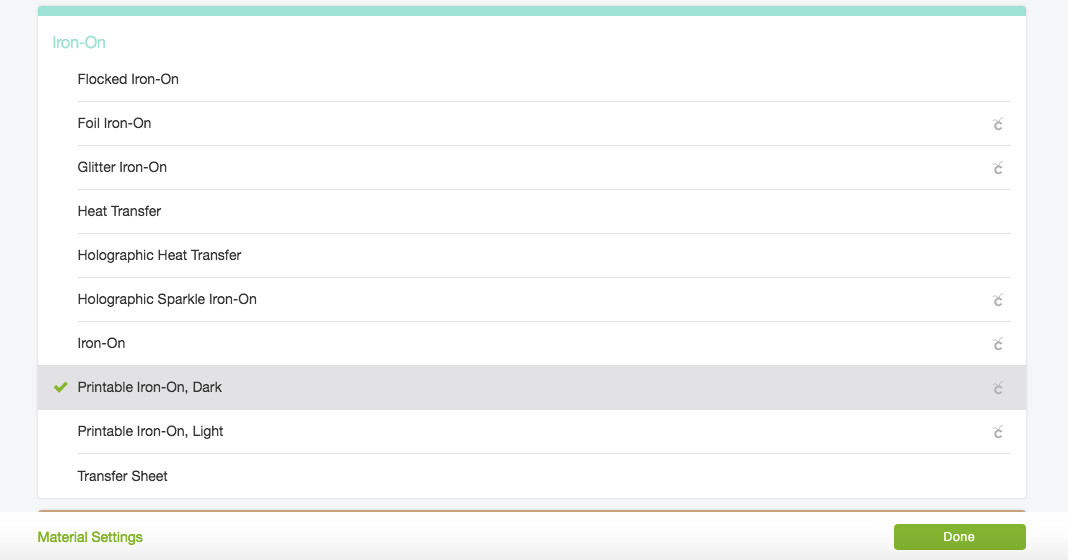 Cut Pete the Cat button designs
Ironing on the Groovy Buttons and Tail
With your designs cut, the final step is to iron them onto the t-shirt to create your Pete the Cat shirt.
-
Position the Buttons: Arrange the button cutouts on the front of the t-shirt. Space them evenly down the center of the shirt, mimicking Pete’s button placement.
 Pete the Cat button cutouts ready for ironing
 Pete the Cat tail cutout ready for ironing
 -
Iron on the Buttons: Use an iron or heat press set to a low heat setting (around 250 degrees Fahrenheit). Place parchment paper or a Teflon sheet over a button cutout and press with the iron for about 30 seconds. Repeat for each button.
 Ironing on Pete the Cat buttons
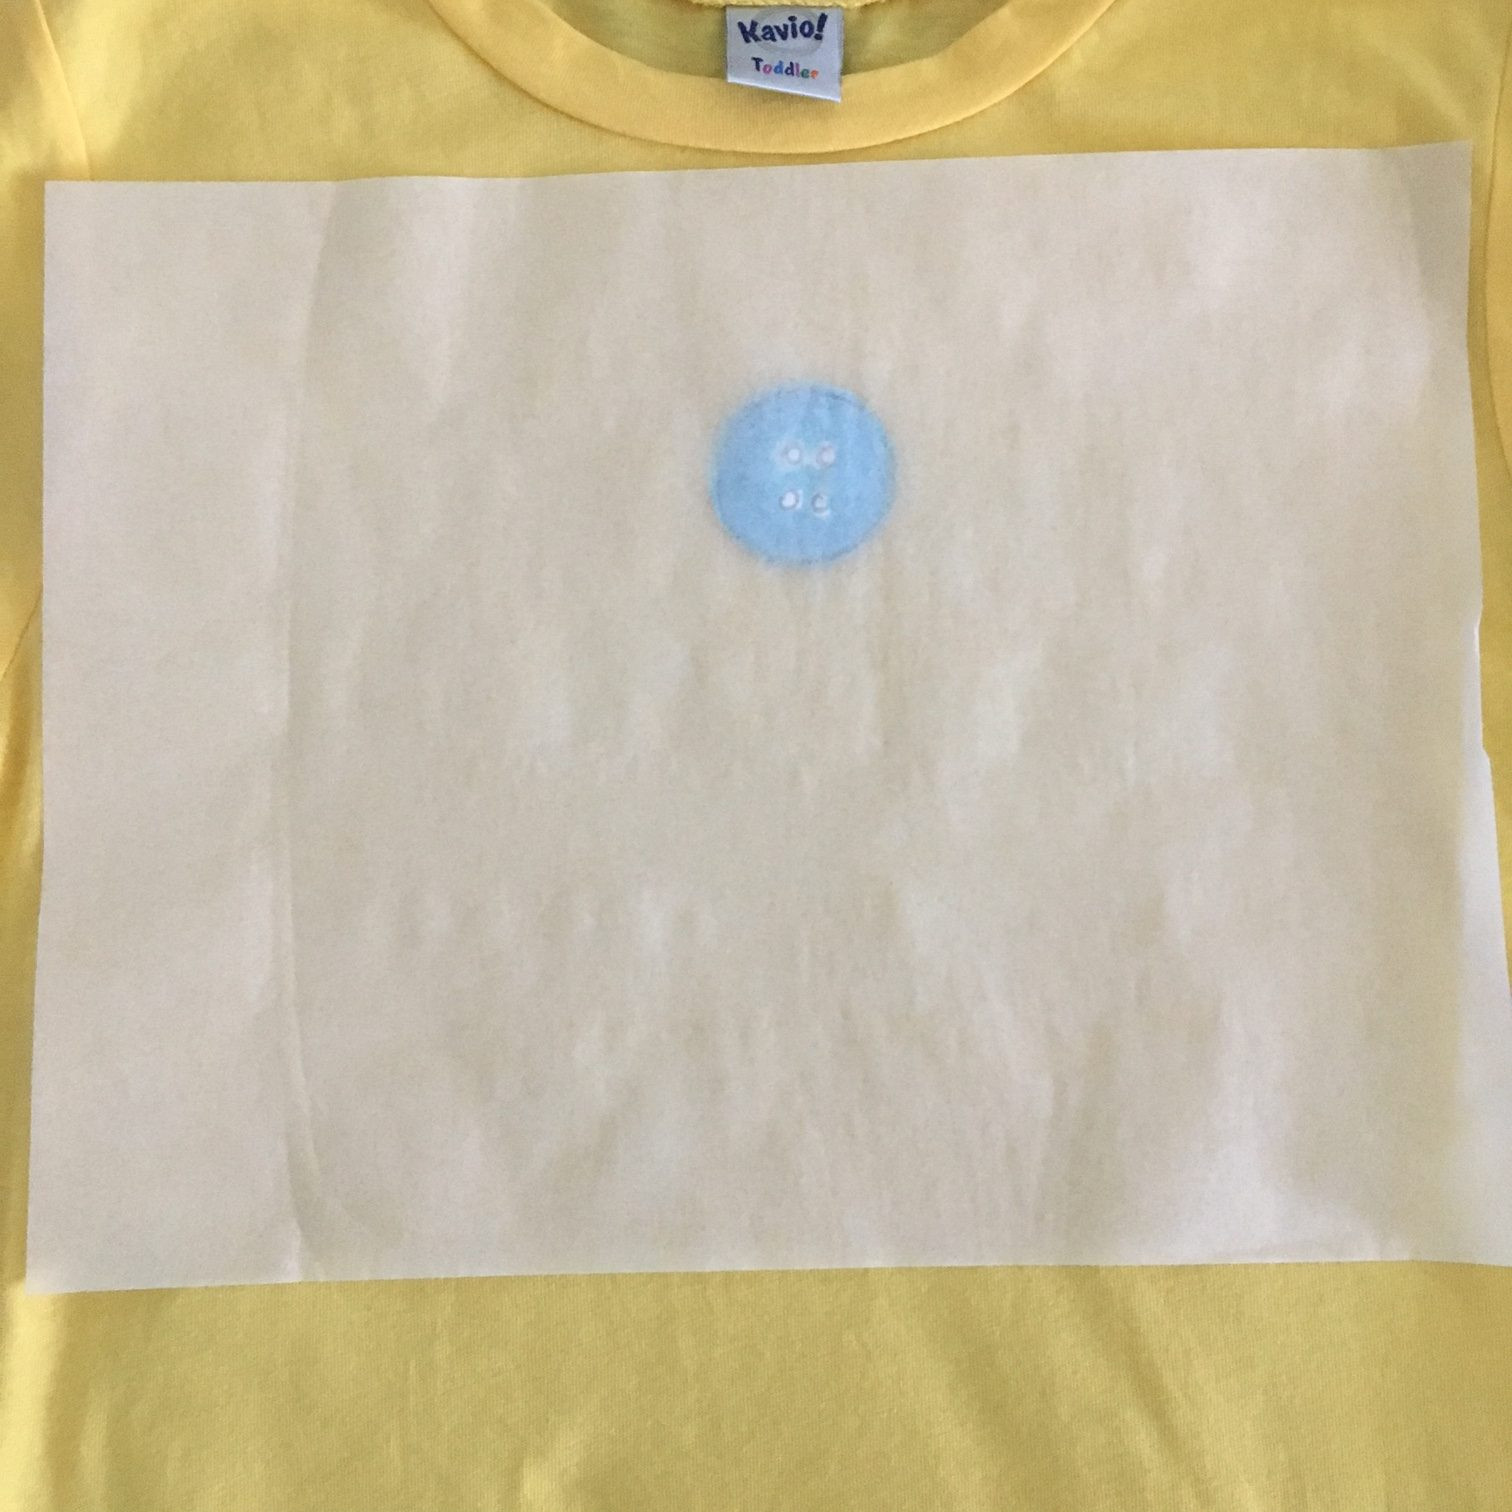 Ironing on another Pete the Cat button
 -
Iron on the Tail: Flip the shirt over and position the tail cutout on the back. Place the top of the tail near the bottom hem of the shirt. Cover with parchment paper and iron using the same method. Due to the tail’s size, you may need to press in sections to ensure full adhesion.
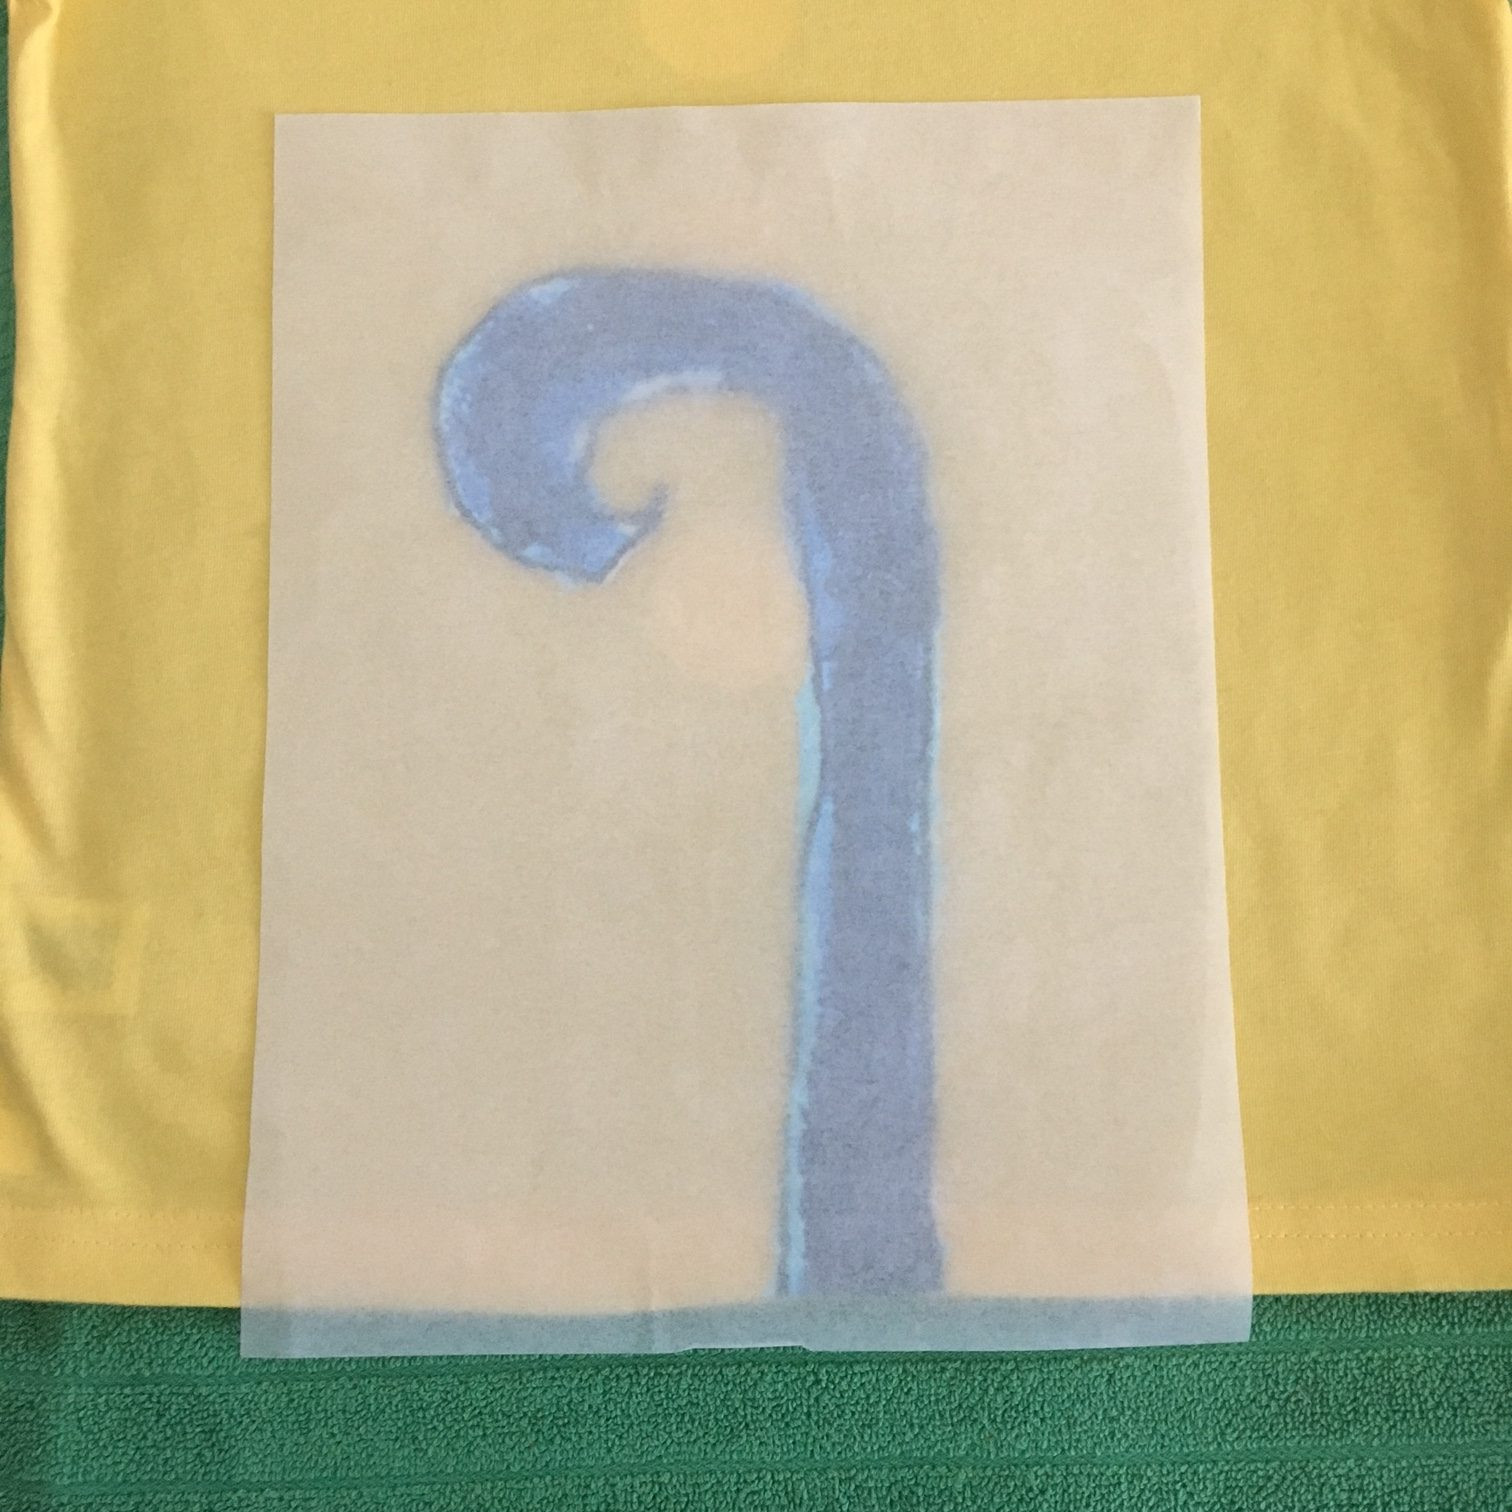 Ironing on Pete the Cat tail on the back of the shirt
 Ironing on Pete the Cat tail detail
 -
Peel off Backing: Once cooled slightly, carefully peel off the backing paper from the iron-on transfers.
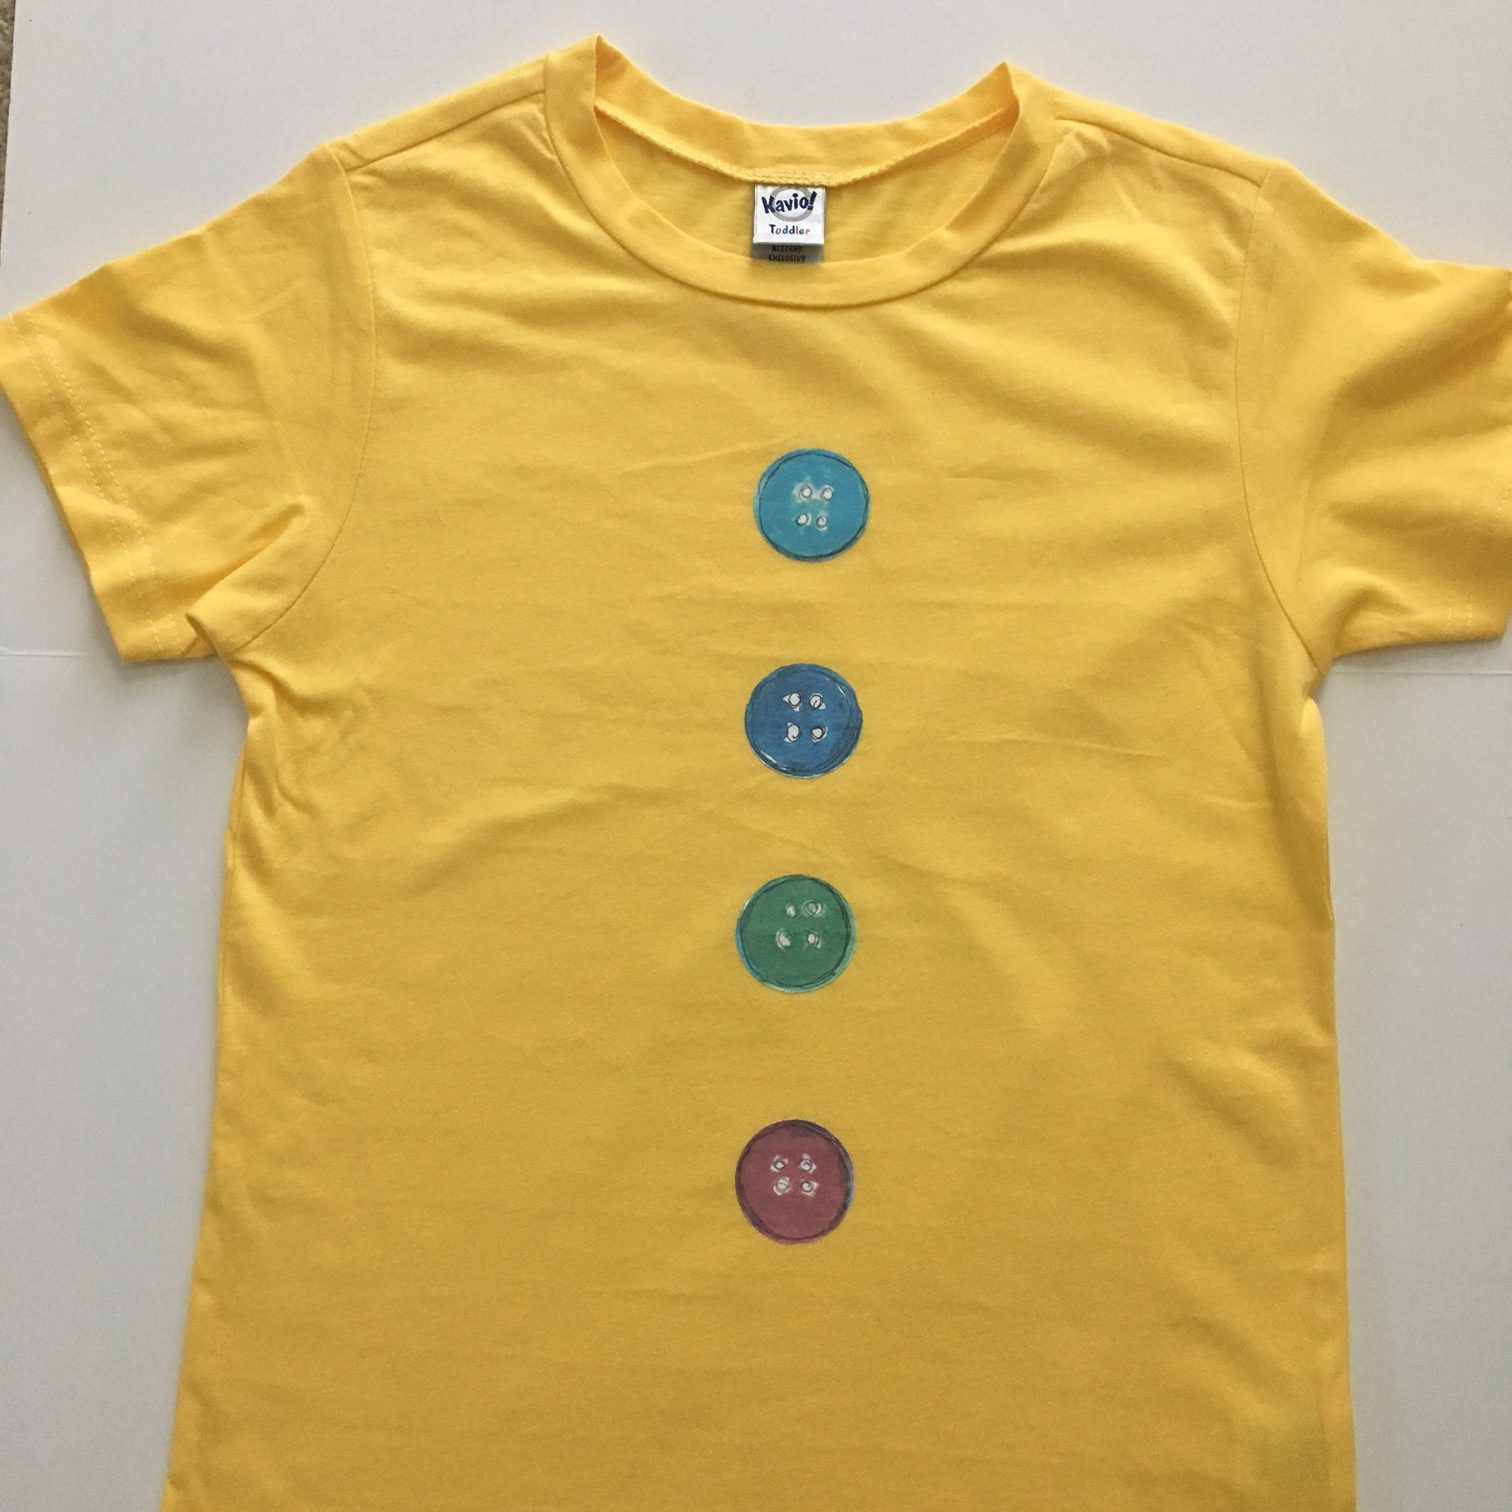 Finished Pete the Cat shirt with buttons and tail
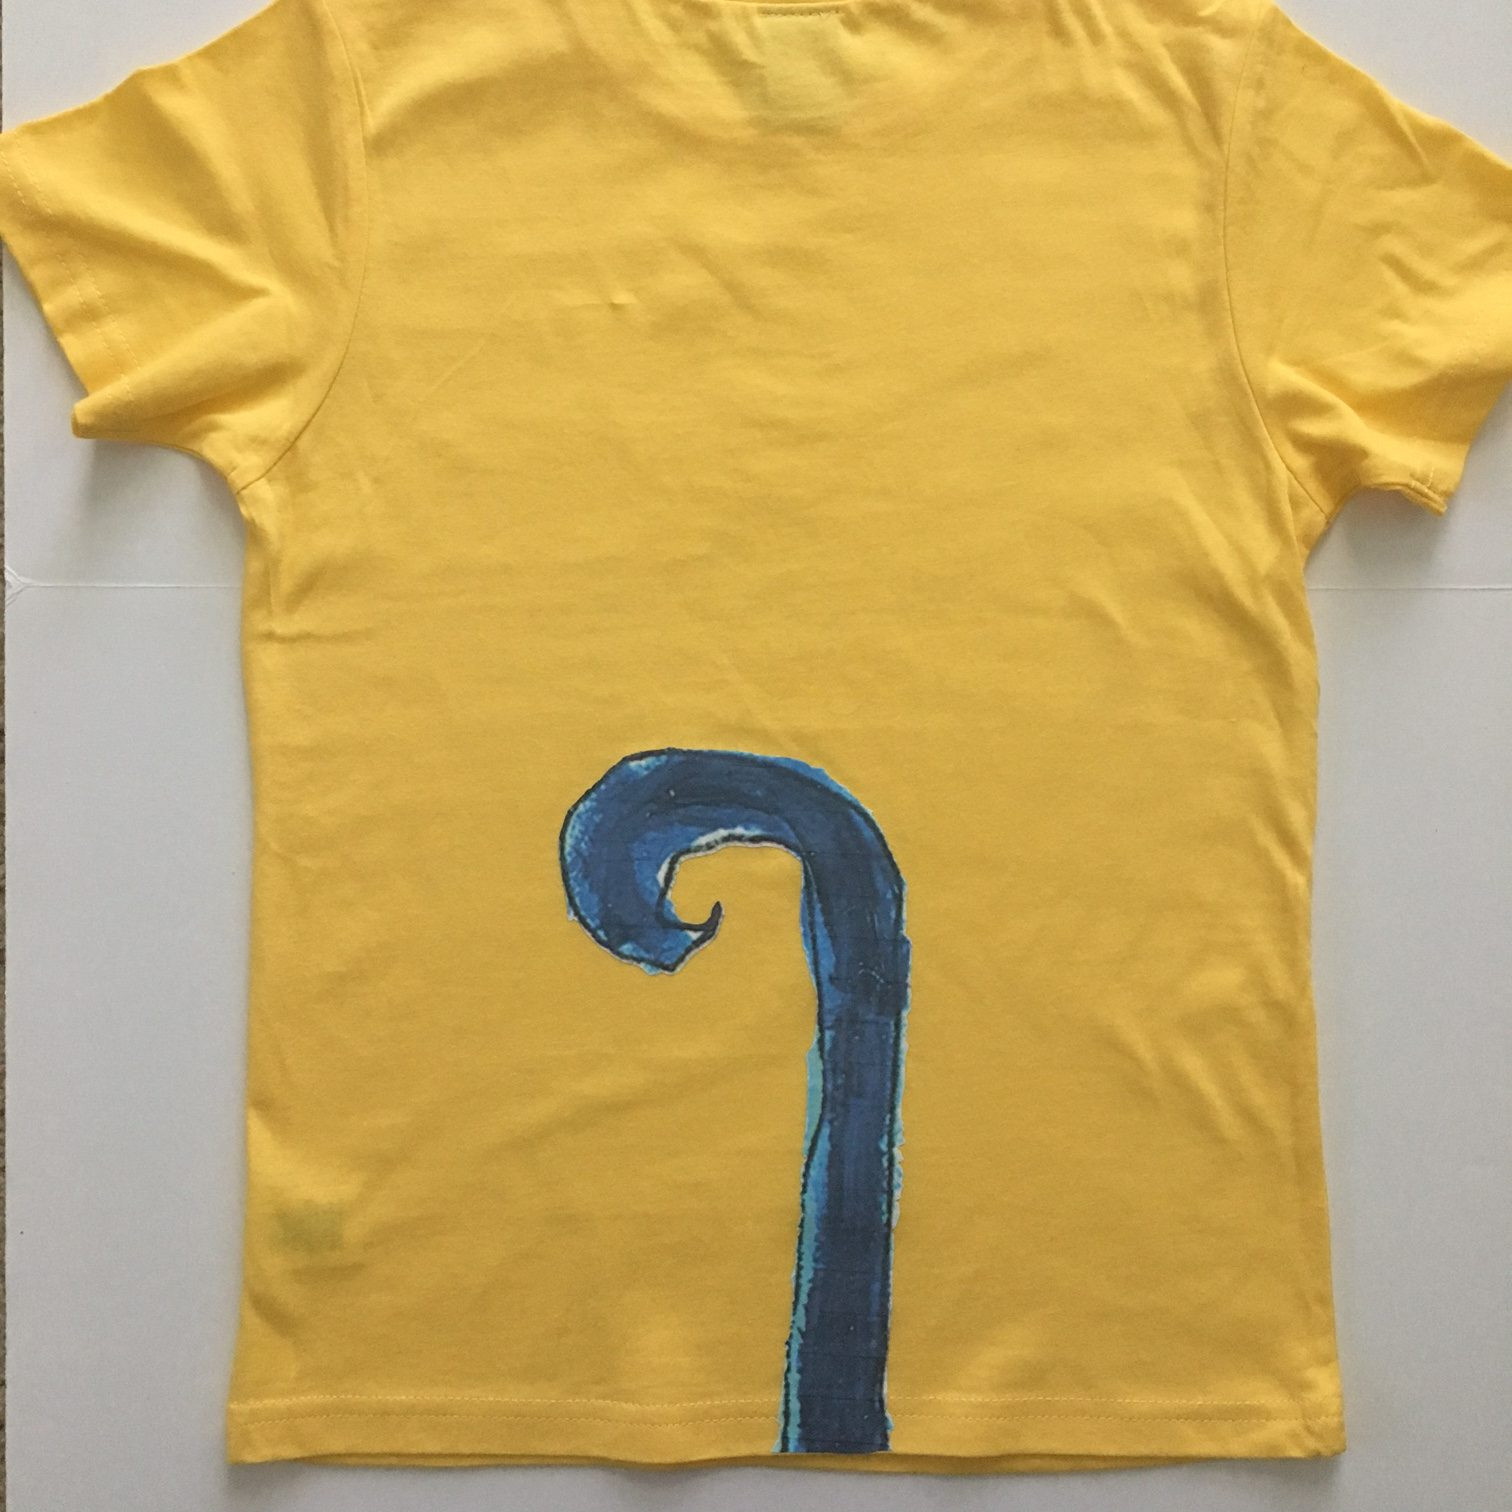 Close up of finished Pete the Cat shirt
Completing the Pete the Cat Look
Your Pete the Cat shirt is now ready! To complete the costume for Literary Character Day or just for fun, pair the shirt with cat ears, blue leggings or pants, and red shoes, just like Pete!
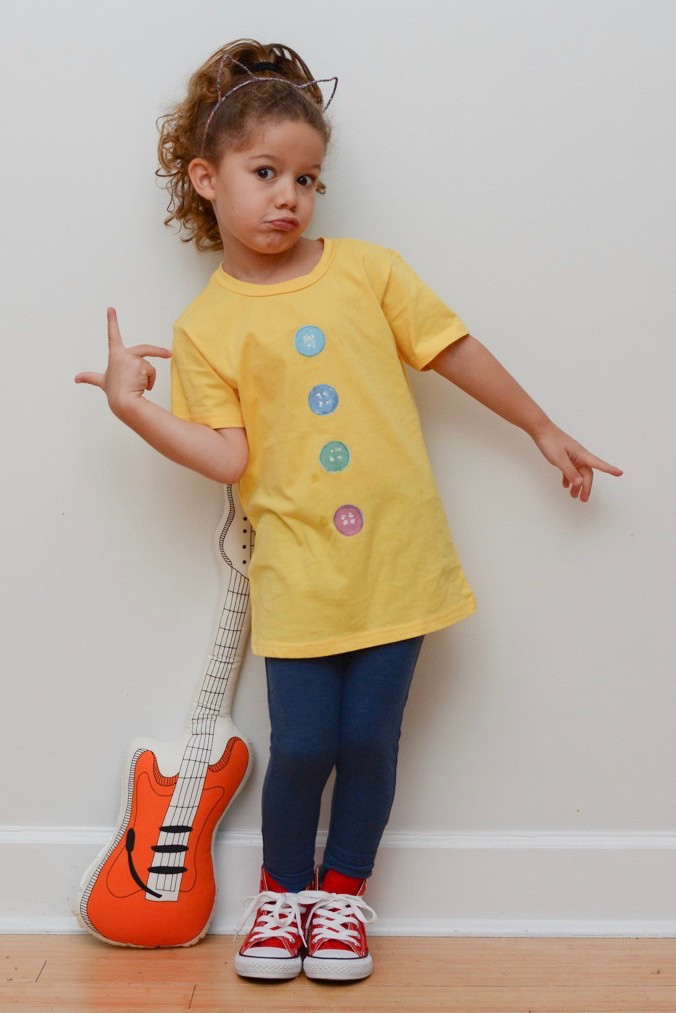 Child wearing finished Pete the Cat costume
 Child in Pete the Cat costume smiling
 Child in Pete the Cat costume side view
Creating your own Pete the Cat shirt is a fun and budget-friendly way to bring this beloved character to life. It’s a perfect DIY costume for school events, Halloween, or just everyday play. Get groovy and enjoy your handmade Pete the Cat creation!
